Lighting is critical for a home, whether it be for tasks or creating ambiance. However, every home has lighting challenges and in this post, I will describe several incidents where I conquered mine.
Giving Light to a Mid-Century Cabin With a Vaulted Wood Ceiling
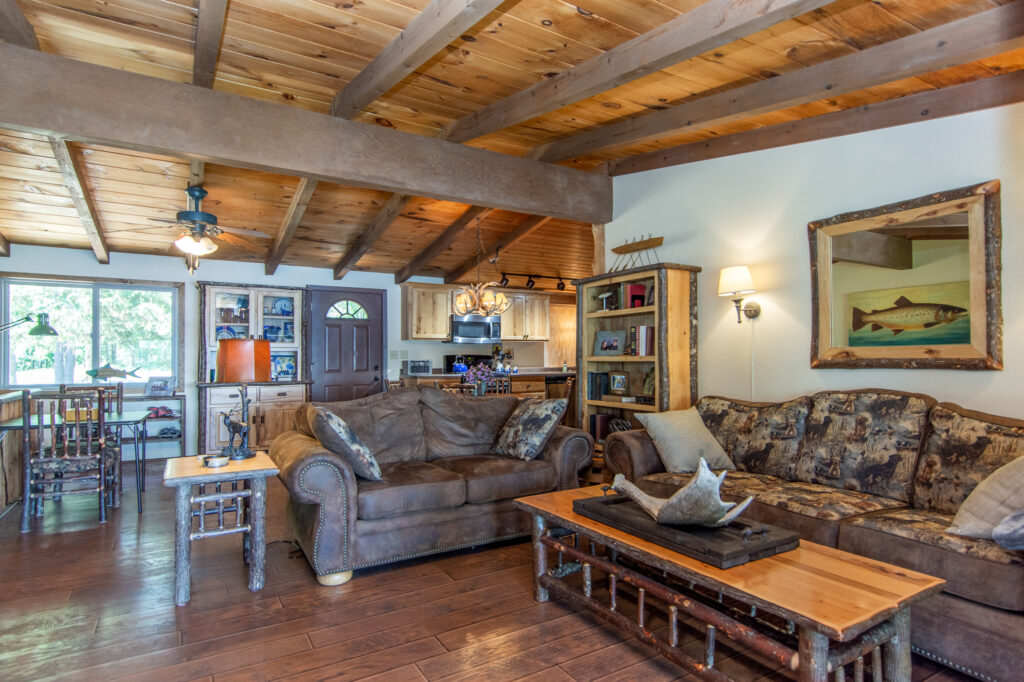
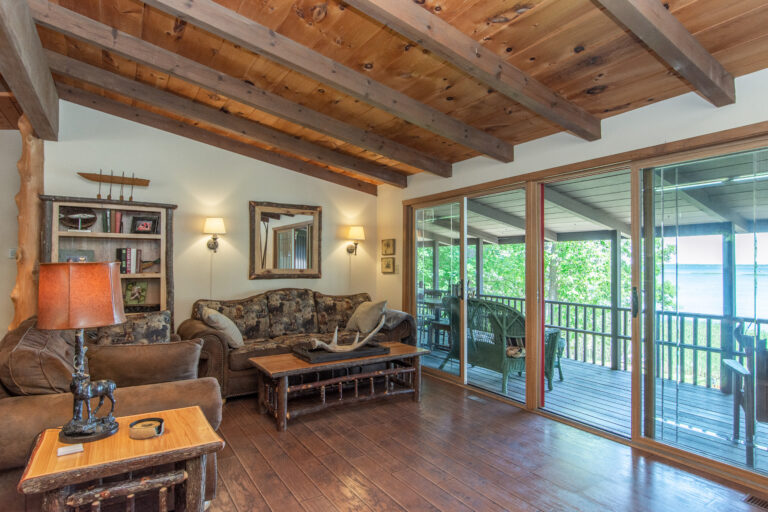
I loved this 1950 cabin, even with all its numerous quirks, one which was awkward lighting. The vaulted wood ceiling on the main level did not have any recessed lights and none could be added as there was no space between the ceiling and the roof.
Cabin with Vaulted Wood Ceiling
Challenge: How to add light to the Living Room
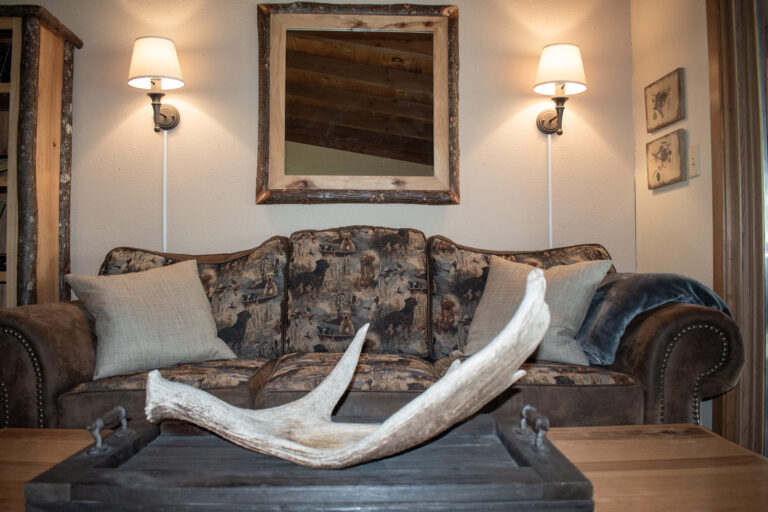
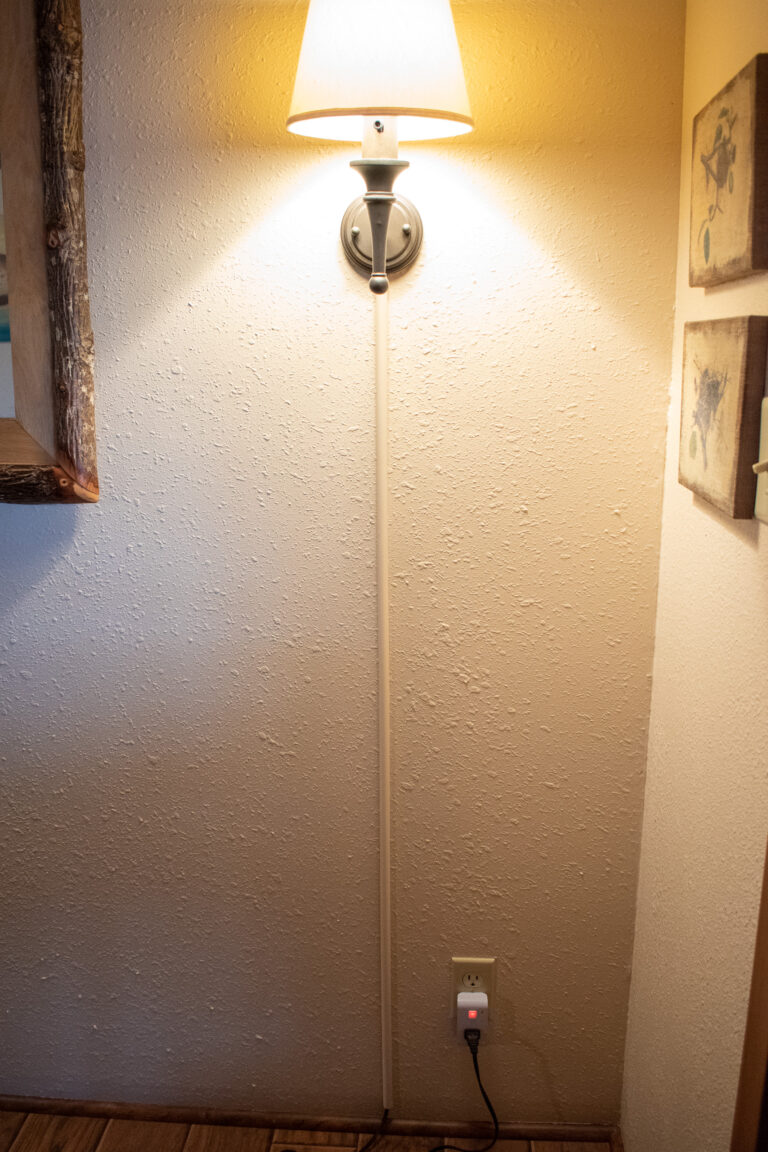
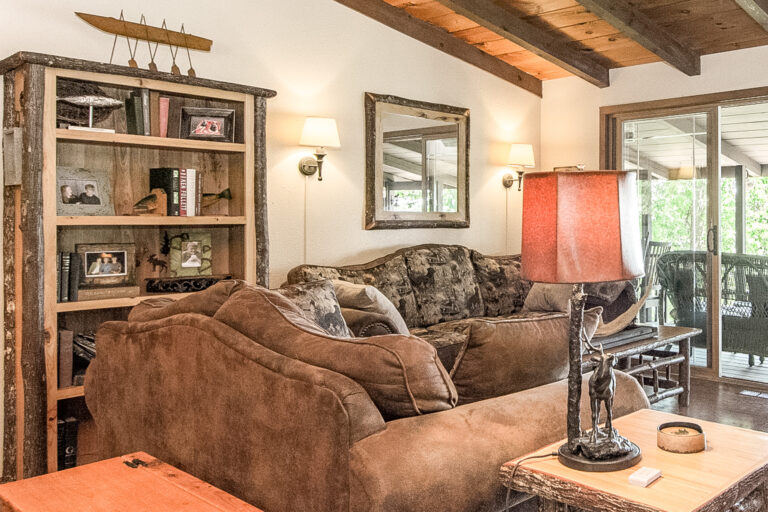
In the living room of the cabin I chose to mount two wall sconces above the couch. I did not want to pay to have them hardwired. After all, “it was a cabin” (our go-to phrase), so I chose “plug in wall scones” and disguised the cord with a paintable cover from Home Depot.
Wall Sconce Before Cord Cover Was Painted
Cord Cover Painted the Same Color as Wall
I also added an elk table lamp connected to the outlet with an extension cord under the loveseat.
Elk Lamp and Sconces Added for Light in Living Room
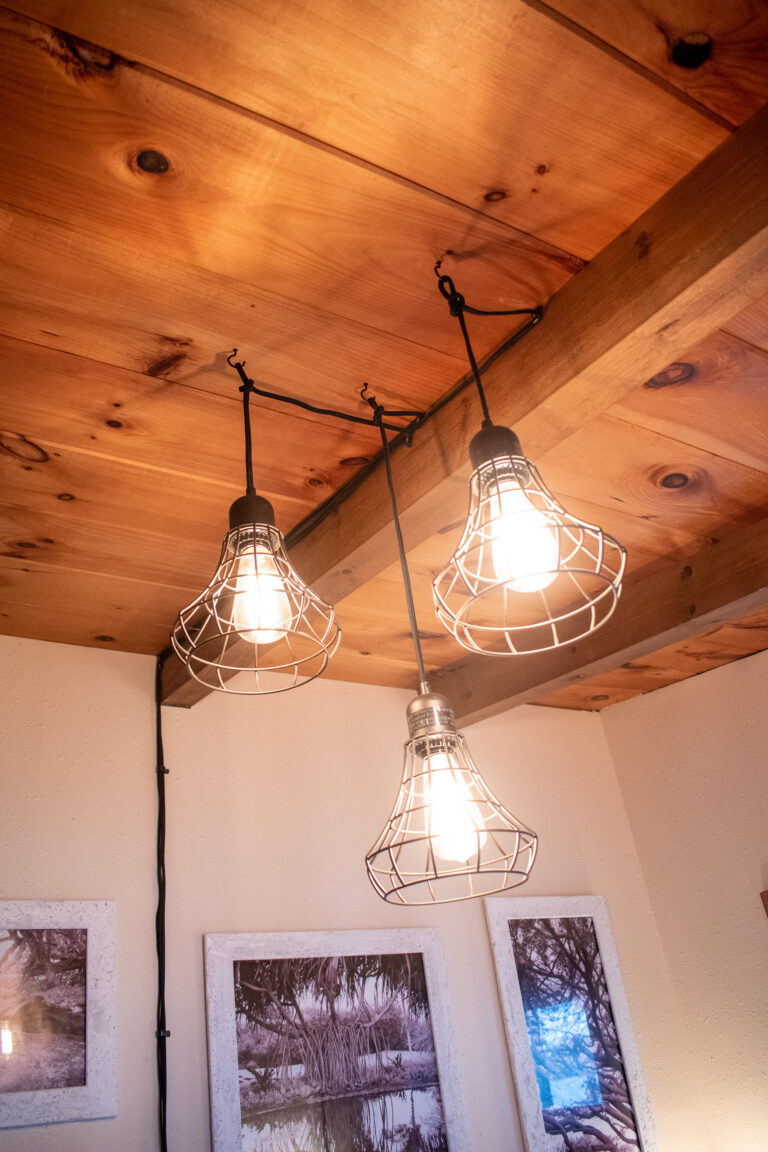
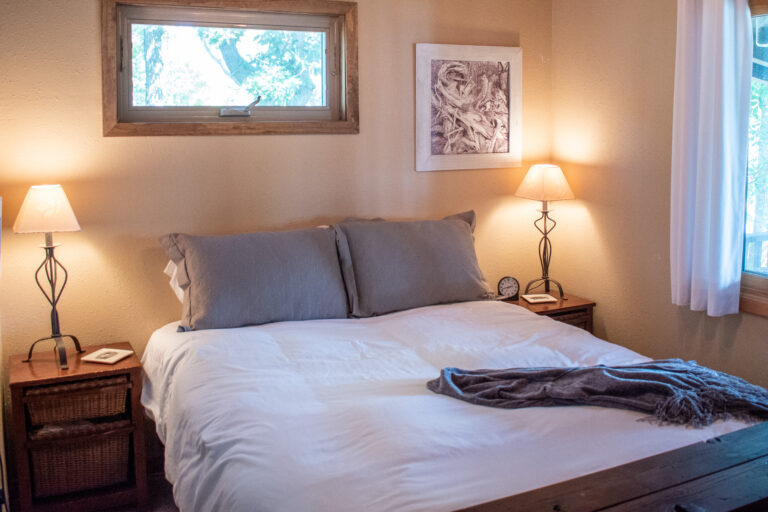
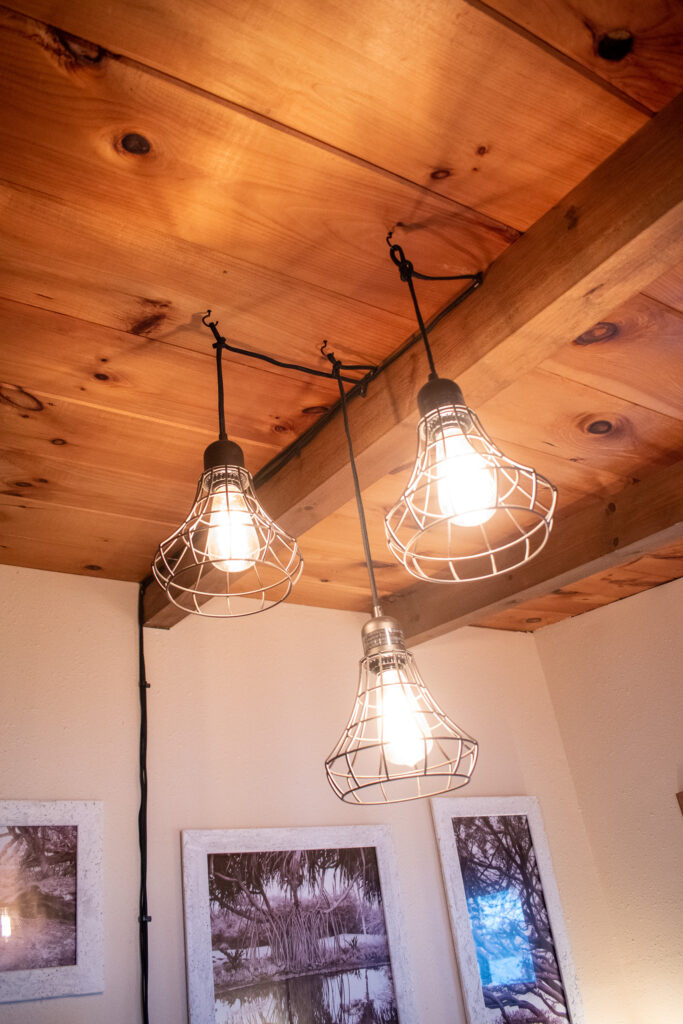
Challenge: How to add light to the main floor bedroom
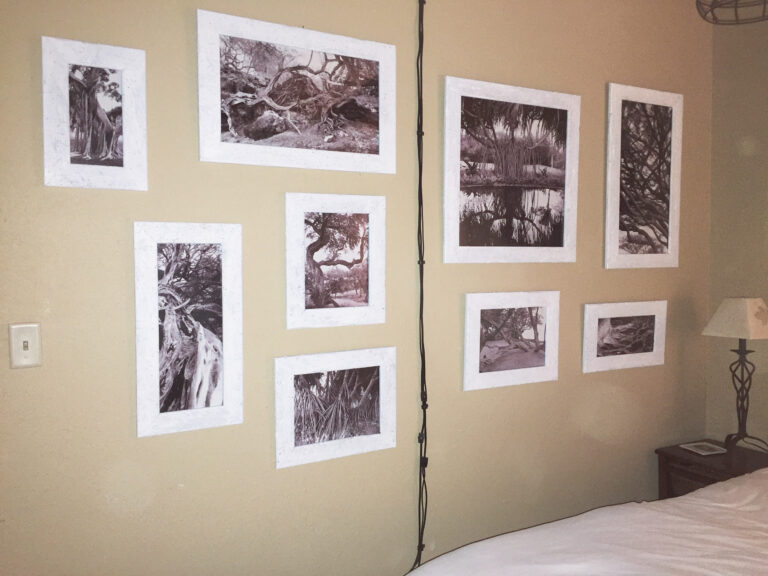
My solution was to hang three Edison style vintage bulbs encased in rustic bronze cages staggered at different heights and plugged into a wall outlet which was conveniently controlled by a light switch. I left the brown cords exposed and incorporated them into the wall collage of black and white tree trunks.
Three Staggered Cage Lights Hung on Hooks in Ceiling
Cords Plugged into Outlet and Integrated with Collage
Additional light was added with two lamps on the nightstands.
Two Lamps on Nightstand
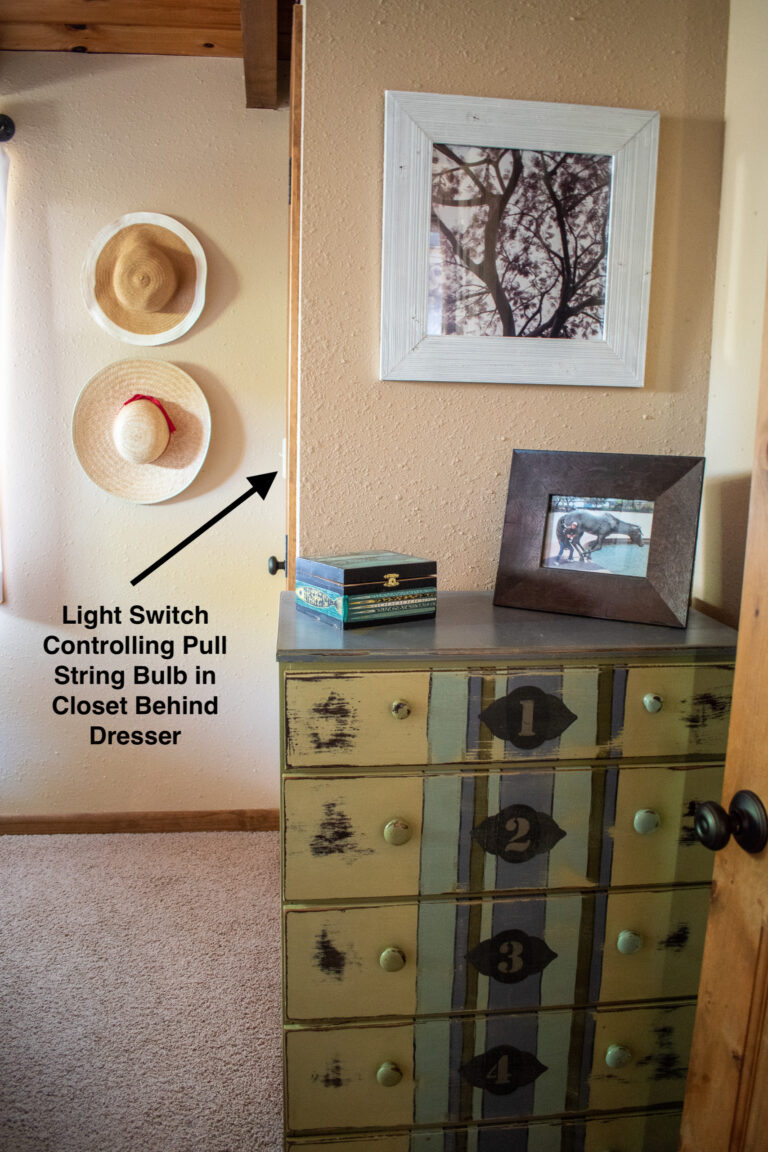
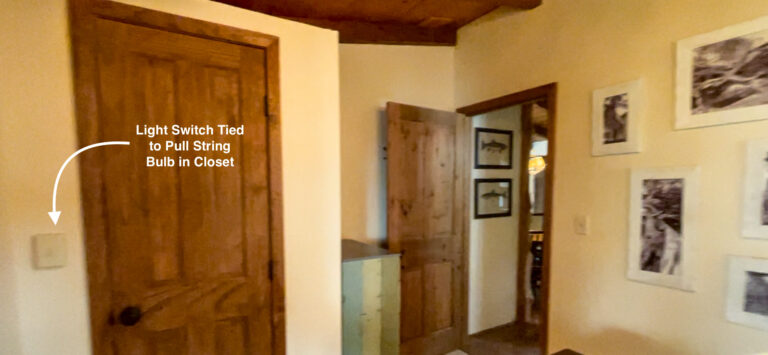
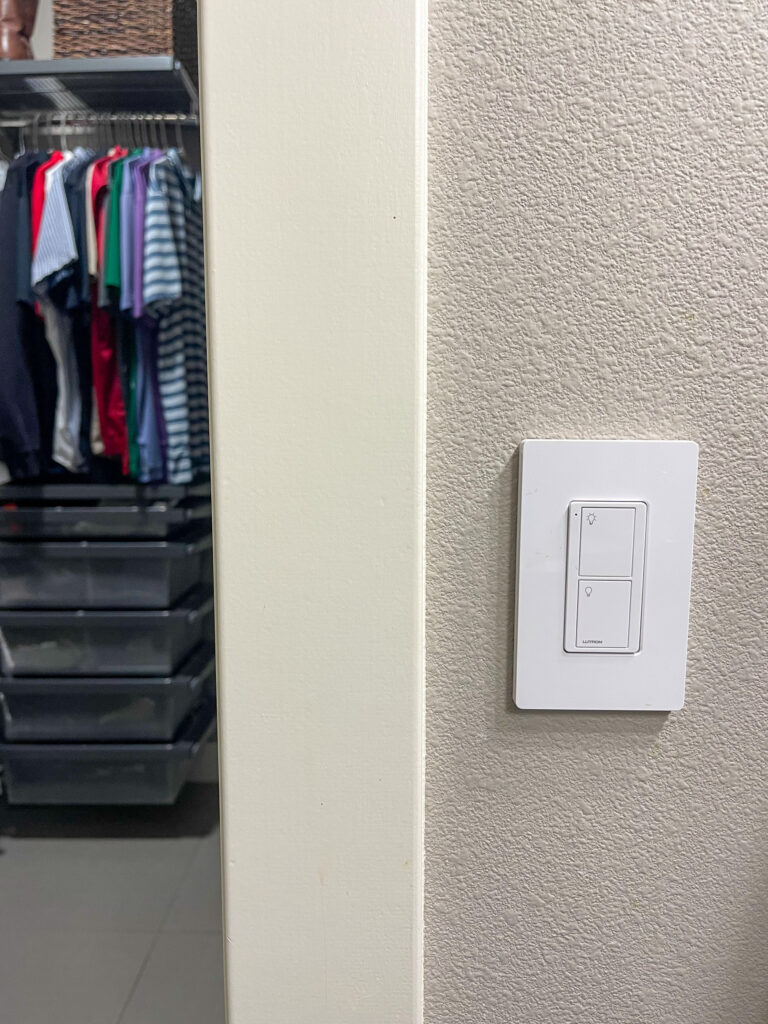
Challenge: How to easily turn on a pull string light
In the back of the bedroom closet there was a bulb in a light socket controlled with a pull string. To make it easier to turn off and on I installed a wireless battery-powered light switch outside the closet door. All that needed to be done was thread the bulb into the remote-controlled socket cap, which was then screwed into the wall socket. Voila! A light switch that looked hard-wired, but was not.
Closet Behind Dresser With Light Controlled with Wireless Light Switch
Fuzzy Picture of Wireless Light Switch on Left Controlling Pull String Bulb In Closet
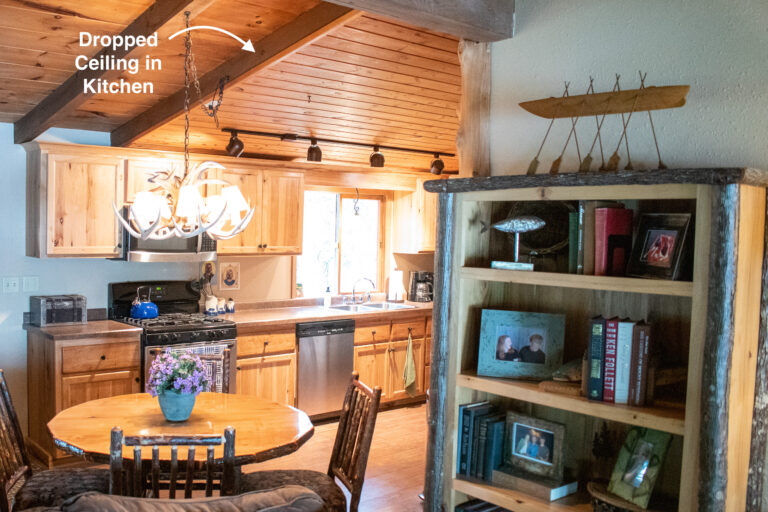
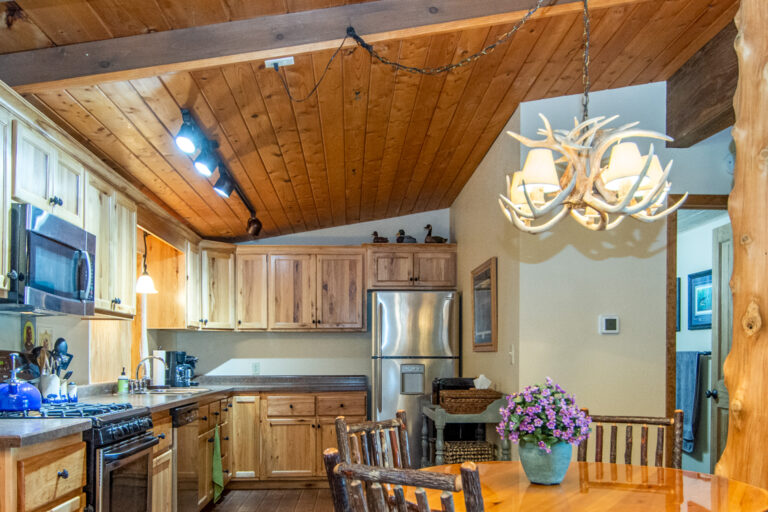
Challenge: How to add task lighting in the kitchen
When the cabin was remodeled the previous owners dropped a wood ceiling down a few inches over the kitchen which used to be a 4th bedroom with a vaulted ceiling. This allowed for the installation of a 4-bulb track light which was hard-wired to a light switch.
Dropped Wood Ceiling With Track Lighting In Kitchen
Challenge: How to add light above the kitchen table
An electrical outlet was installed at the closest end of the dropped ceiling and connected to a front door light switch. The antler chandelier was plugged into the outlet and the draped chain allowed the fixture to be positioned directly over the kitchen table.
Electrical Outlet in Dropped Ceiling for Antler Chandelier
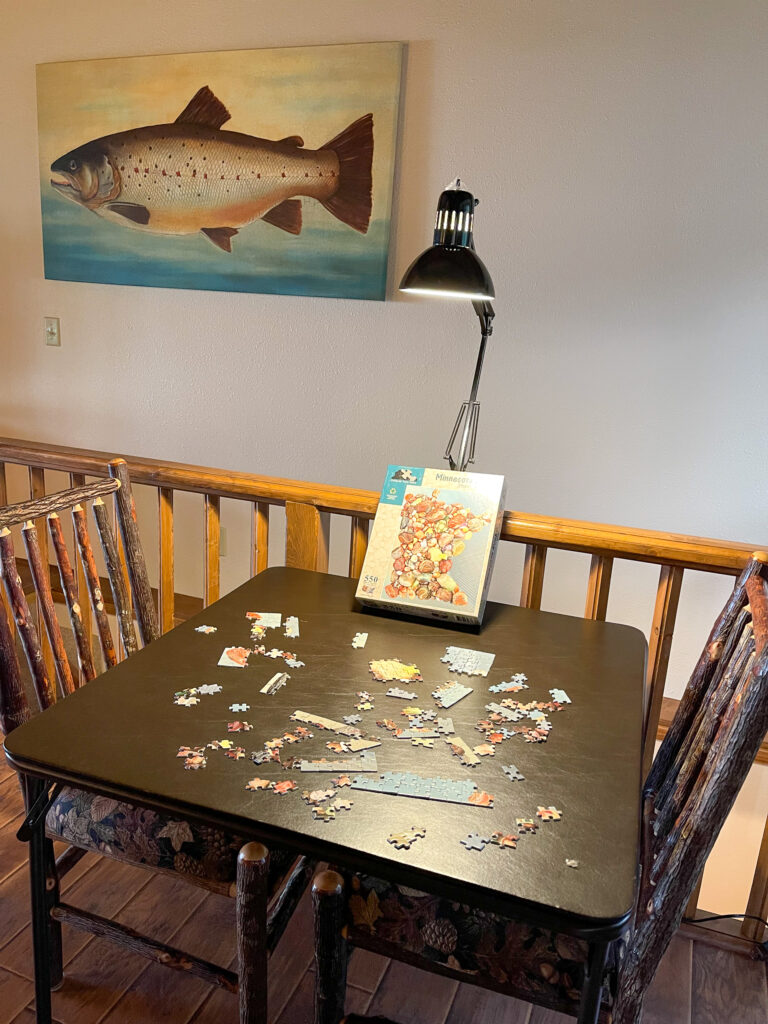
Challenge: How to add task light to a puzzle table
Puzzle pieces are hard enough to see but even worse with poor lighting. The solution at this puzzle table was to attach a desk lamp with a clamp to the stair rail. The result was a functional light with a rather interesting industrial look.
Desk Lamp Clamped to Stair Rail
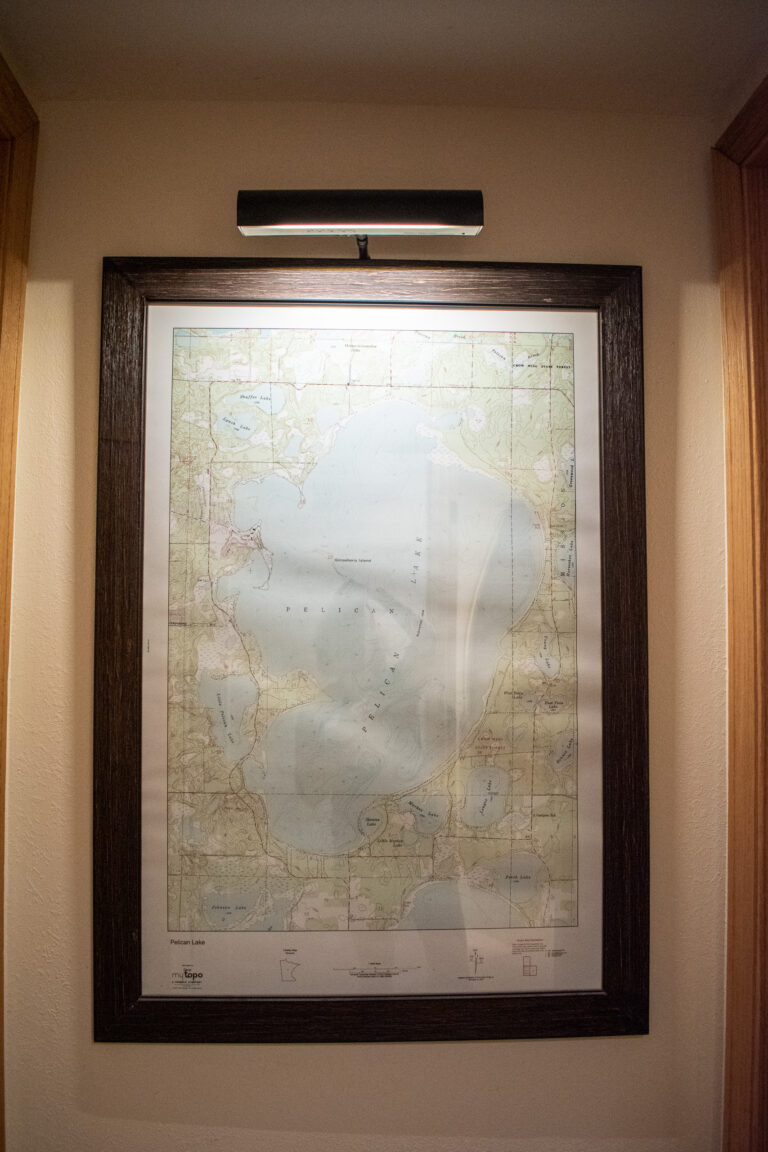
Challenge: How to illuminate a map in a dark corner with no electrical outlet
Battery Operated Picture Light Controlled with Remote
Lighting Inside Cabinets with Glass Doors
Challenge: How to hardwire upper cabinets in a built-in wall pantry
When I painted our kitchen cabinets on Highover Court (see: “Painting Kitchen Cabinets for a Whole New Look!”) I replaced the upper pantry fronts with glass and had the electrician install puck lights controlled with a dimmer light switch. It looked like a china hutch and was beautiful when always lit on the lowest setting. Because the cabinet did not go to the ceiling it was relatively easy to install the lights from above and thread the electrical wire through the wall to the light switch.
Pantry on Left Before Glass and Lights Added to the Top
Newly Painted Pantry With Glass Fronts and Puck Lights
Challenge: How to hardwire lights “post build” in upper cabinets with glass fronts
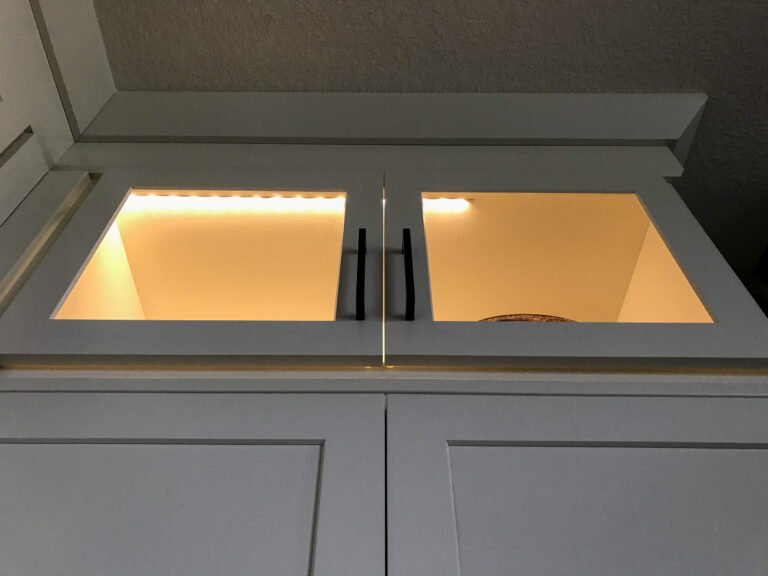
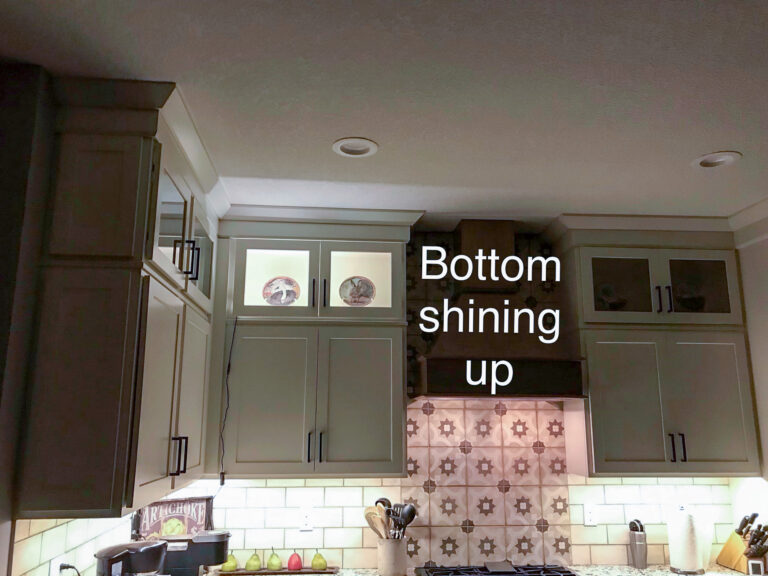
When we purchased our Elshire home I loved how the kitchen cabinets went all the way to the ceiling, but I was disappointed the builder did not install lights in the upper glass-fronted ones because I knew it was far more complicated and expensive to install “post build”. In my opinion glass front cabinets are underwhelming when not lighted so I bit the money bullet and called the electrician. The Elshire cabinets were much higher and I did not want to look up directly into puck lights so I decided to try the popular LED strip lights instead. The dilemma was how to mount them, from the bottom up, top back, or top down. My patient electrician taped a plugged-in sample strip so I could try it all three ways.
Upper Glass Cabinets with No Lights
LED Strip Sample (does not extend the entire width)
Number 1. Bottom shining up – There was not only light in the box, but also on the ceiling. I did not like the residual light it created on the ceiling.
Strip Lights on Bottom Shining Up
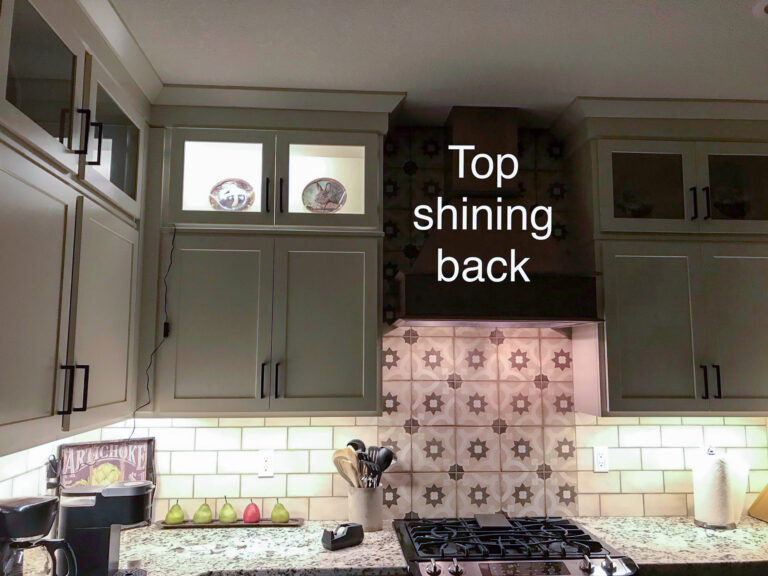
Number 2. Top shining back – I did not like the shadows it created.
Strip Lights on Top Shining Back
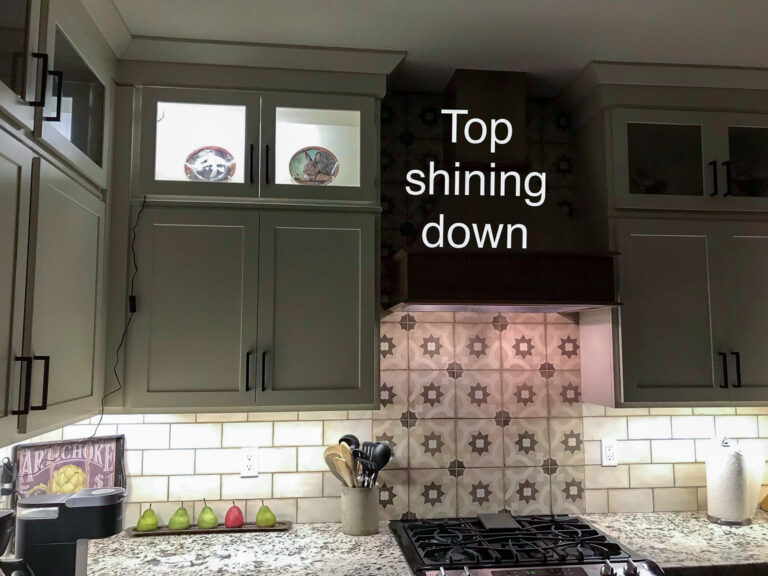
Number 3. Top shining down – I loved it!
Strip Lights on Top Shining Down
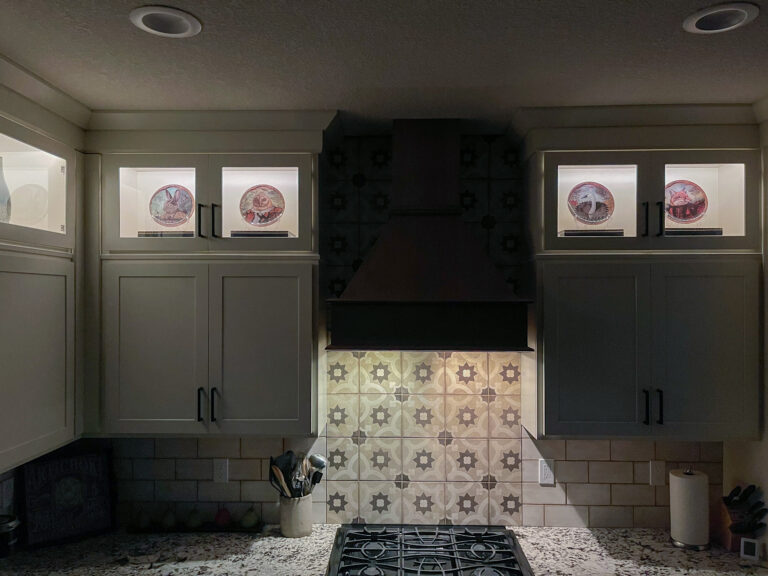
Like the story, “Goldilocks and the Three Bears”, the 3rd option was just right. I loved the beautiful pools of light and how they showcased my whimsical Aesop Fable plates.
Lighted Cabinets with Aesop Fable Plates Displayed
The LED strips are hardwired to a dimmer switch and I keep them on the low setting 24/7. They work as a night light and give off a warm glow.
Lighted Cabinets at Night
Controlling Lamps with a Remote
Lamps add a homey feel to any room. However, I do not like reaching beneath and searching for the light switch. My hand is always on the wrong side.
Challenge: How to control lamps remotely
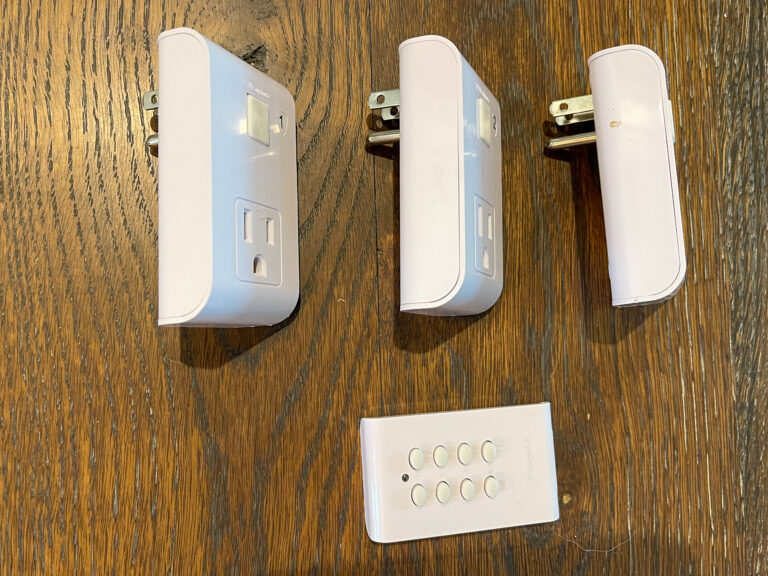
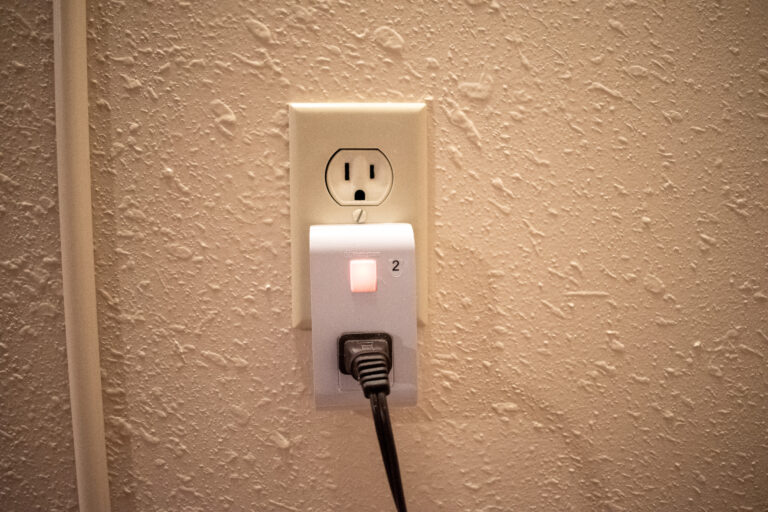
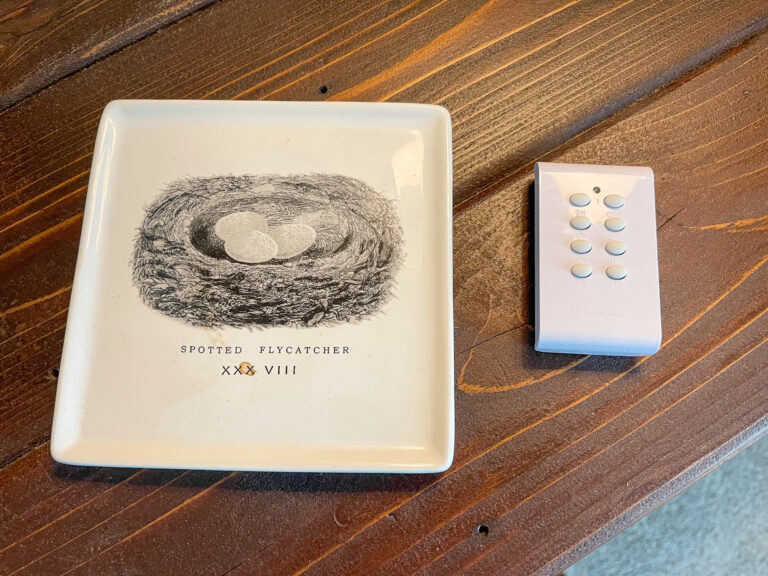
When Christmas shopping years ago I discovered a wireless remote-controlled outlet system. It allowed me to turn on the tree lights without crawling underneath to plug the cord into the wall. I thought it was the cat’s meow.
I incorporated the same system at the cabin where I plugged the two wall sconces and elk lamp into the remote controlled power plugs so they could all three be turned on and off with the same wireless remote
Remote With Power Plugs
Sconce Plugged Into Remote Controlled Power Plug
Power Plug
Remote Controlling Three Light Sources
Elk Lamp and Two Sconces Controlled with Remote
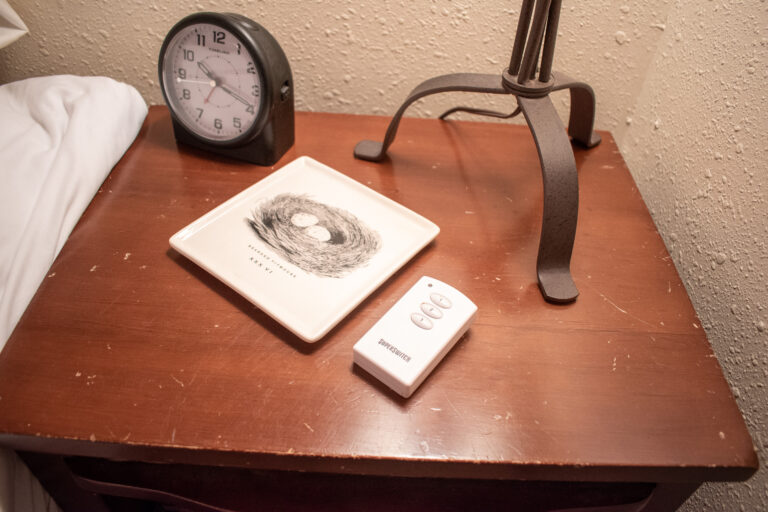
In the cabin bedroom, I controlled two bedside lamps with a remote.
Remote Controlling Two Bedside Lamps
Cabin Bedside Lamps Controlled With Remote
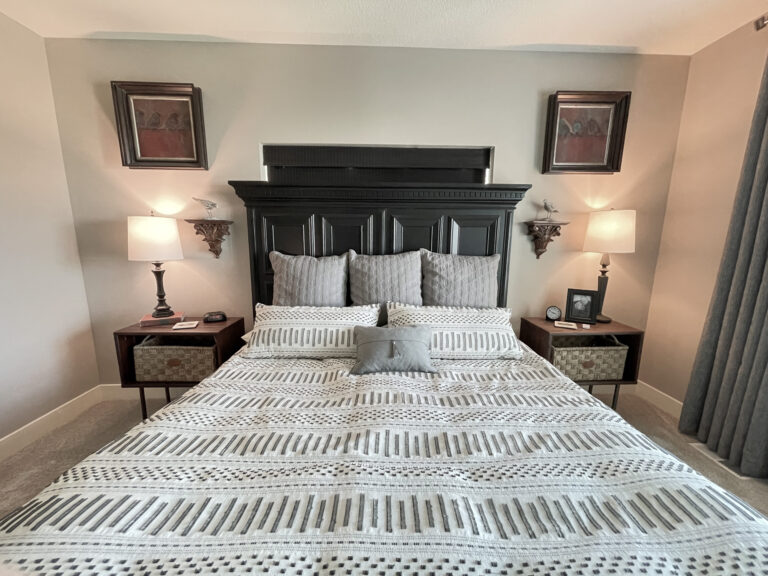
In our Elshire Home I control the two bedside lamps and our tripod floor lamp, all with the same remote.
Remote Controlling Three Lights in Elshire Bedroom
Two of the Three Lamps Controlled with Remote
Third Lamp Controlled with Remote
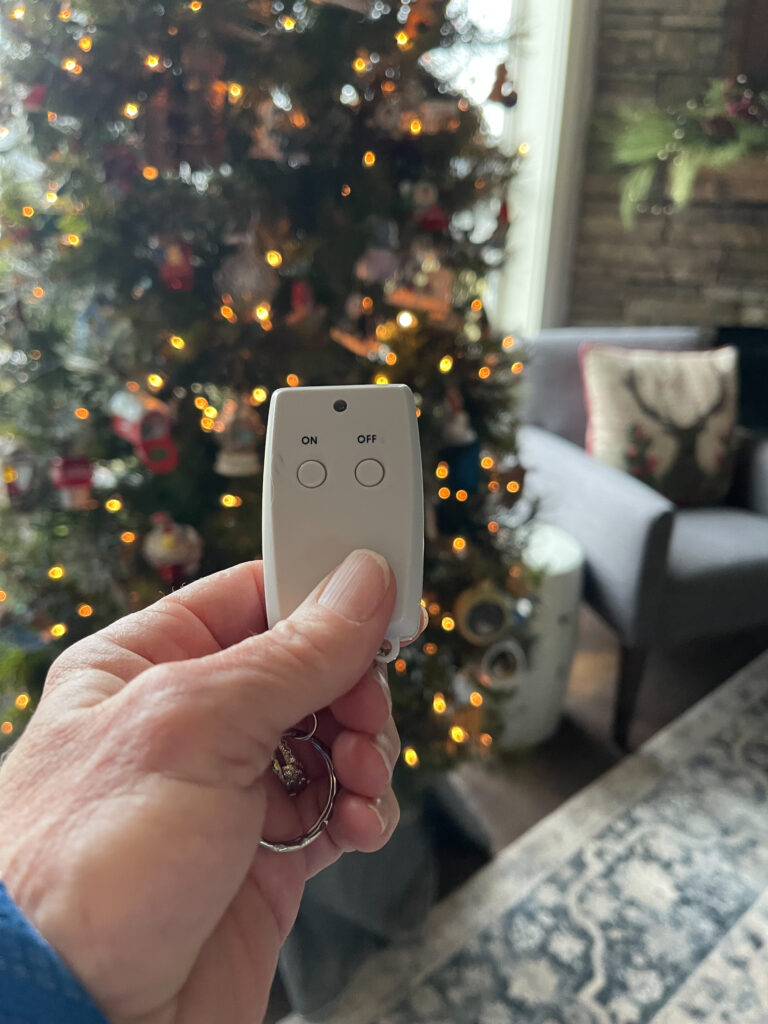
And of course I control our Christmas tree lights with a remote.
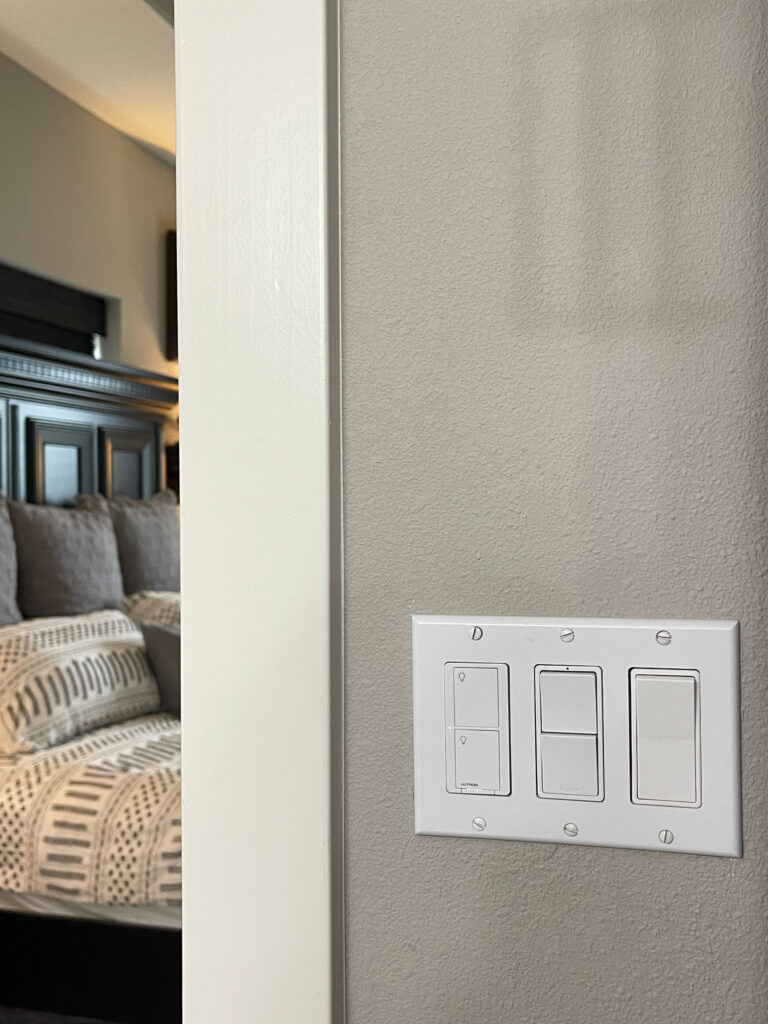
Adding a Second Light Switch without Fishing Wires
Challenge: Adding a second light switch without fishing electrical wires through walls and ceilings
The electrician that wired our Elshire home did some quirky things. For example, there is a light switch in a small linen closet, but no light above. Since it is so small it is not worth tearing up the ceiling in search of a junction box.
However, I could not live without a second switch in the primary bathroom. I believe there should be an “Electrician Code” that if there are two entrances to a room, there should be a light switch at each door. This was not the case in our primary bathroom or bedroom.
After some research, my husband, Daryl, installed a Lutron wireless remote switch. He replaced the current light switch to make it compatible with a wireless switch located at the other entrance to the bathroom. And, we did not even have to cut into the sheetrock. Now I have a switch at both entrances. The bedroom is next!
Original Plate with Replaced Switch on Left
Newly Added Wireless Light Switch Tied to the Switch in the Three Plate
Narrow Profile of Added Switch Mounted Directly on Wall (no cuts in the sheetroock)
Getting More Light From a Single Light Socket
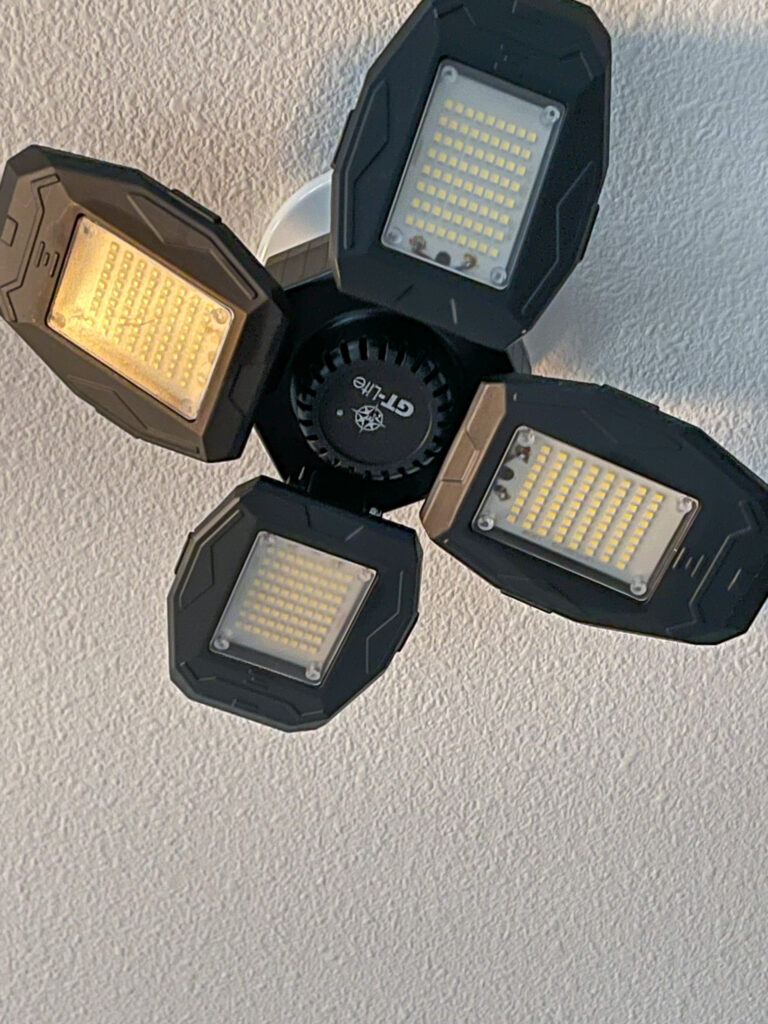
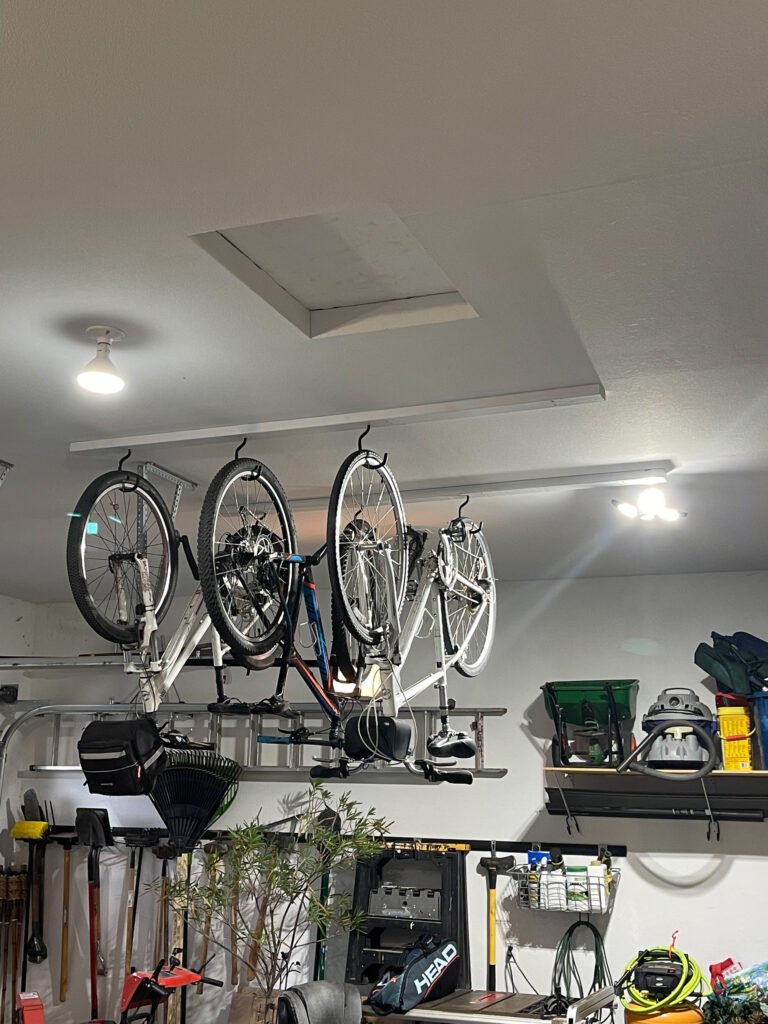
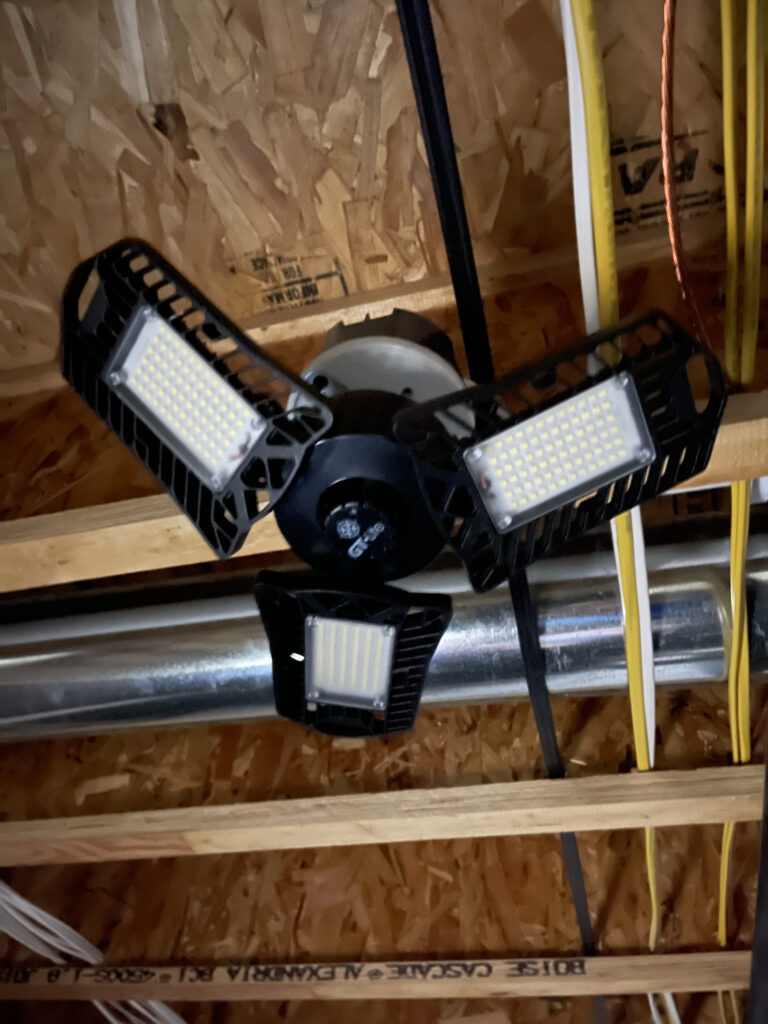
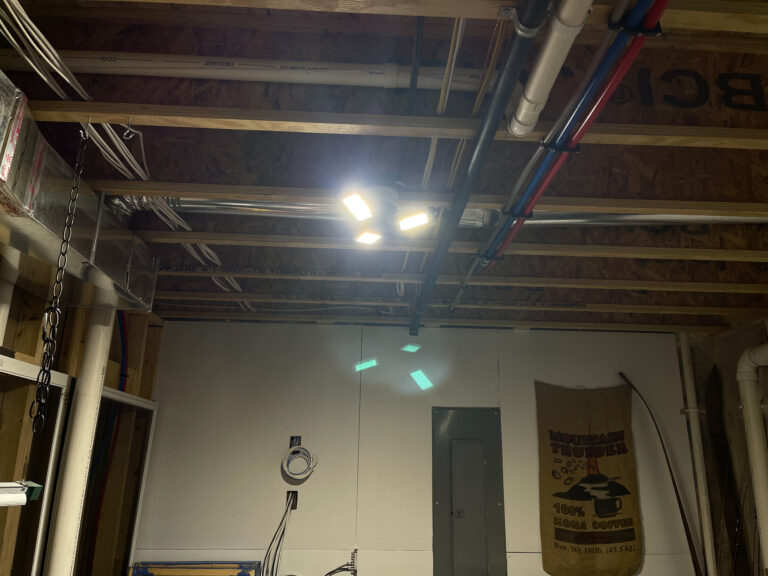
Challenge: More light in the garage and basement
I like to do projects in our garage, but the single light bulbs do not give adequate light. While at my brother’s home, I noticed his bright LED garage light. I liked it so much that I got one for the garage and one for our unfinished basement area.
Four Panel LED Bulb
Four Panel LED Bulb on Right in Garage
Three Panel LED Bulb
Three Panel LED Bulb in Unfinished Area of Basement
Exterior Fairy Lights without Electricity
Challenge: Outdoor fairy lights with no electrical cord
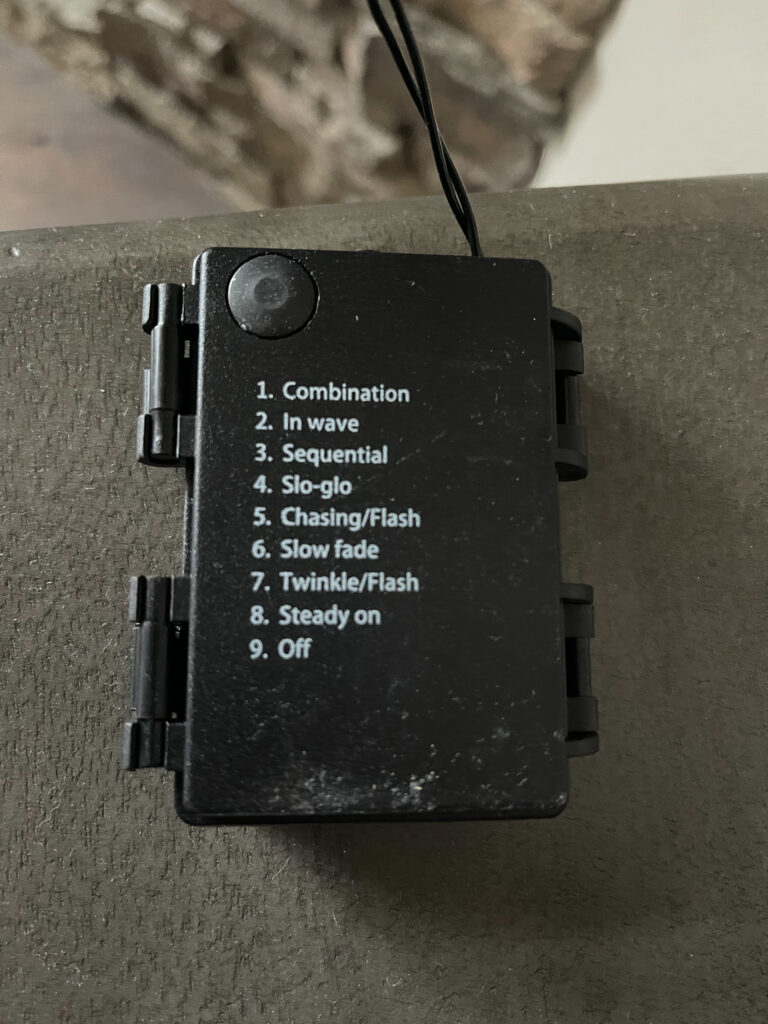
I have several garden obelisks in my pots on the deck and I wanted to somehow light them without stringing electricity to each pot. My solution was these small LED battery-powered lights (similar to fairy lights) found at Home Depot. They use 3 AA batteries and are on a 6-hour timer. I absolutely love the warm glow viewed from within my kitchen every evening. I liked them so much that I placed a string on my mantel for Christmas. Since Home Depot does not stock them regularly I found them on Amazon.
Small LED Battery Powered Lights Wrapped Around Garden Obelisks On Exterior Deck
Battery Operated LED Lights on Mantel
Battery Case for Wireless LED Lights
I also purchased mini LED solar powered lights at Menards, but they only work when there is enough sun to charge the solar panel, which is hit or miss in the short winter days.
Lighted Makeup Mirror With No Outlet
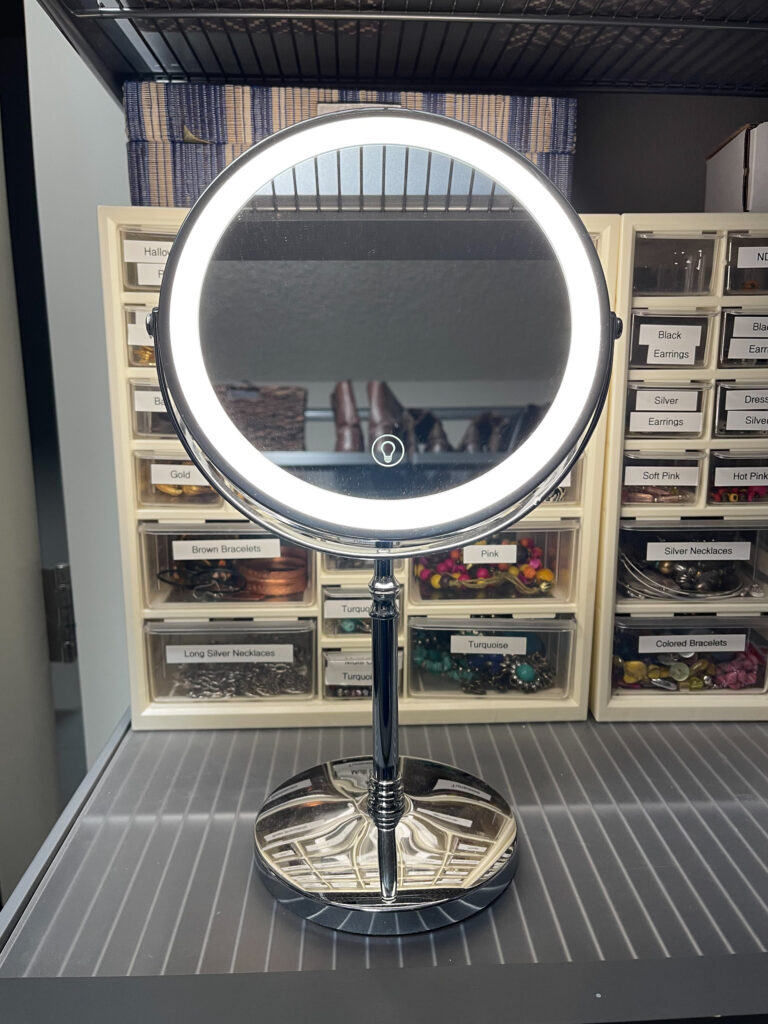
Challenge: Using a makeup mirror where there is no electricity
Lastly, I wanted a lighted makeup mirror in my closet, however, I had no electrical outlet. I found this mirror on Amazon and was so pleased with it that I purchased one for my daughter, Kate. It has a built-in rechargeable battery that I plug in periodically, but so far it holds a charge for a long time as long as I turn it off when not in use. It has 3 dimming levels and a magnifying feature on the reverse. I use that side sparingly, as you can sometimes see too much at my age.
Rechargeable Battery Operated Make Up Mirror in Closet
Well, that is the end of my post on how I conquered some of my lighting challenges. What challenges have you had, and what was your solution? Tell me about it in the comments below.
Meanwhile, good luck in your quest for good light!


Great information Cheryl.
Thank you Karen!
Wow, nice post. Like the painted cord covers. Never heard of such a thing.
Thank you. Yes, the painted cord covers blend in much better.
I’ve always liked how you did the ceiling lights in the main floor bedroom at the cabin.
Thank you Sam!
The older I get, the more light I need!
Good info. 💡
For sure!!