Are you frustrated that you can’t find the perfect furnishing for your home? Why not build furniture? In this post I will tell you about several pieces a non-carpenter, like me, has built. I will start with my rustic dock board pieces and finish with my breakfast niche buffets.
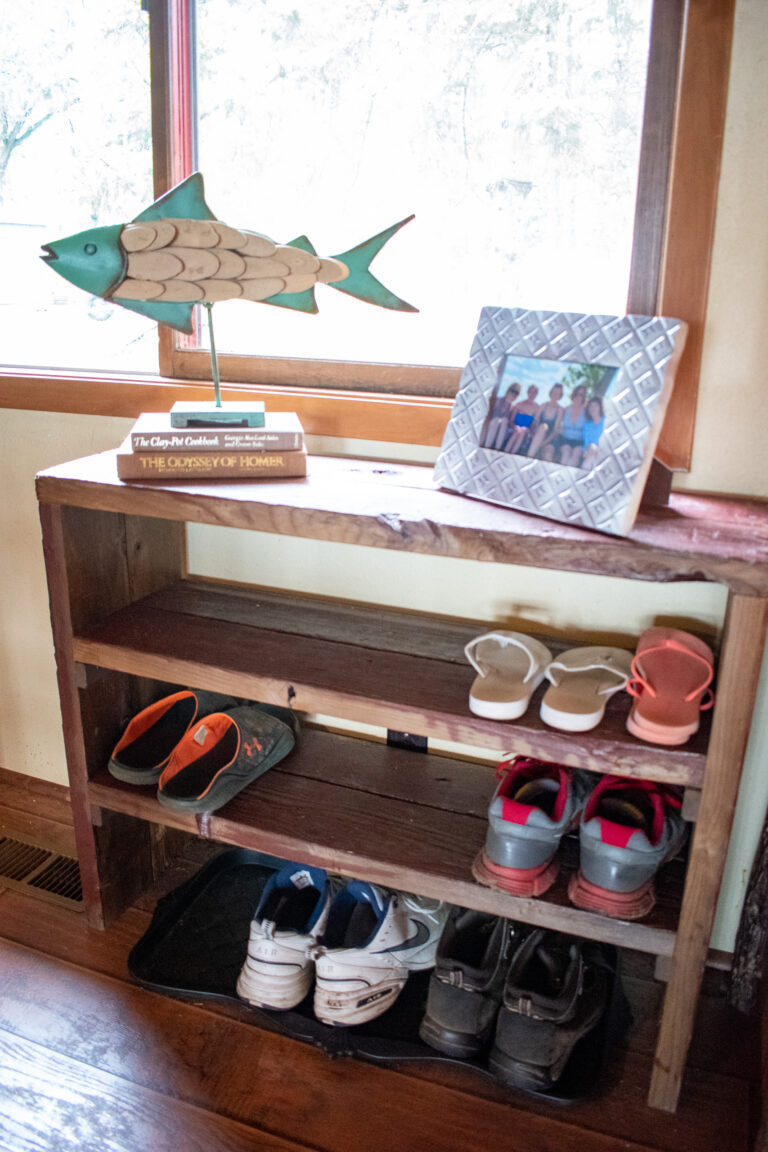
My first venture into building furniture was a shoe rack made of old dock pieces. It was very simple with boards screwed together. The rustic look was well suited to a cabin so I chose not to sand or paint. What I liked was that I could customize it to fit perfectly under the window and between the china hutch and floor vent.
Cabin Shoe Rack
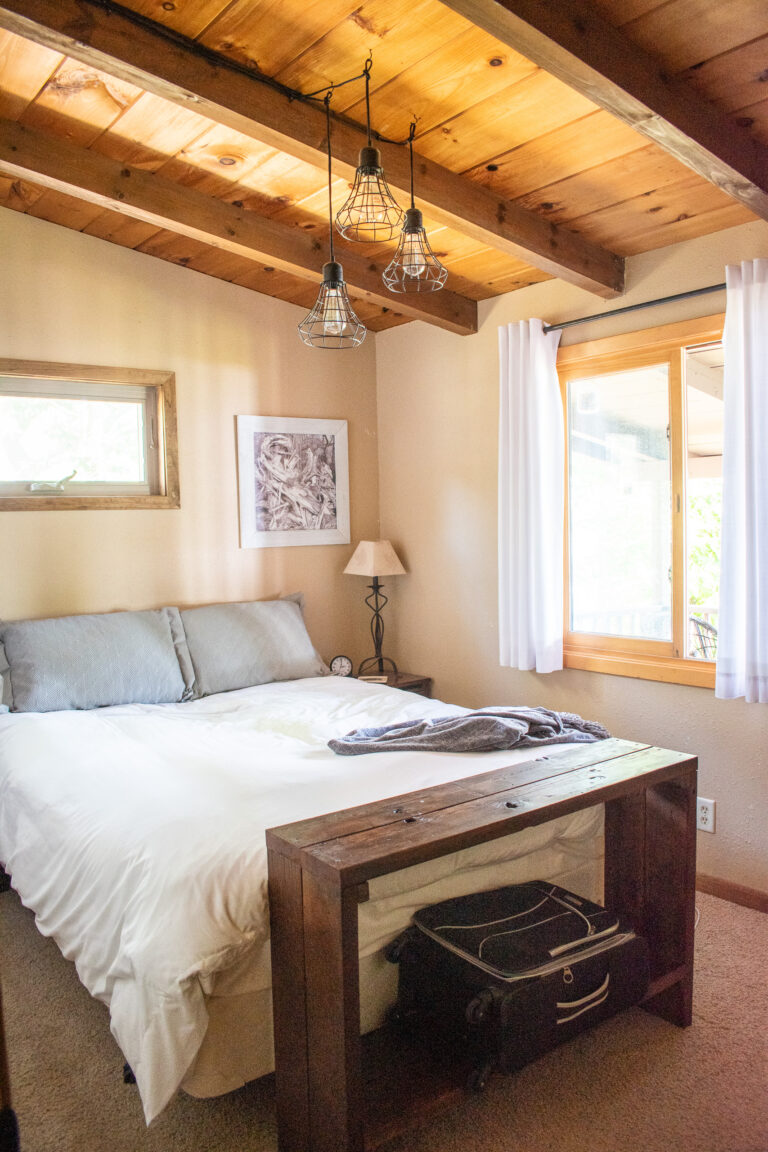
Bench For End of the Bed
In the tiny cabin bedroom, we needed something to hold our carry-on suitcases so I built this very narrow piece from more old dock boards. Again, I could customize it to the perfect width and height.
Bench for End of Bed
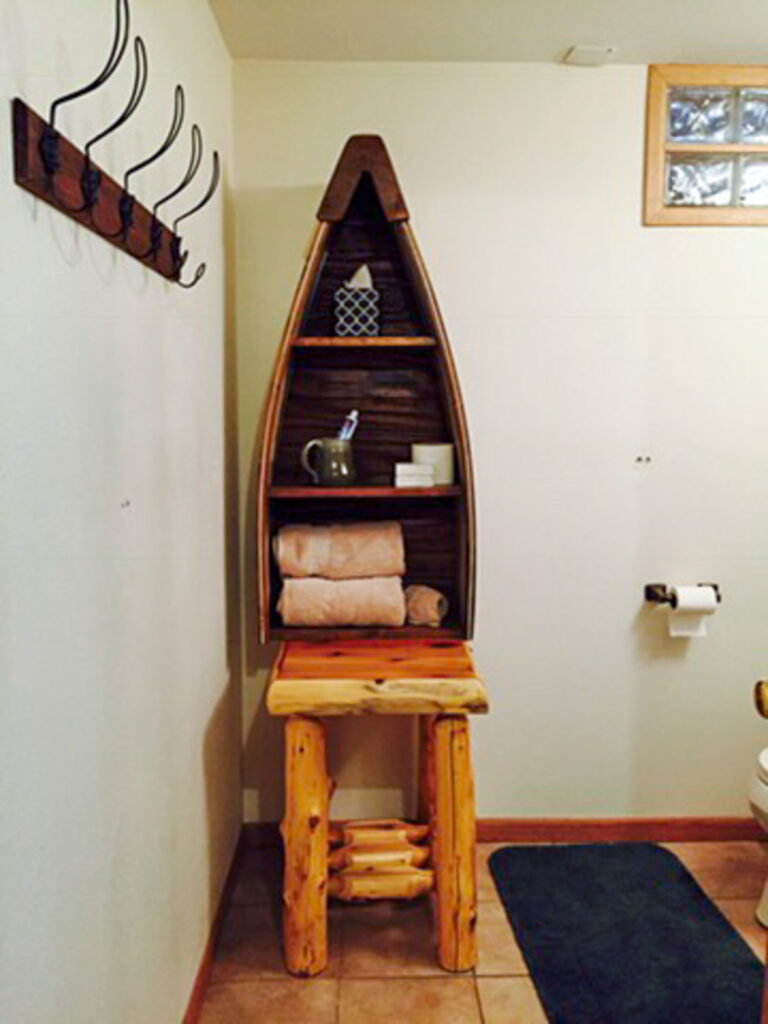
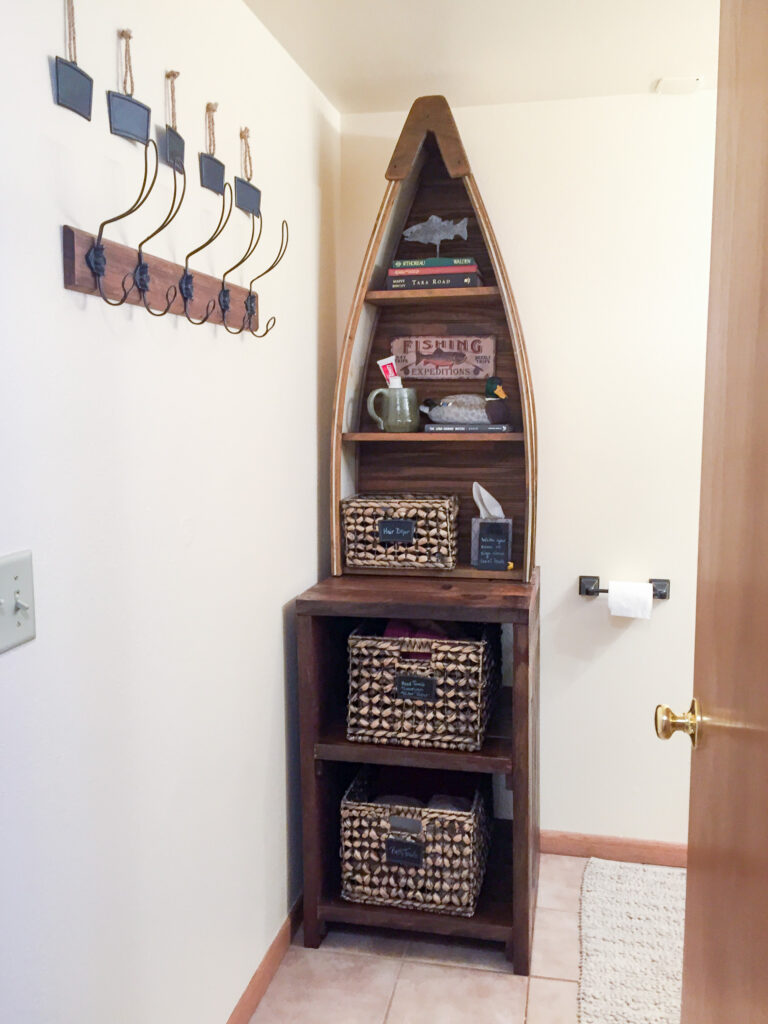
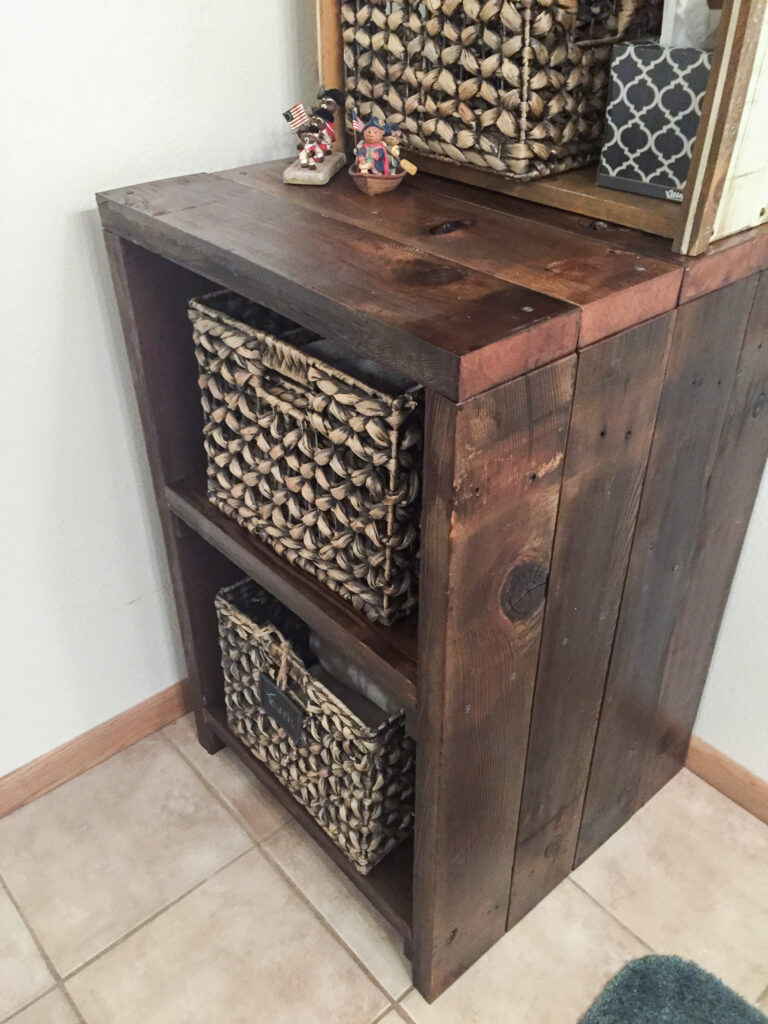
Open Linen Hutch
The lower-level cabin bathroom came with a cool canoe shelf, but it looked dorky on the log end table. An easy solution was constructing a linen hutch for a base out of old dock pieces. The dimensions were customized for the height, depth, and width of the canoe shelf and also for the baskets containing extra towels and toiletries.
After - Canoe Shelf on Open Linen Hutch
Open Linen Shelf Built to Fit Baskets
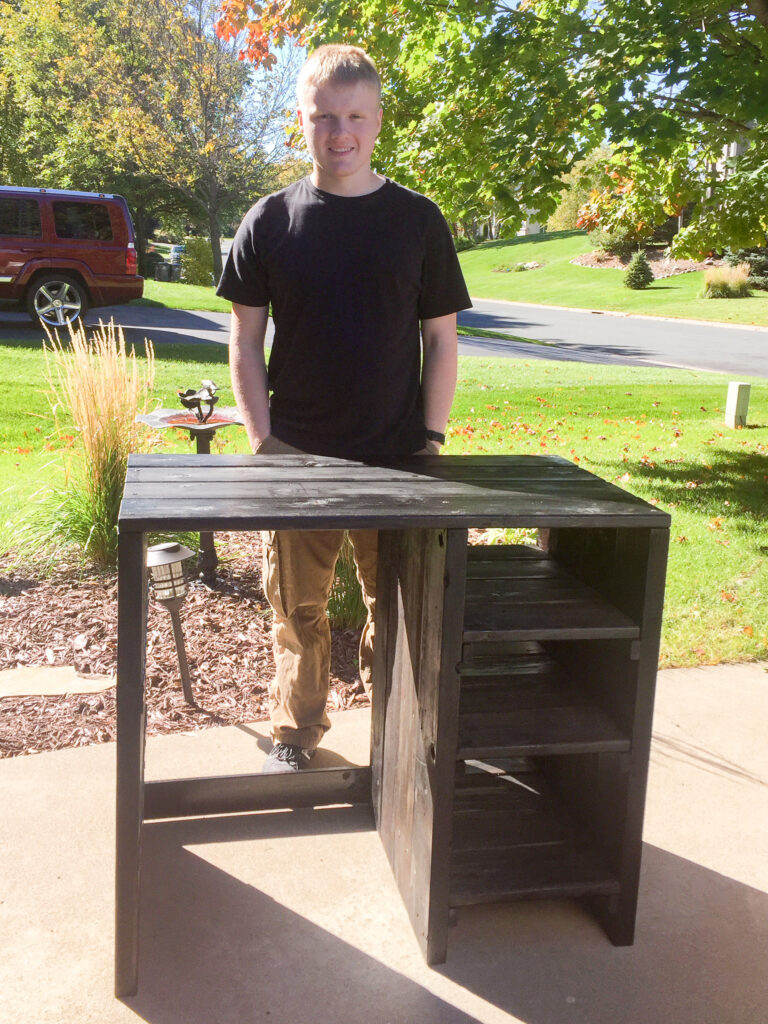
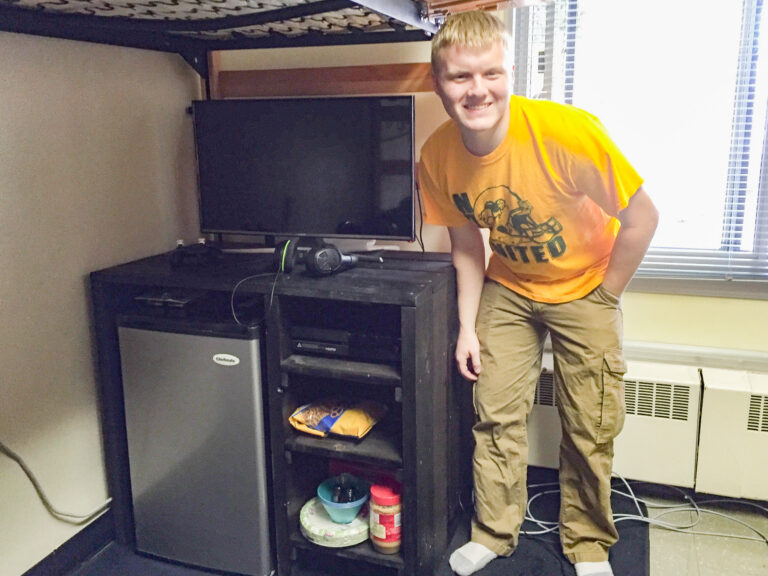
College TV / Refrigerator Stand
When my son Sam, went to college, he needed a TV stand. I custom-built one from old dock pieces to fit exactly under his lofted bed. On the left is an opening for his small refrigerator and on the right are shelves for his gaming console and miscellaneous food snacks.
College TV / Refrigerator Stand
College Stand Under Loft Bed
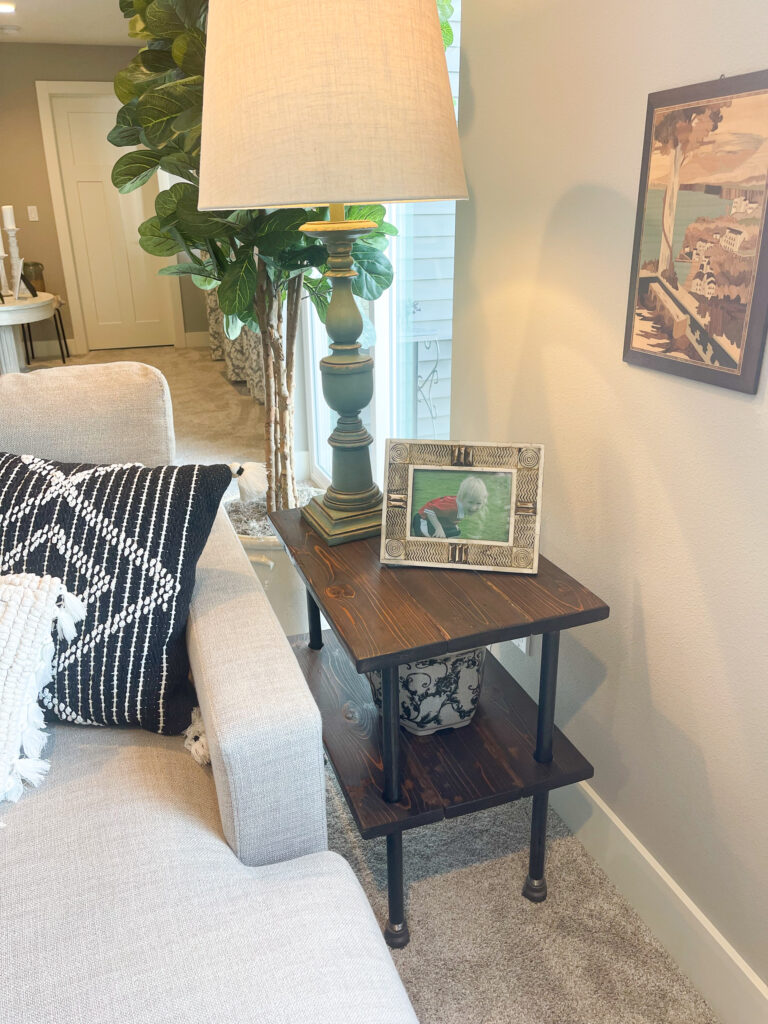
Bedside and End Tables
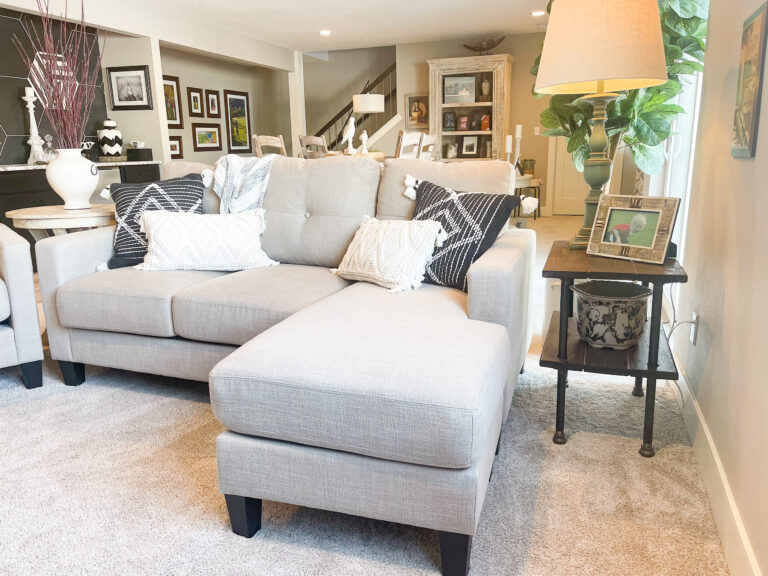
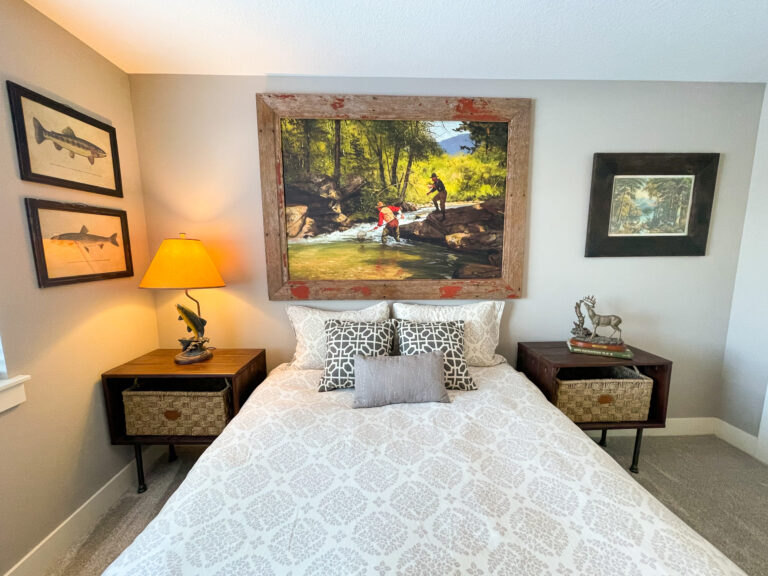
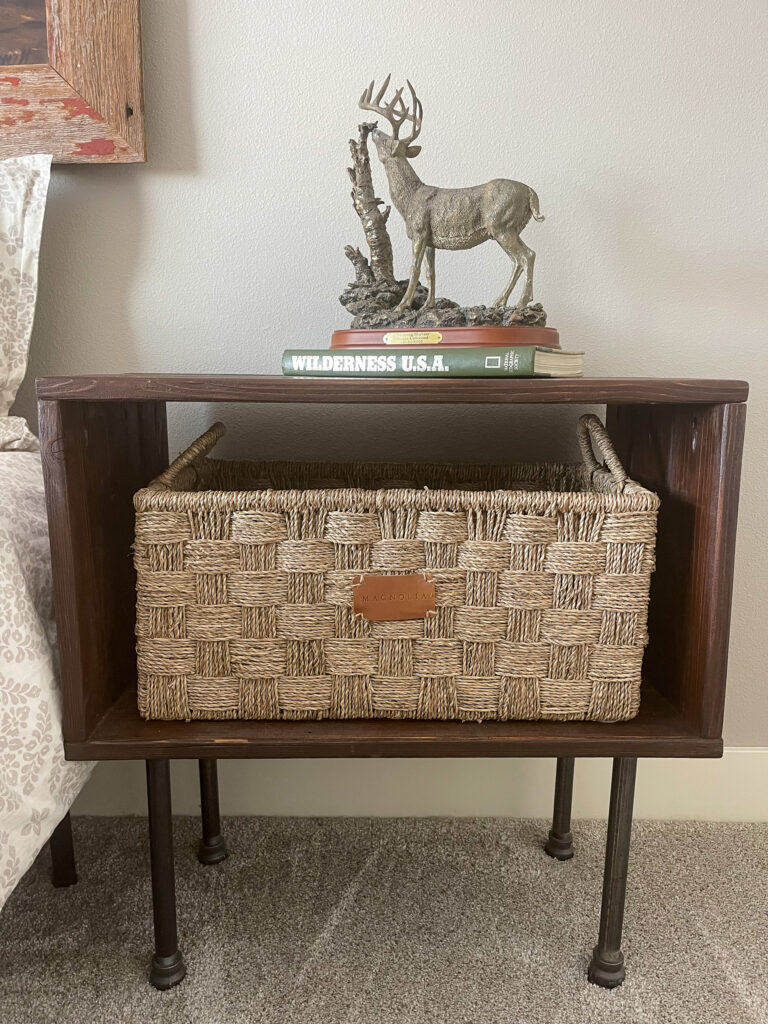
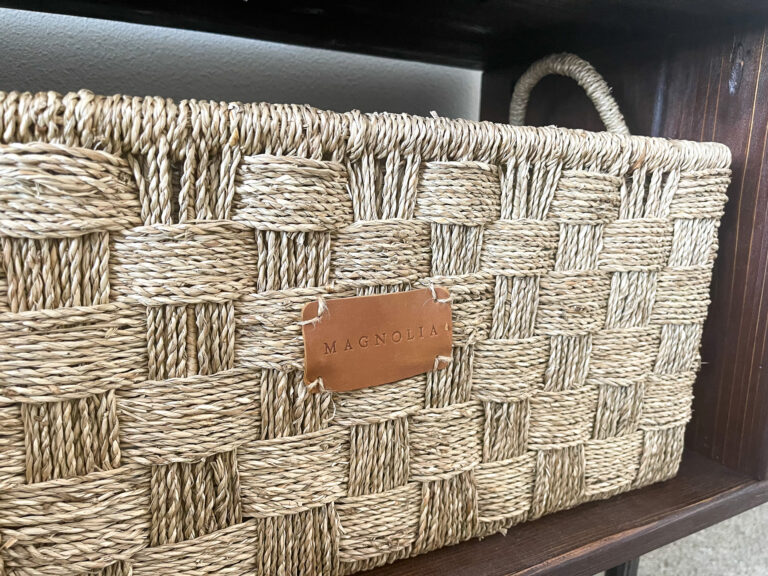
More dock pieces were used to make an end table and two bedside tables for my husband’s (Daryl) temporary apartment. Plumber’s pipe from Home Depot was used for the legs and supports between shelves. The Magnola wicker baskets fit perfectly on the lower level of the bedside tables.
End Table Built with Dock Boards and Plumber's Pipe
End Table in Lower Level
Night Stands Built From Dock Boards
Night Stand with Plumber's Pipe Legs
Magnolia Basket
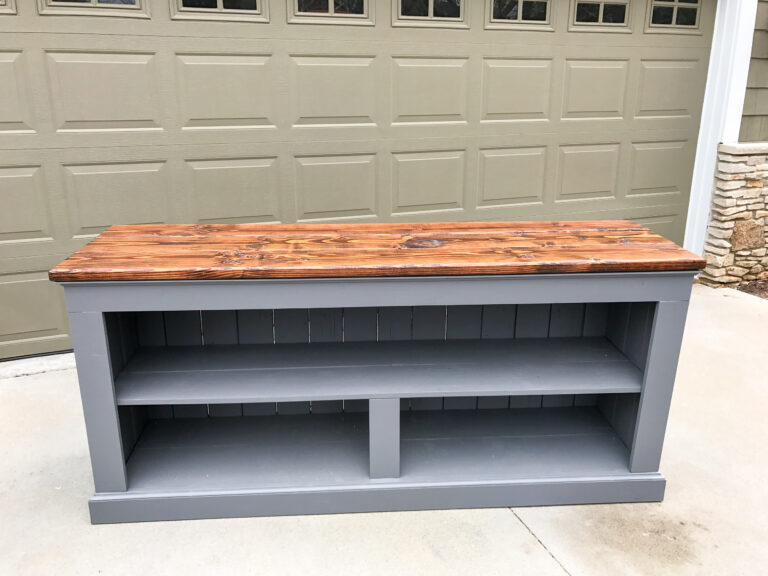
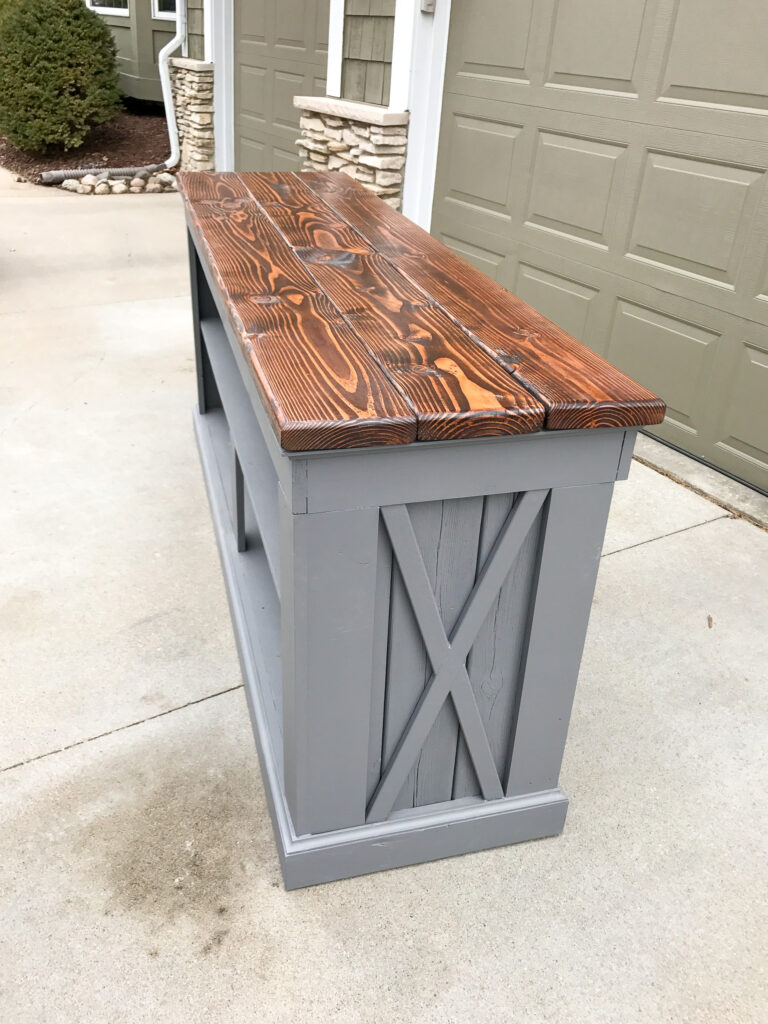
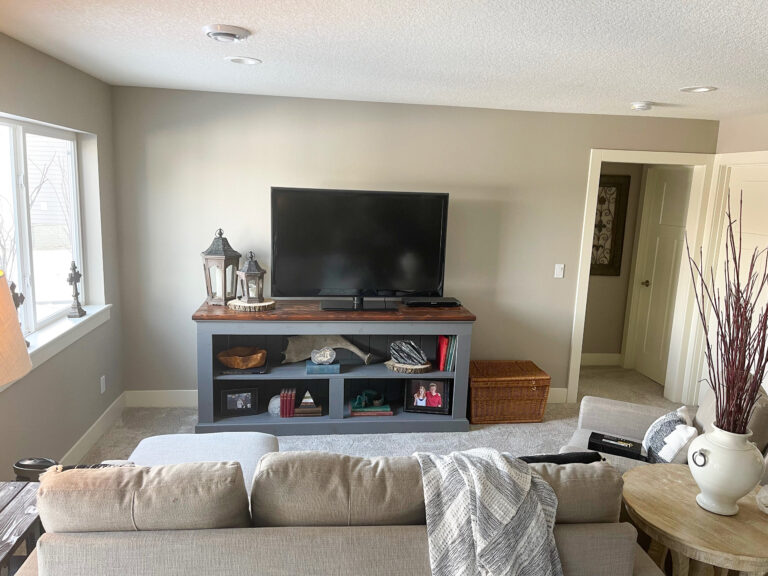
TV Console
Also needed for the apartment was a TV console so I found a plan on Google and took the plunge to build it even though it was an upgrade from my previous simple pieces. Of course, my never-ending supply of dock boards was used for the back and sides. It came out just as I had hoped, however, it was quite heavy to carry up the stairs to the third-floor apartment. It now is displayed on the lower level of our Elshire home.
TV Console with Dock Boards on Back and Sides
Side of TV Console
TV Console in Lower Level
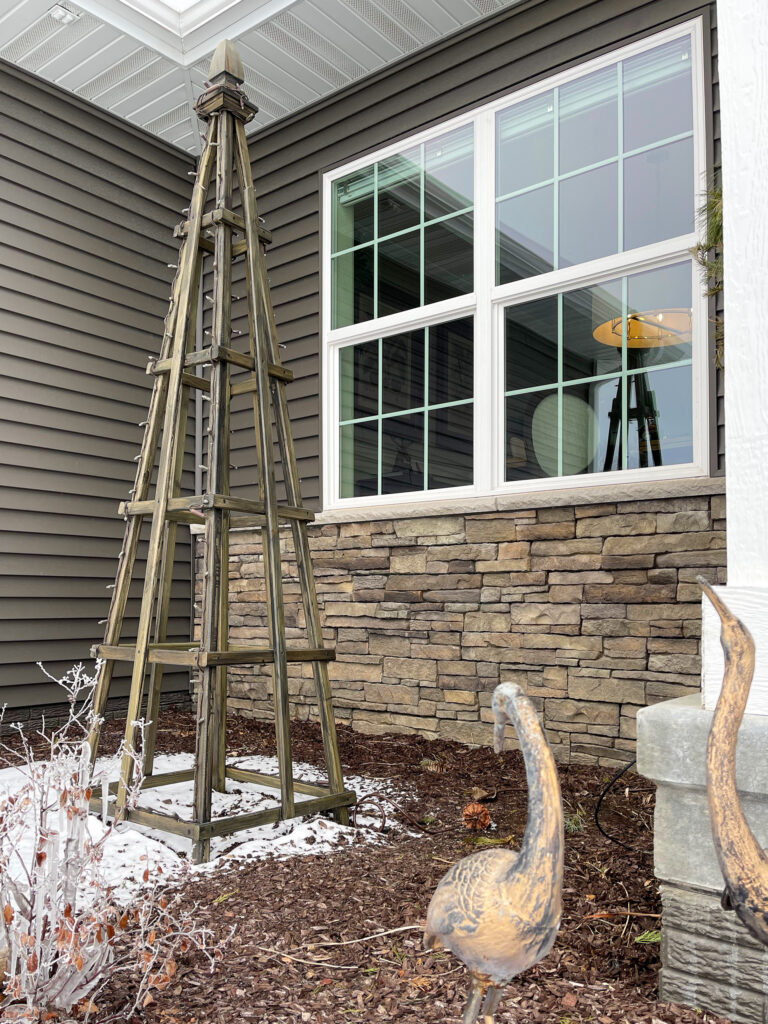
Garden Obelisk
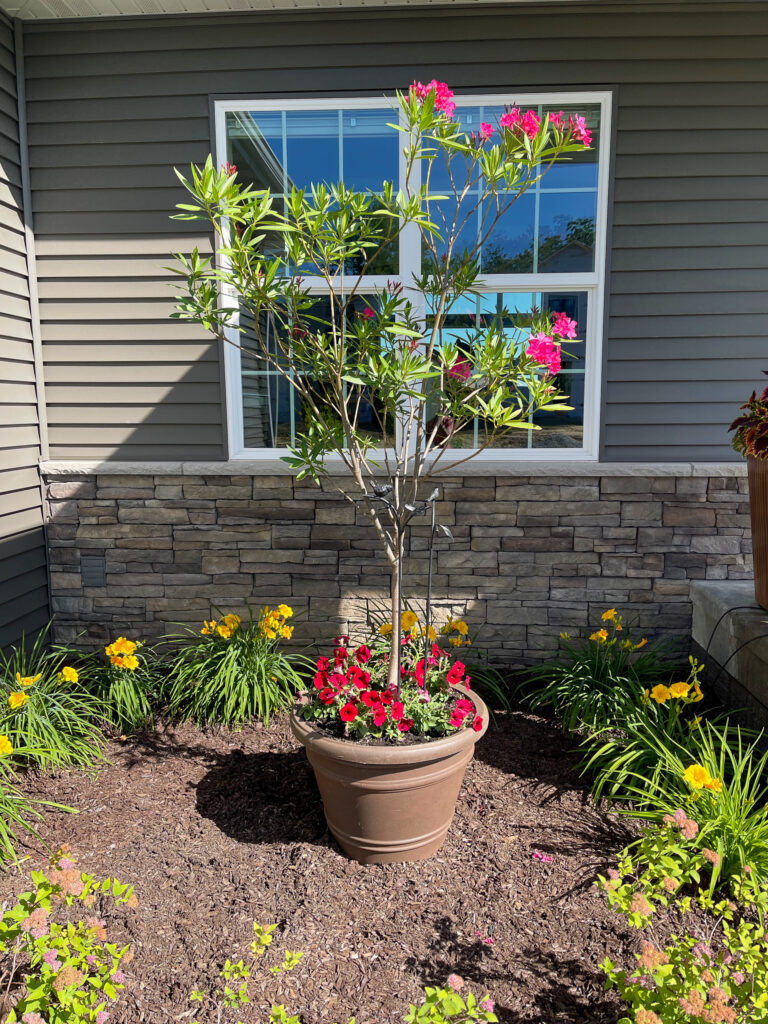
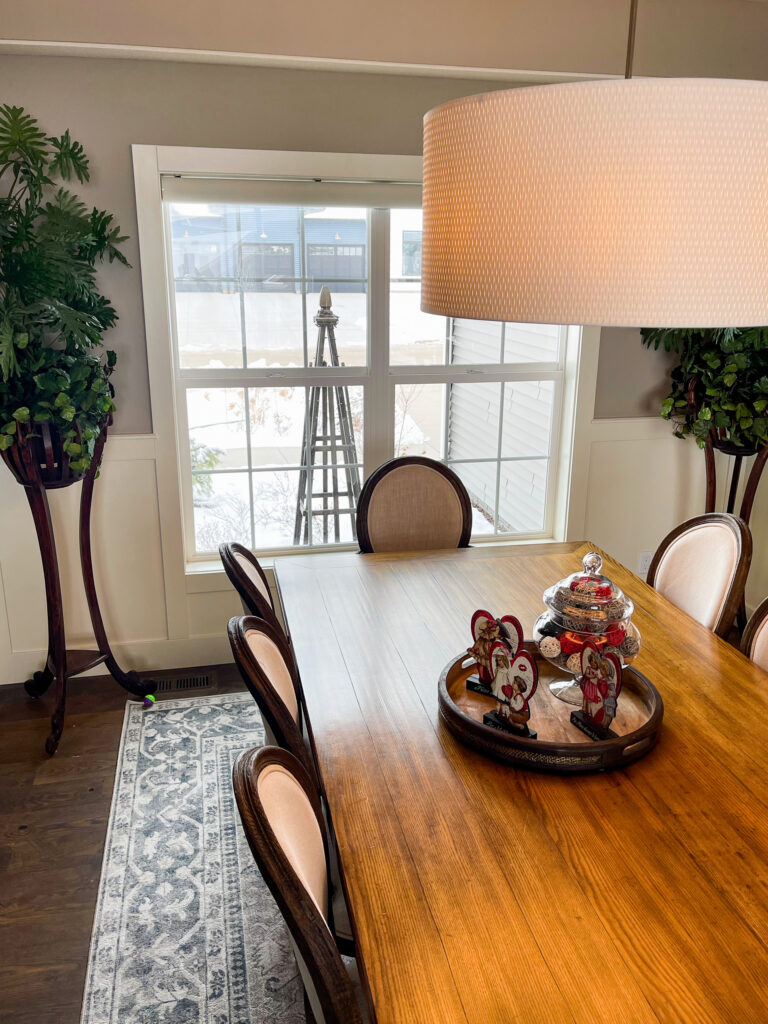
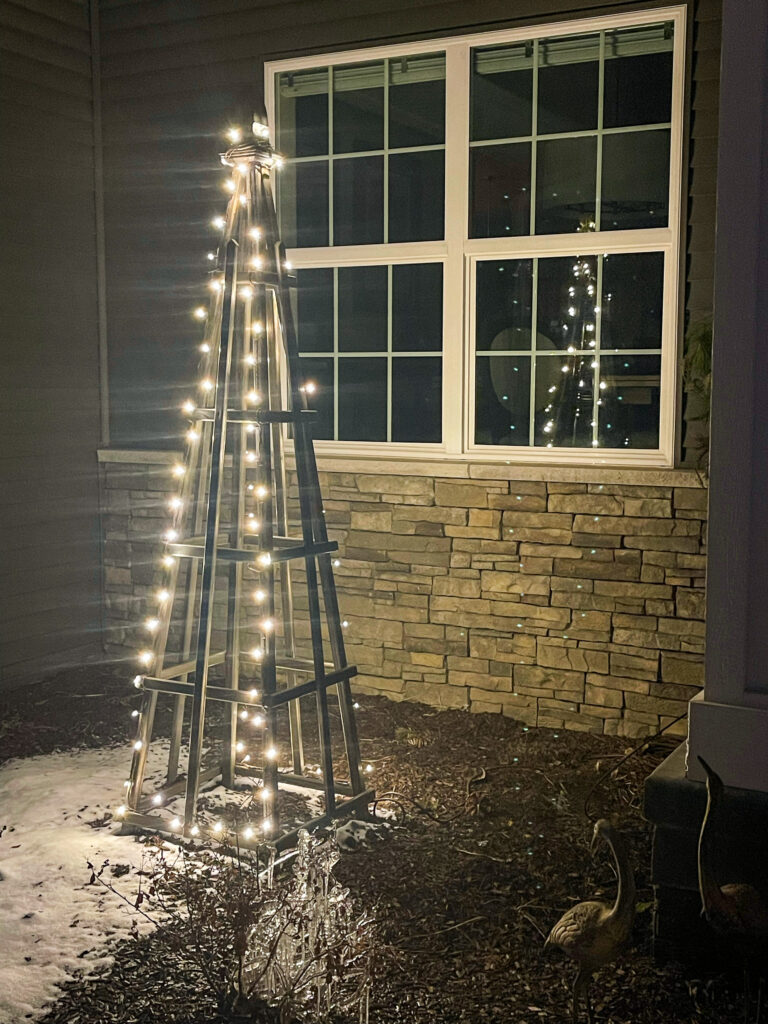
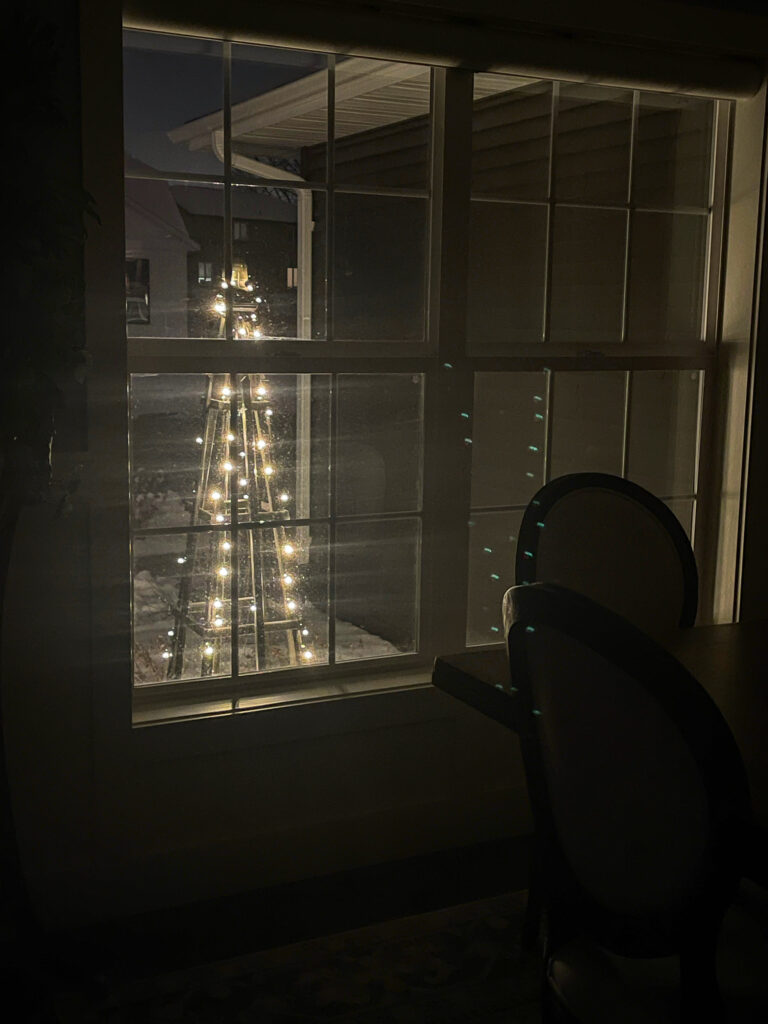
Outside, in front of my dining room window, I have a beautiful potted Oleander tree, named “Ollie”. Because he will not survive IA winters we use a furniture dolly to move him into the heated garage when the weather turns cold. But, the space left behind looked lonely so I decided to build a garden obelisk for the winter months. Once again, I Googled a plan and made an obelisk the perfect height for viewing from inside. LED lights with brown wire were stapled to the structure and placed on a timer so it is not only beautiful during the day, but also at night.
"Ollie", the Oleander in Front of Dining Room Window
Obelisk in Front of Dining Room Window
Obelisk Viewed From Inside
Obelisk Outside Lighted
Obelisk Inside Lighted
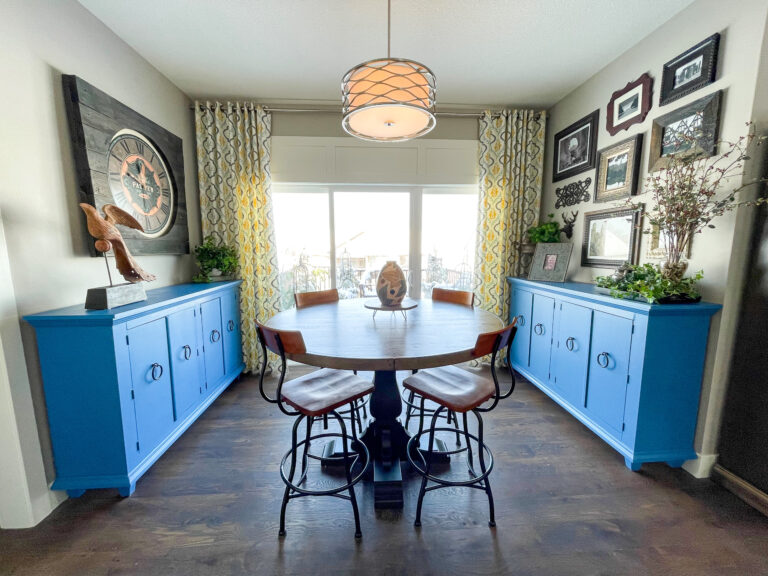
Breakfast Niche Buffets
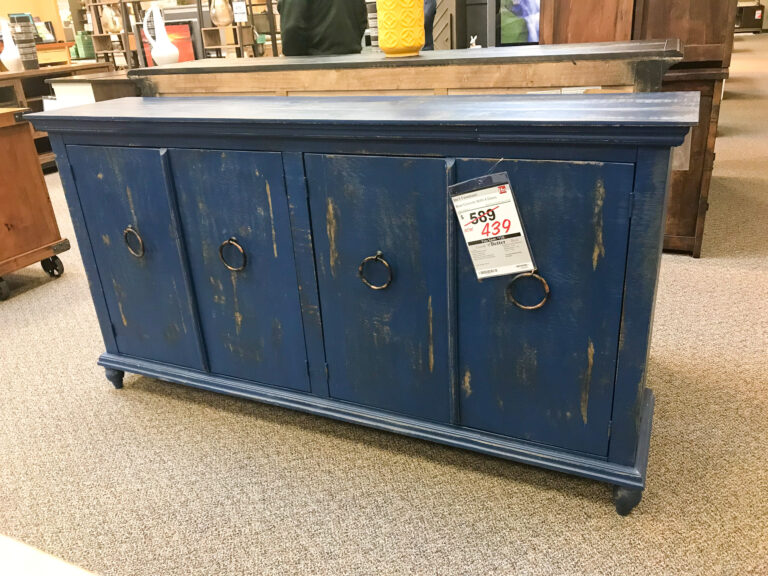
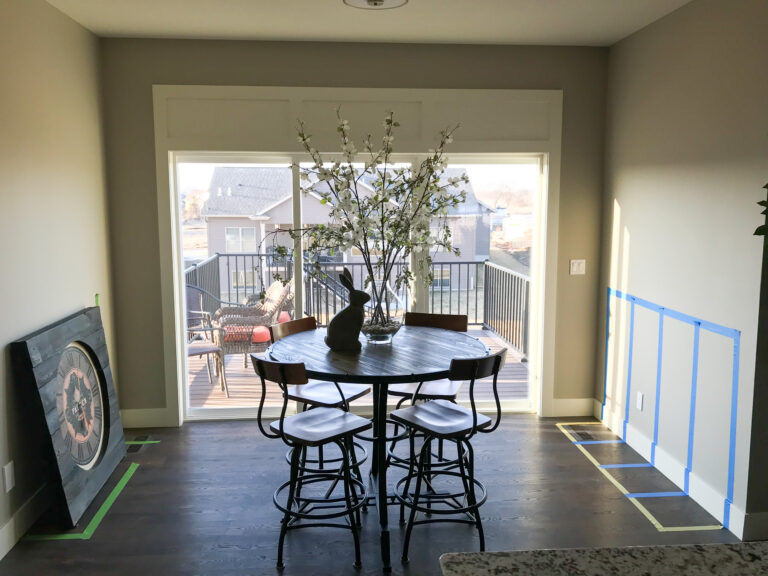
Our Elshire home has an open concept which I love but still wanted to create distinct living and dining spaces. I could envision two buffets on opposing walls in the breakfast niche, but could not find the correct size. I did find the perfect console (my prototype) at a furniture store, but it was too short, too deep, and too long. After much thought and lots of photos, I decided to try my hand at building a buffet without a Google plan, just to see if I could do it. It worked! And, I liked it so much, I built another.
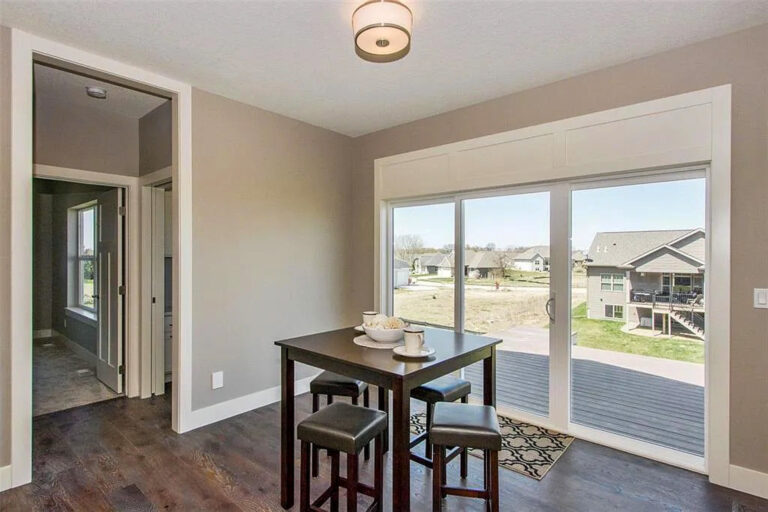
Kitchen Niche Staged by Builder
Console Used as Prototype
Ironically, the material cost of my buffet was $459 and the prototype was $439 on sale at the furniture store. My labor was free, plus I had to pitch in another $20. A spreadsheet with a breakdown of the materials used in 2020 prices is here: Elshire Kitchen Console Cost.
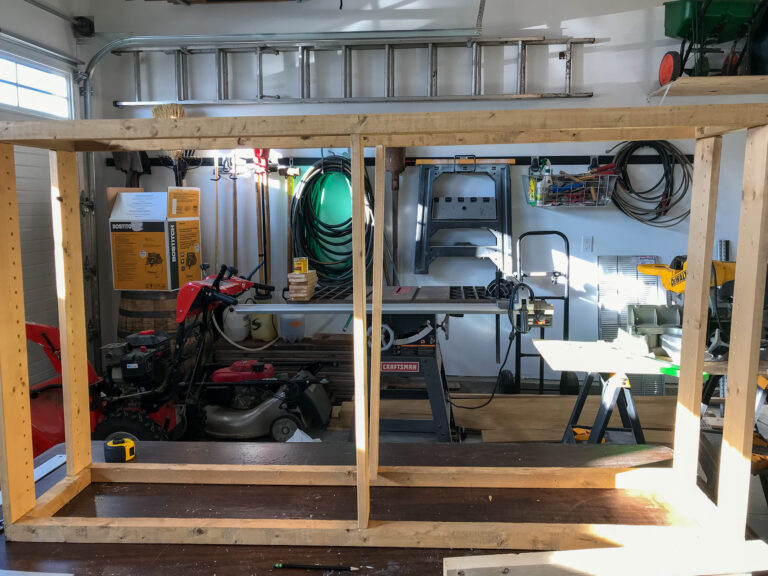
Decide the dimensions with tape on the wall and floor. It could not encroach into the window so it had to be narrow – only 16” deep. At 40” the height is a little over a third the height of the 9’ ceiling. Just the statement I wanted.
Tape on Wall & Floor Marking Dimensions for New Buffet
Step 2
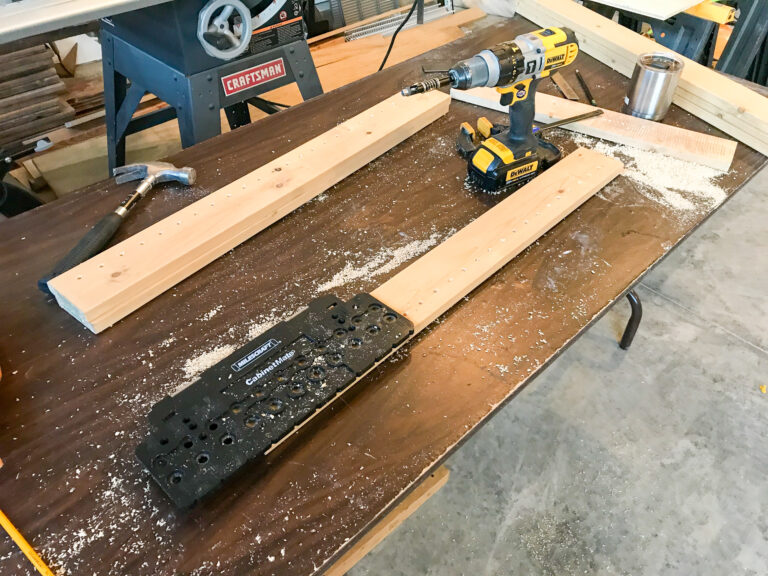
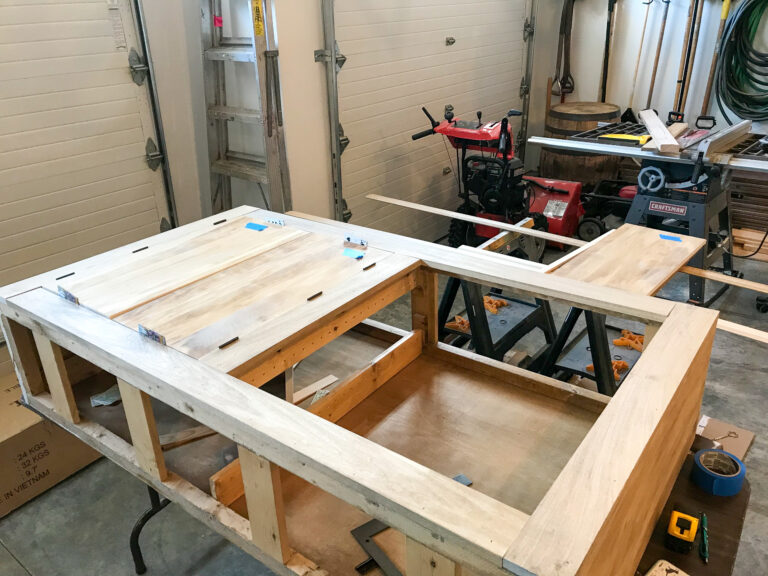
Build the bottom frame and top frame with the help of my husband, Daryl, as it is critical to get it perfectly square. Add 5 rails to the bottom frame and 3 rails to the top frame.
Bottom Frame (before middle rail added) & Top Frame
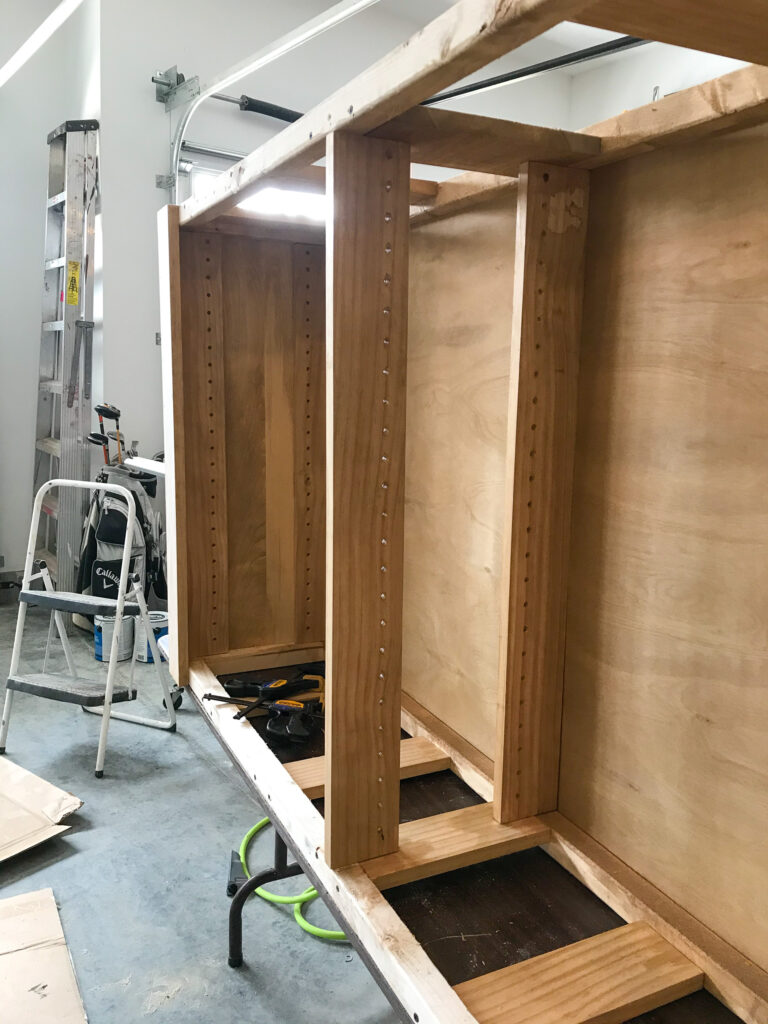
Step 3
Drill shelf pin holes in the 6 support boards using a shelf pin drilling jig. This took much longer than I thought and was quite messy, but I wanted the flexibility to place my shelves at whatever height desired.
Drilling Shelf Clip Holes
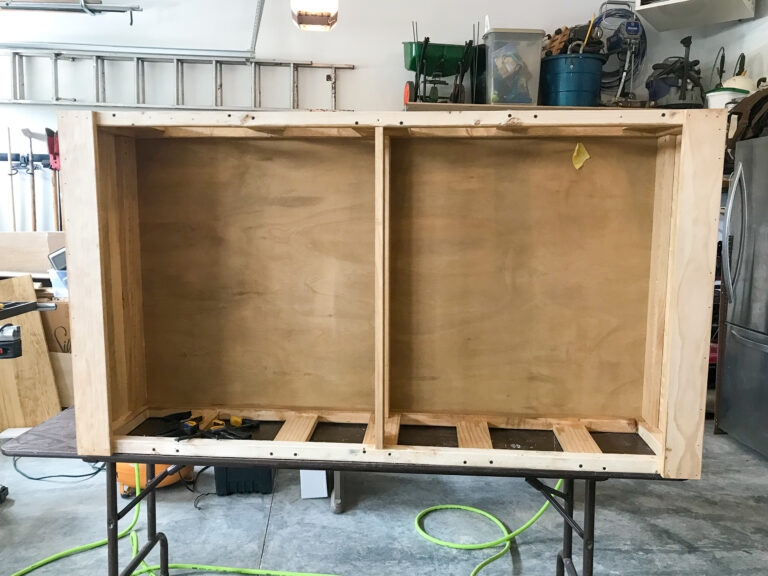
Step 4
Attach the 6 support boards to the bottom frame using screws drilled up from the bottom of the base. Attach the top frame to the support boards with screws drilled from the top.
Support Boards Drilled Into Frames (before rails added)
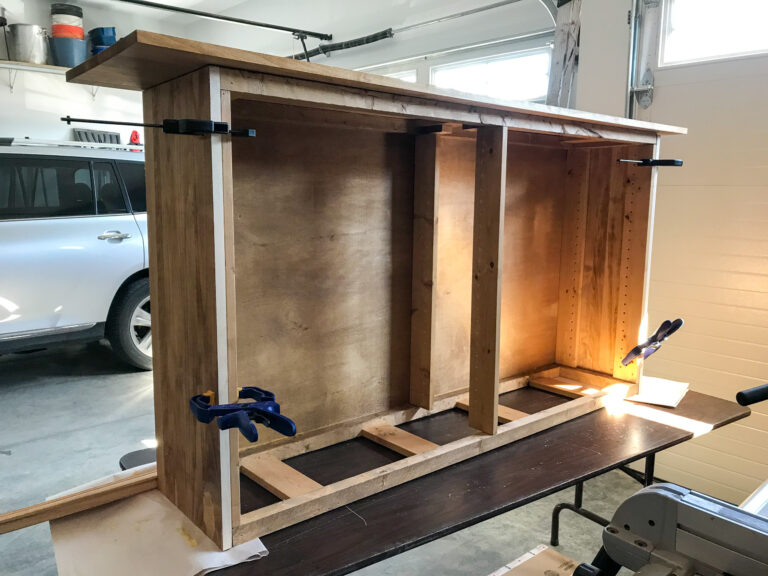
Step 5
Glue and screw the back panel of ¼” plywood and the two side panels of 16” Aspen wood purchased at Menards.
Back & Side Boards Added
Inside View of Buffet
Step 6
Glue and nail trim on the front at the top, bottom, middle, and 2 sides.
Buffet with Side Trim - Before Top, Bottom, and Middle Trim Attached
Buffet With Five Trim Pieces and Two Doors
Step 7
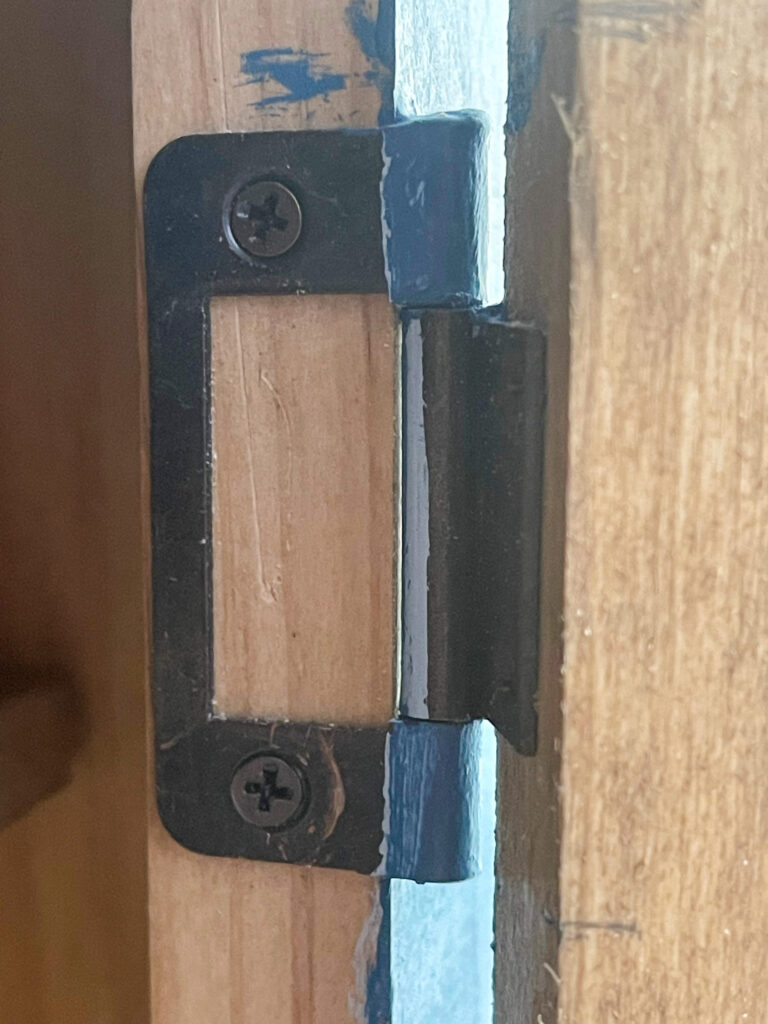
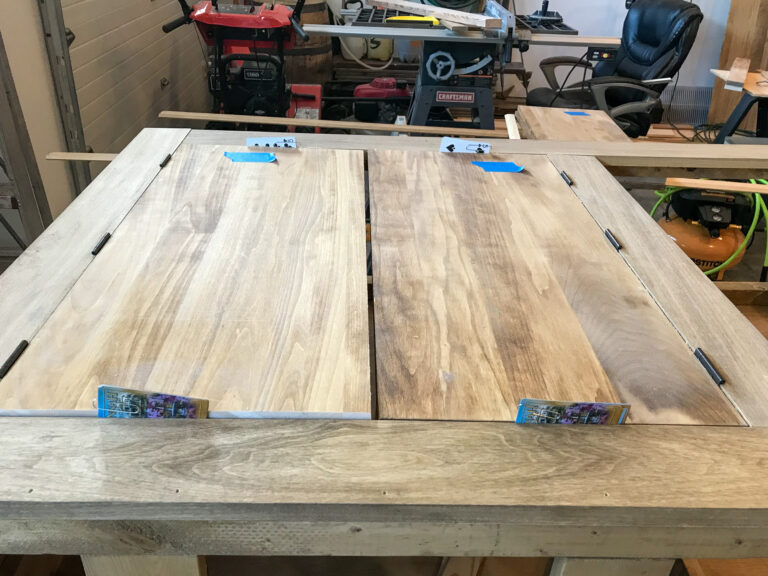
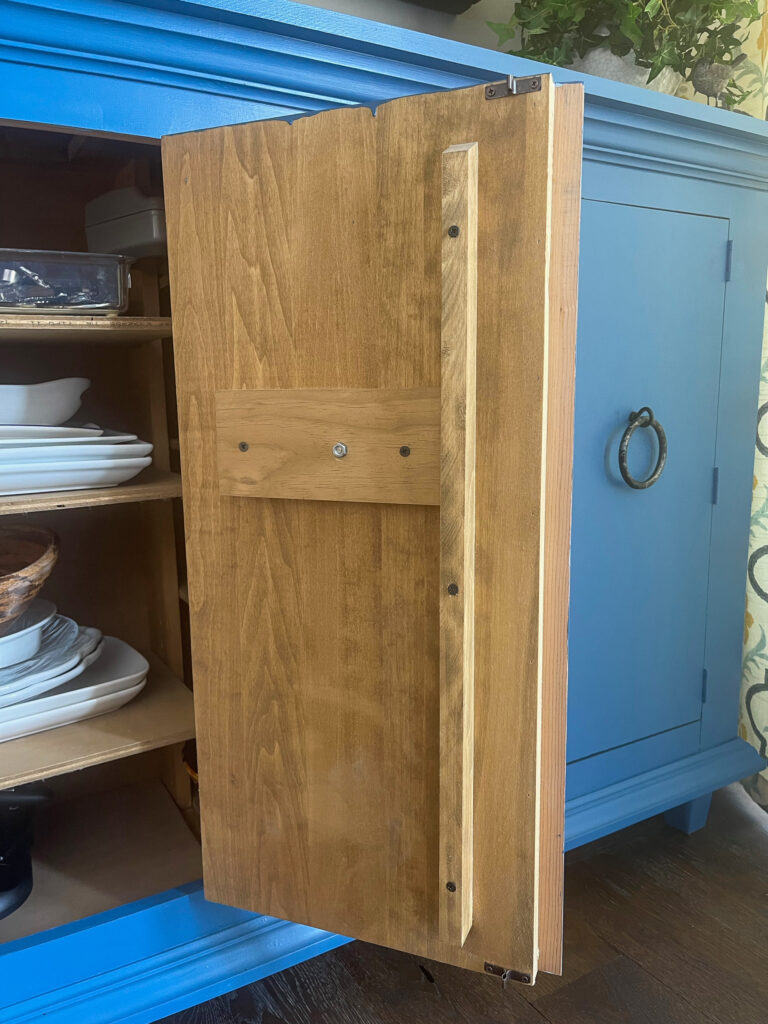
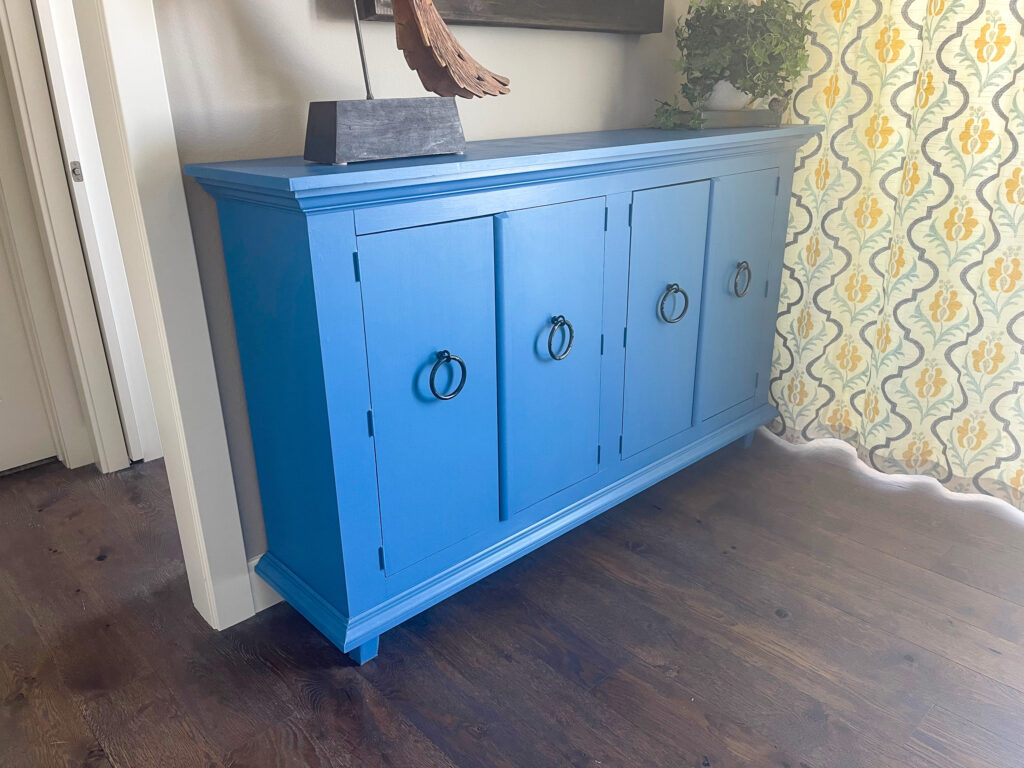
Mount four doors from ripped Aspen panels with 3 hinges per door. Normally I do not like exposed hinges, but it looked good on my prototype and appeared to fit my skill level, so I chose simple no-mortise hinges purchased online. I read the tip about using playing cards to get an even spacing on the top and bottom. The gap in the middle is disguised with a simple curved trim piece attached to the two doors on the right, just as on the prototype. The catches inside keep the doors closed.
No Mortise Hinges
Doors with Playing Cards Used for Spacers
Curved Trim Piece Covering Gap Between Doors
Supports Inside Doors
Door Latches at Bottom and Top
Step 8
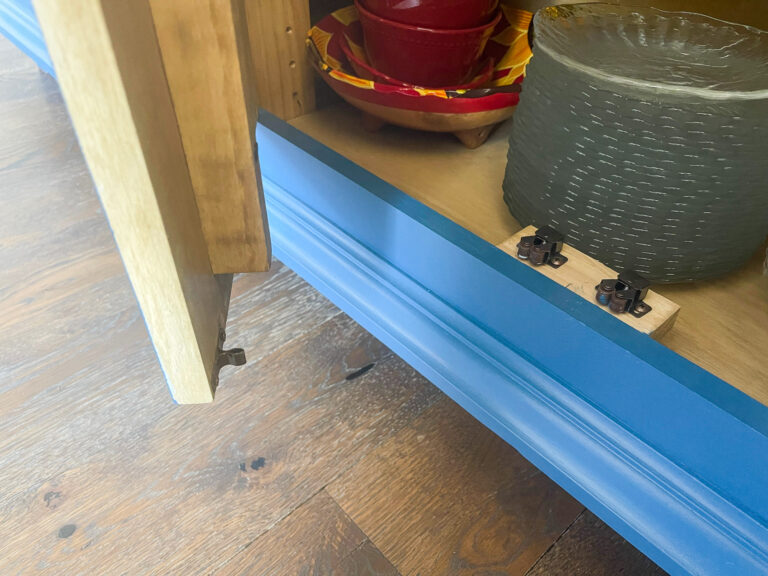
Attach the feet purchased at Menards. I actually liked mine better than the ones on the prototype.
Prototype Feet
My Feet
Step 9
Glue and screw 16” Aspen board to the top frame.
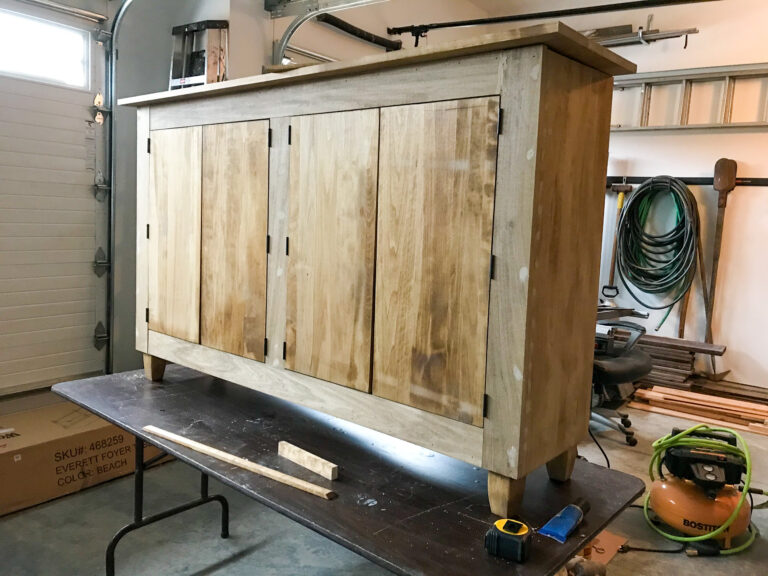
Cabinet With Four Doors and Top
Step 10
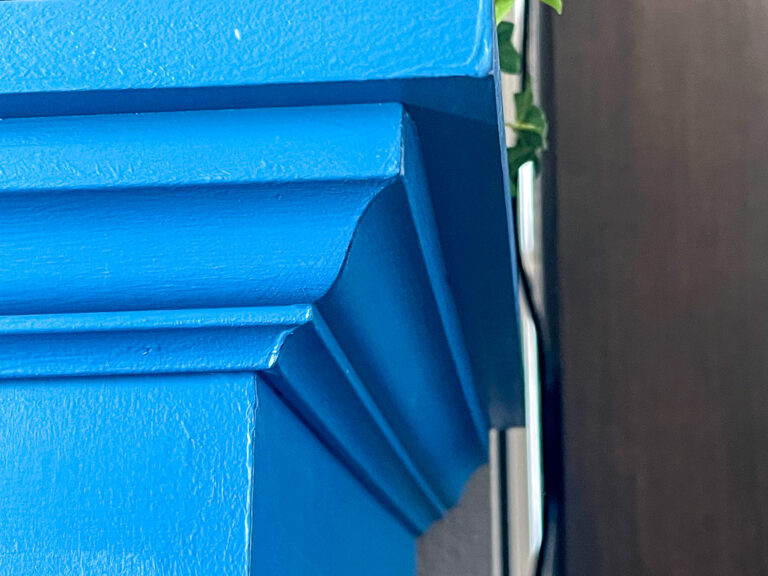
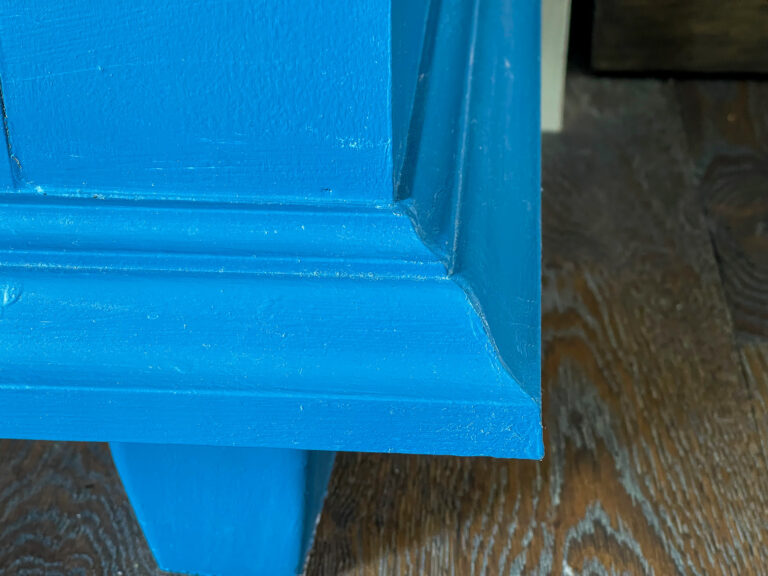
Attach the crown molding to fit under the top on the front and sides. Turn the molding upside down and do the same to the bottom on the front and sides. Cutting the miter joints was very hard for me to get my head around, but I found an excellent video that explained the process in the easiest way.
Upper Trim
Lower Trim - Same as Upper Trim Except Inverted
Step 11
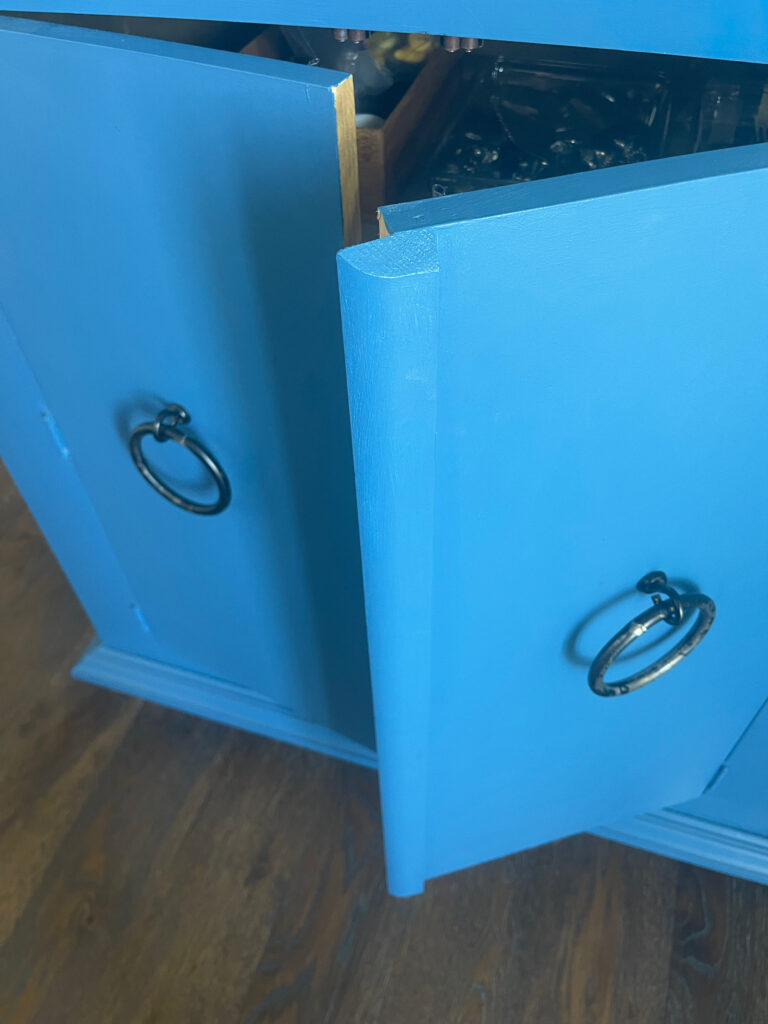
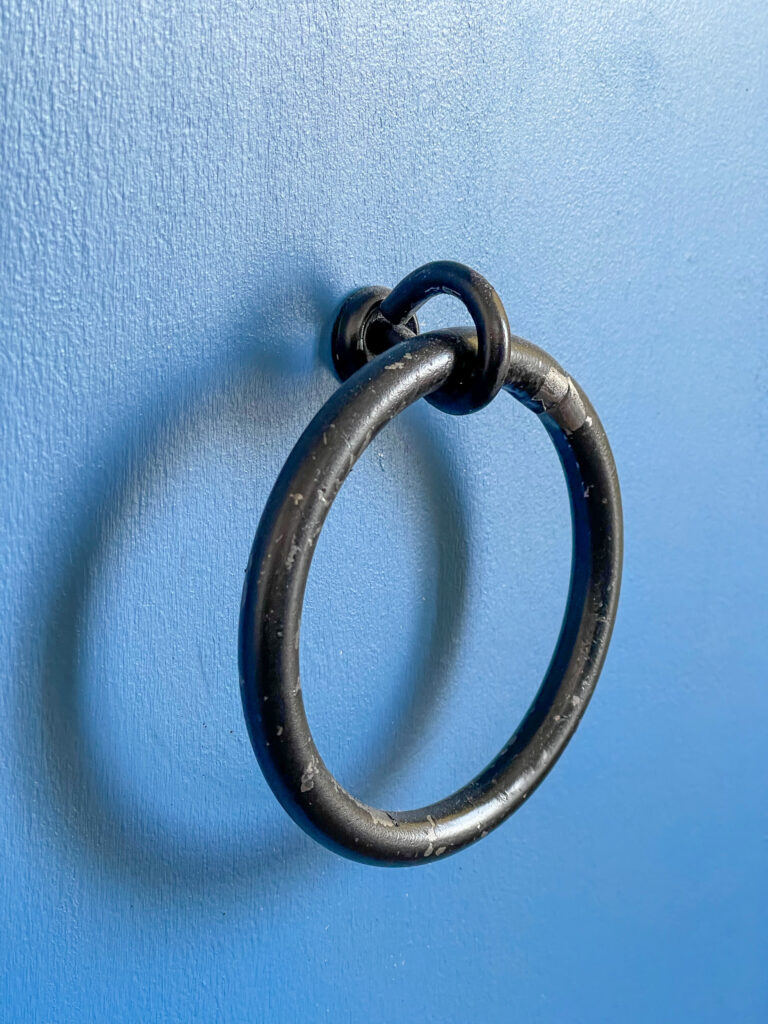
Attach the ring handles. It was not easy to find the large rings that were like the ones on the prototype, but after lots of online searching, I finally found what I wanted. The shipping was almost 3x the price of the rings, but what could I do?
Door Ring in Eye Bolt
Step 12
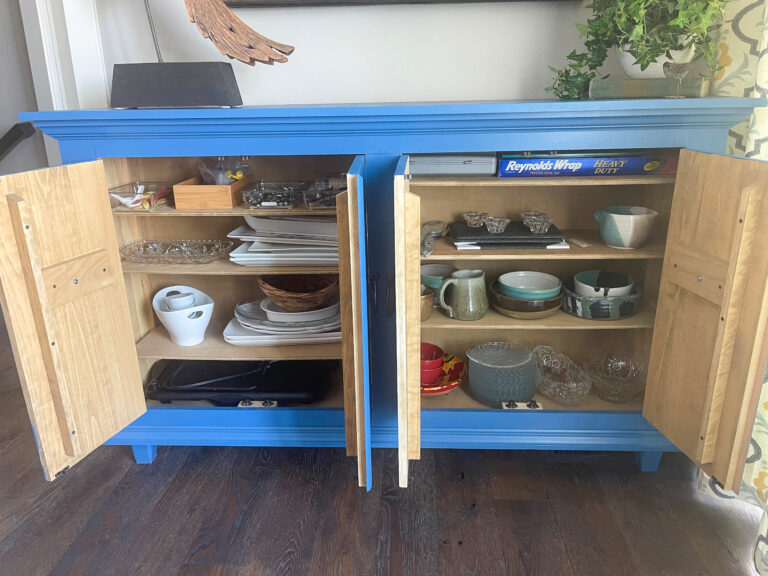
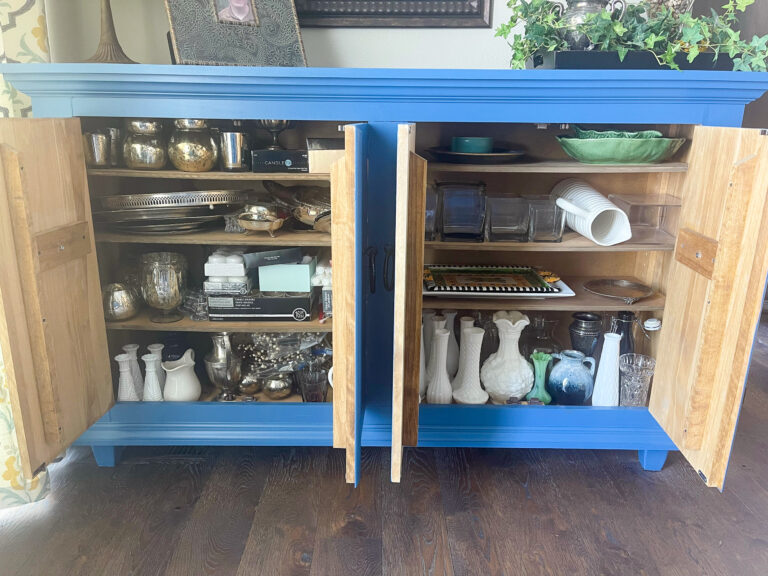
Cut and stain several ½” plywood for inside shelves.
Inside Buffet #1
Inside Buffet #2
Step 13
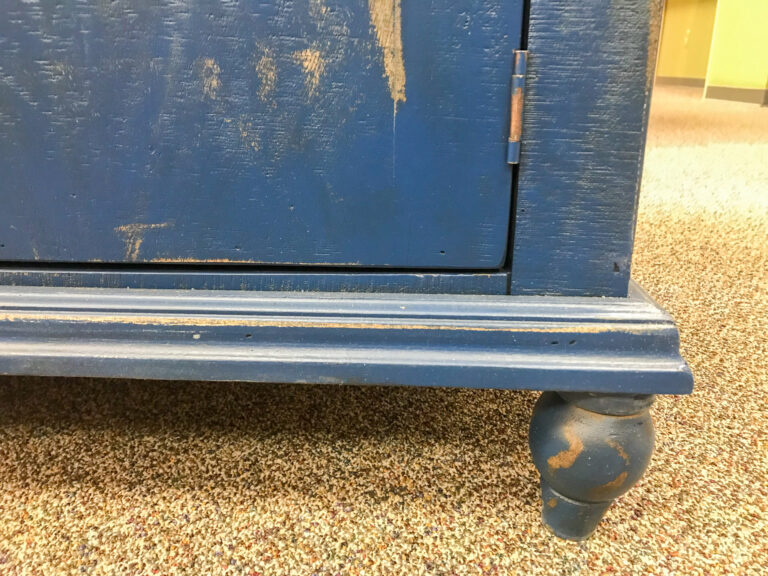
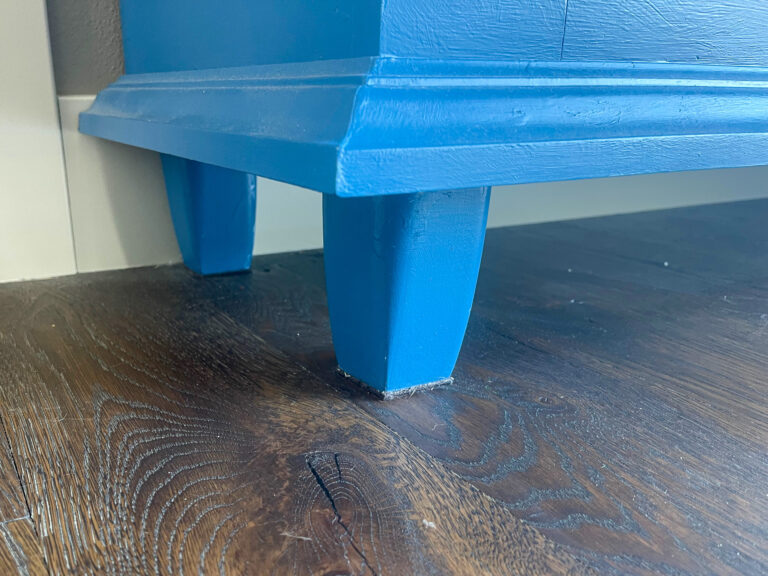
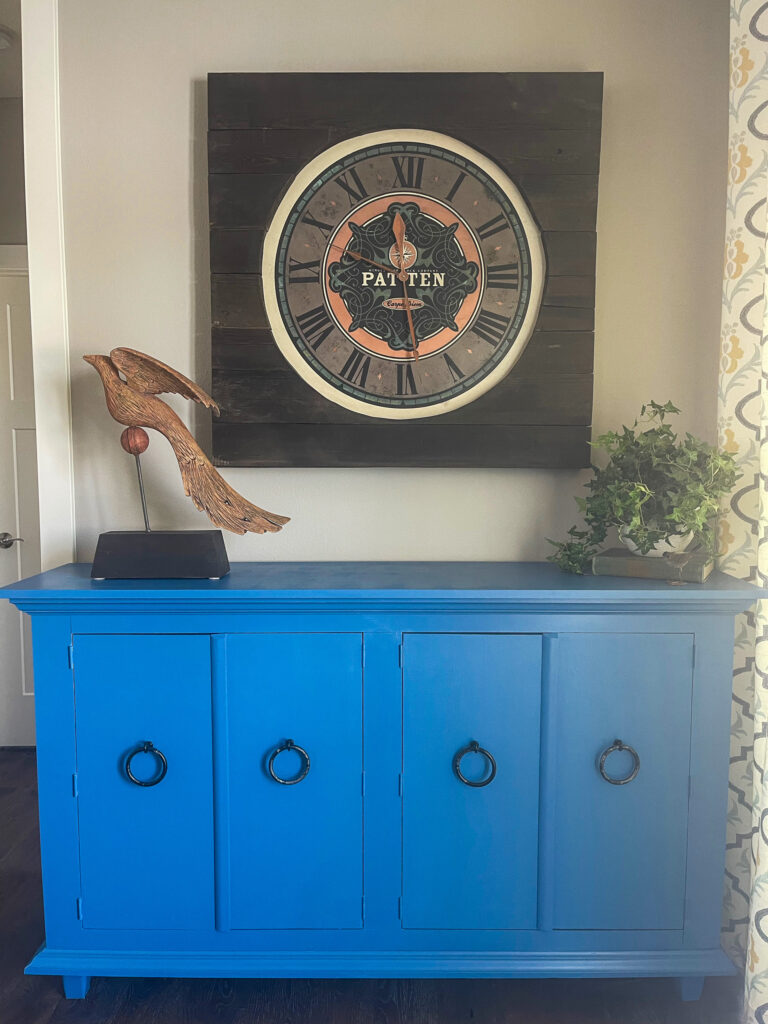
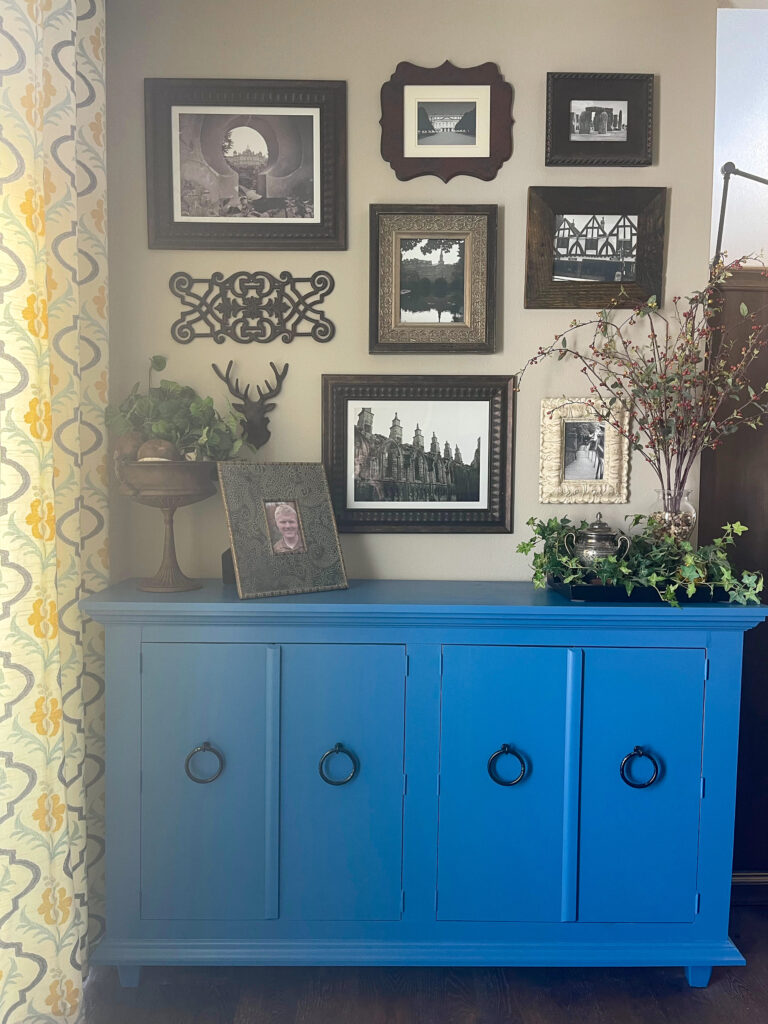
Finally, prim and paint the entire exterior, including hinges and feet. I have never had a blue piece of furniture in my life, but I liked the color in the prototype and my dark floors have a slight blue tint. Even at that, I had to tell myself to be brave as I was painting this very bright blue color. When it was done, I loved it! Originally, I planned to distress the exterior just like the prototype but decided to leave it clean and solid.
Buffet #1
Buffet #2
Kitchen Niche with Two Matching Buffets
That wraps up my furniture building to date. I will say that as a non-carpenter, I have only built these pieces because I had the free lumber (lots of old dock pieces), and/or I could not find what I wanted in the correct size.
Do you have any projects you have built? I would love to hear about your endeavors – just tell me about them in the comments below.
Cher – Of course I LOVE the 2 blue cabinets. They are unique and perfect where you have them in your home. The large ring handles were worth the money. I am also intrigued by the simple end tables using plumber pipes. Questions: How close did you put your shelf pins in the blue cabinets and could have you done with fewer number? How did you anchor your plumber pipes with the side and end tables? Was there an additional piece of wood underneath the shelves you used? If so how did you drill into that to fit the plumber pipe? What type of glue did you use? Seems like you would need more than glue as it would be wabbly, especially as pipes are hollow. Was that a measuring nightmare? You are good at problem solving and creative ideas. Thanks for the post .Christie
I screw a flange to the underside and it has threads the pipe screws into. Very easy.
I measure several times, but I still made errors and have to cut another board. 🙂
Sandra Hanf
3 years ago
You continue to amaze. Hope to see you on a YouTube spot someday.

Your furniture piece look wonderful.
Thank you!
Thank you Karen!
Cher – Of course I LOVE the 2 blue cabinets. They are unique and perfect where you have them in your home. The large ring handles were worth the money. I am also intrigued by the simple end tables using plumber pipes. Questions: How close did you put your shelf pins in the blue cabinets and could have you done with fewer number? How did you anchor your plumber pipes with the side and end tables? Was there an additional piece of wood underneath the shelves you used? If so how did you drill into that to fit the plumber pipe? What type of glue did you use? Seems like you would need more than glue as it would be wabbly, especially as pipes are hollow. Was that a measuring nightmare? You are good at problem solving and creative ideas. Thanks for the post .Christie
I screw a flange to the underside and it has threads the pipe screws into. Very easy.
I measure several times, but I still made errors and have to cut another board. 🙂
You continue to amaze. Hope to see you on a YouTube spot someday.
Thank you Sandy!
Great post! Thank you for sharing your wonderful creations with us!
Thank you Karen!
Cheryl, you are amazing! So creative!
Thank you Carole!