How to Sew Fully Lined Grommet Curtains the Right Way!
In this post, I will tell you how I sewed 7 sets of fully lined grommet curtains. I will share my step-by-step instructions and the mistakes I have made along the way. By no means, am I an accomplished seamstress. However, I can thread an entry-level sewing machine and sew a relatively straight seam. “Relatively” being the operative word. But, I have found even crooked seams can still get the job done.
Lastly, I will show the Results of 4 sets of curtains sewn in 2020 and 3 sets sewn in 2023. I will also show my mistakes and how to avoid them.
Challenges
Challenge #1: Finding reasonably price fabric
I live in a small town with no access to fabric outlets. Thus, I am relegated to Hobby Lobby, JoAnn Fabrics, and the internet. It is difficult to find the right fabric for under $12/yard. And, when you need 10+ yards plus lining, the cost can add up. After all, I sew my curtains because I want to save money. Using my Curtain Cost Spreadsheet makes it easy to estimate the total cost before I begin.
Tip: When shopping online always request samples to get the feel of the fabric and to get the desired color before placing an order. Even if there is a small charge it is well worth it in the long run.
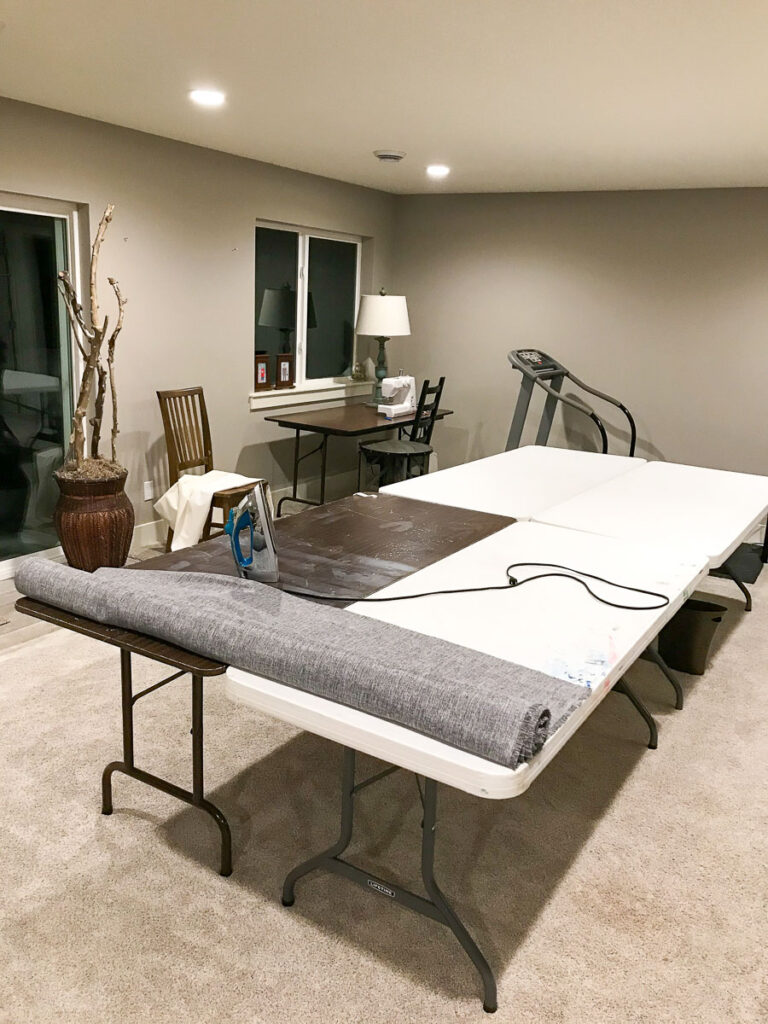
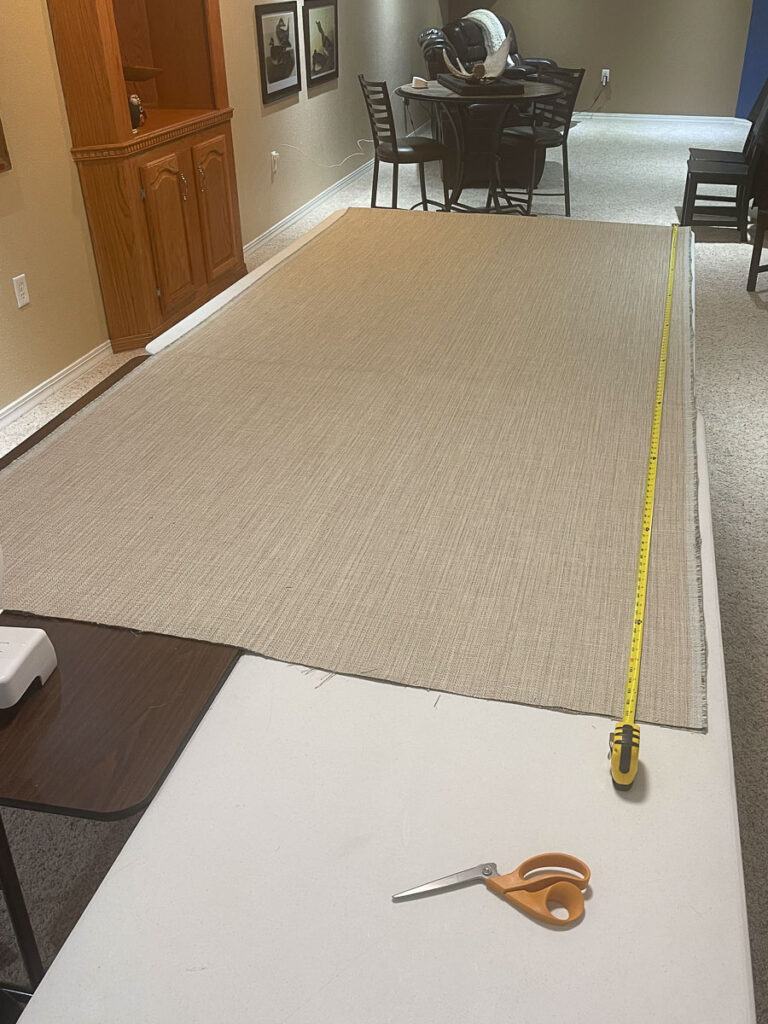
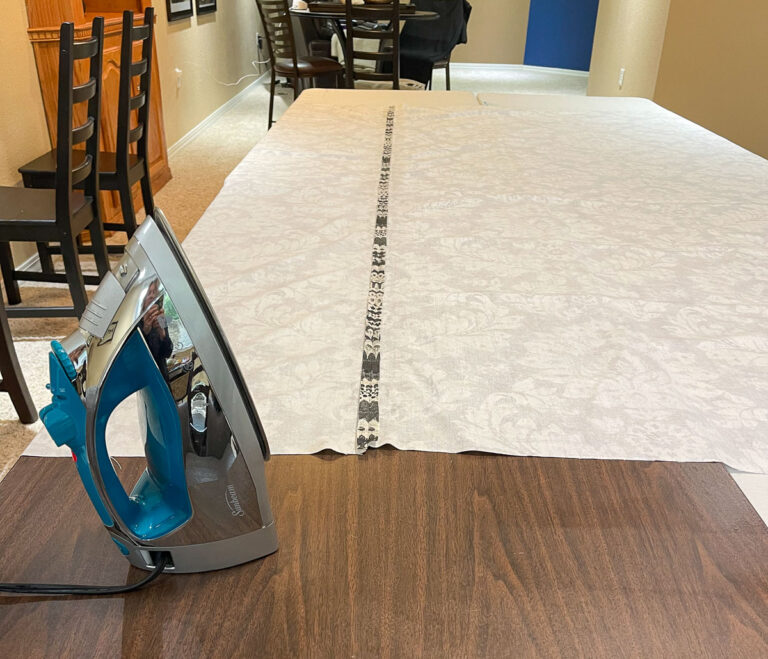
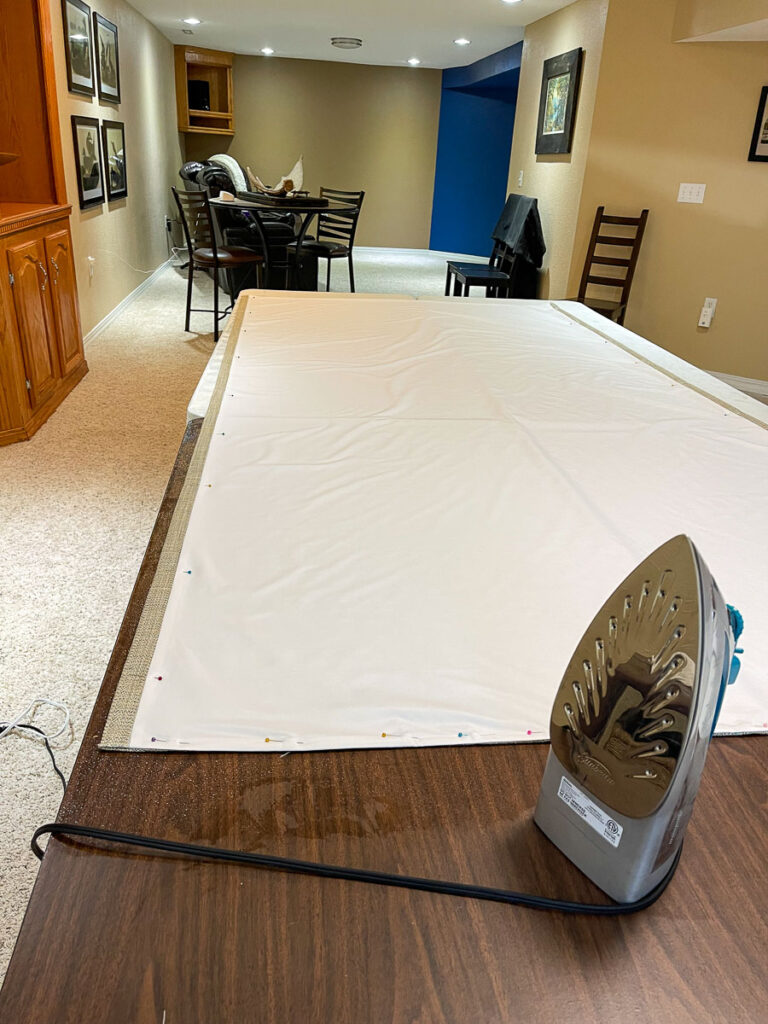
Challenge #2: Creating a large enough work table
Several of my curtains are close to 9 feet in finished length because I like to hang them just below the ceiling. Fortunately, we have 4 long tables and even though the one at Sam’s home was a foot shorter it worked well enough.
Three plastic and one wood table for work surface
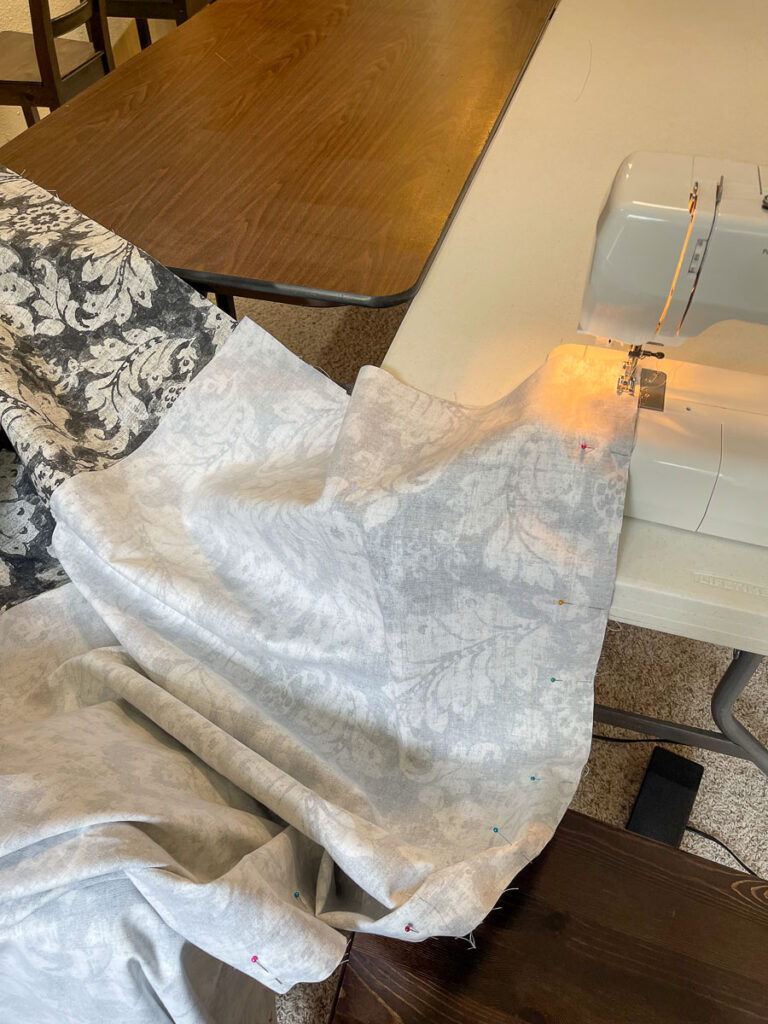
Challenge #3: Sewing fulling line curtains
It requires LOTS of laps around the tables. Lining up the fabric, pinning the fabric, sewing the fabric, and ironing the fabric. Repeat…. Repeat…. Repeat.
Challenge #4: Inserting plastic grommets
Determining the correct number is critical and cutting the circles the correct size even more. If you over-cut the circle, it can be a problem.
Determining the correct even number of grommets
Cutting precise circles for grommets
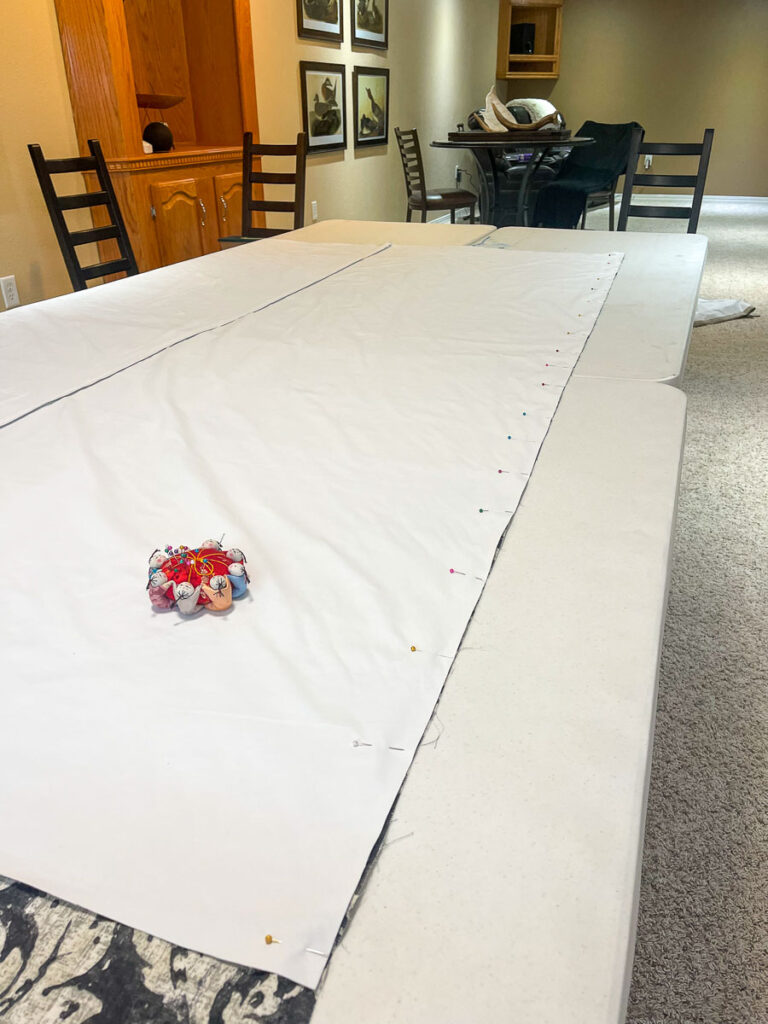
Challenge #5: Hemming the curtains
Oddly enough measuring the correct length and sewing the hem before hanging did not always work as planned. I had better results when I hung, pinned, ironed, hung, re-pinned, and only then did I sew. Particularly, as I am very sensitive to anything looking crooked.
Pinning hung curtains before sewing hem
Step-by-Step Instructions
Step 1: Purchase Materials
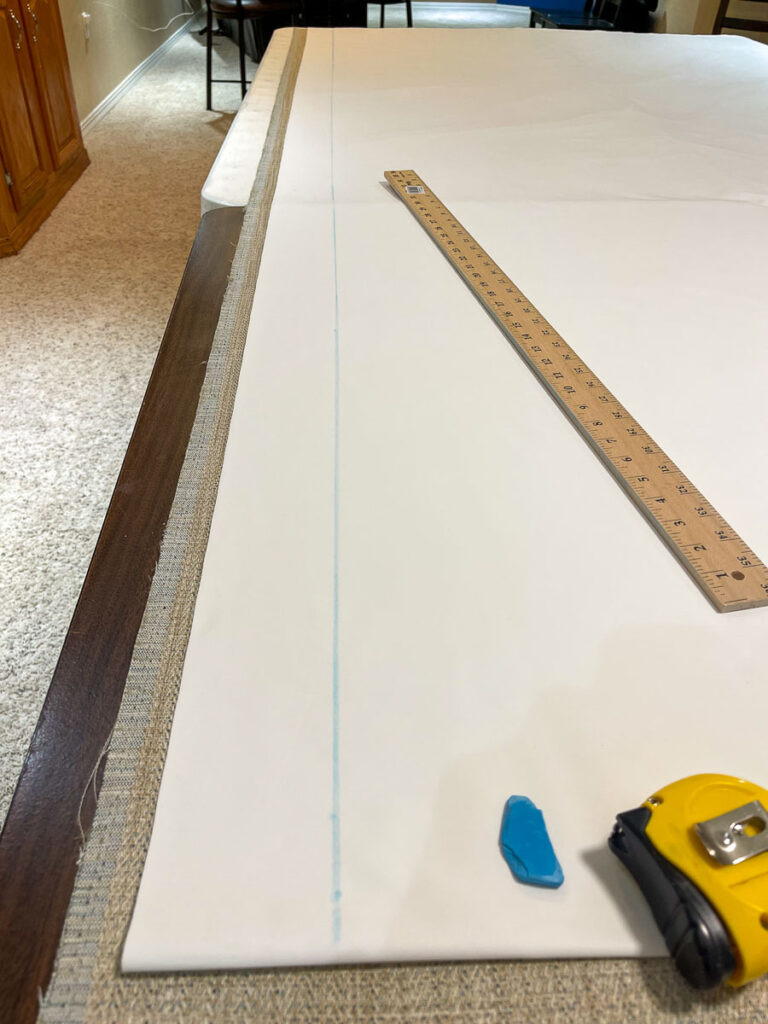
To determine the desired curtain length and width, I developed a Curtain Measurement Spreadsheet. All my curtains were from 54” wide fabric. Of my 7 sets, one was one width per side, one was double width, and the remaining 5 were one-and-a-half widths. It all depends on the window size and desired fullness.
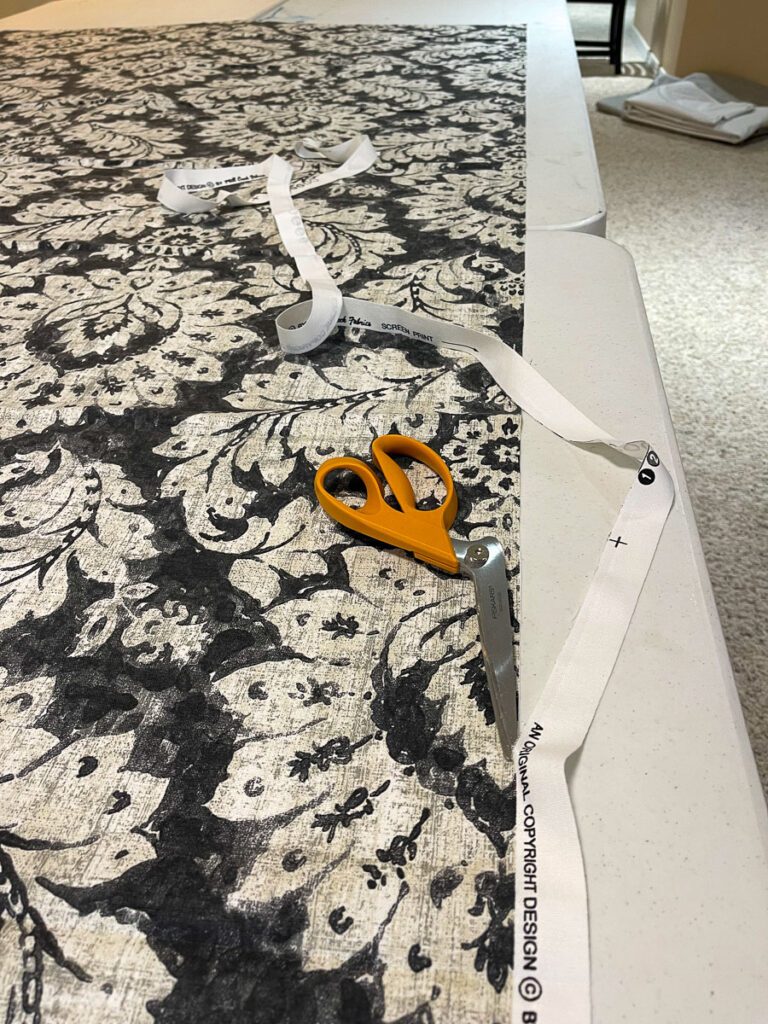
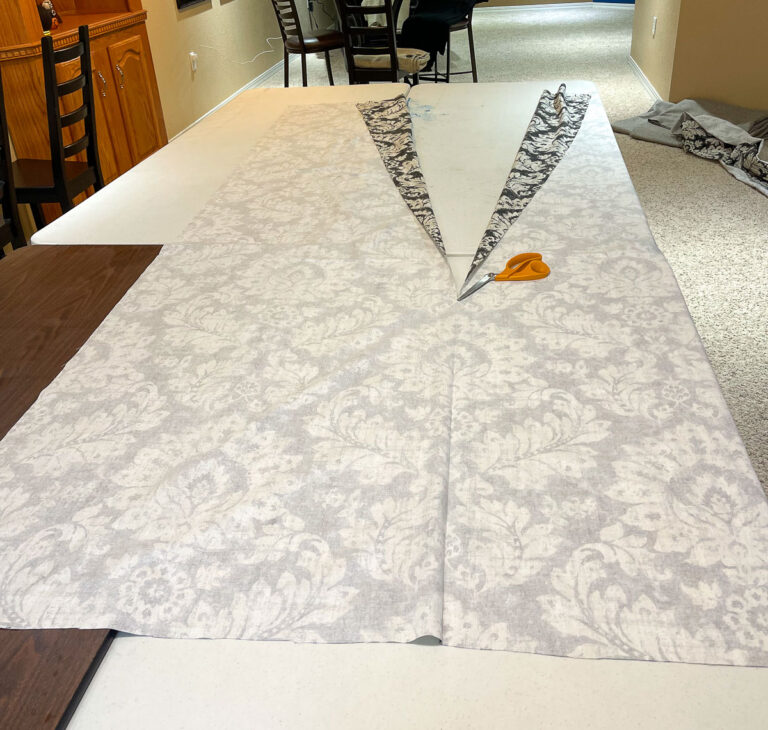
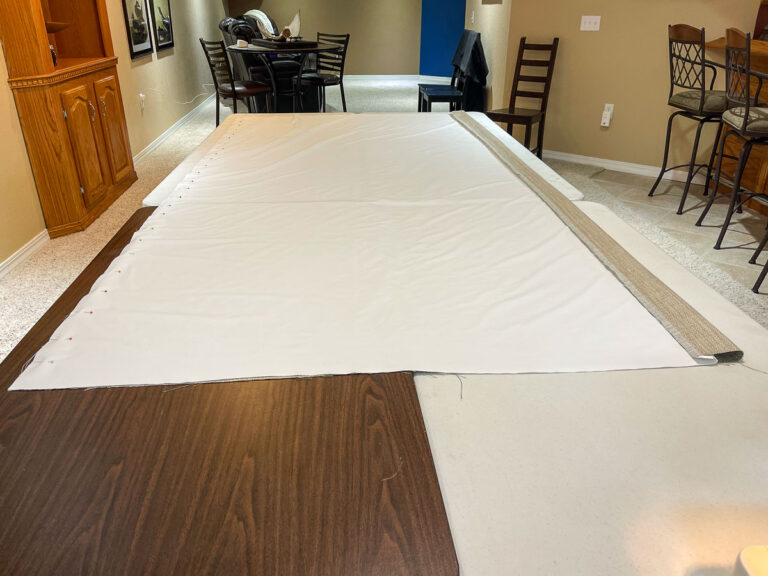
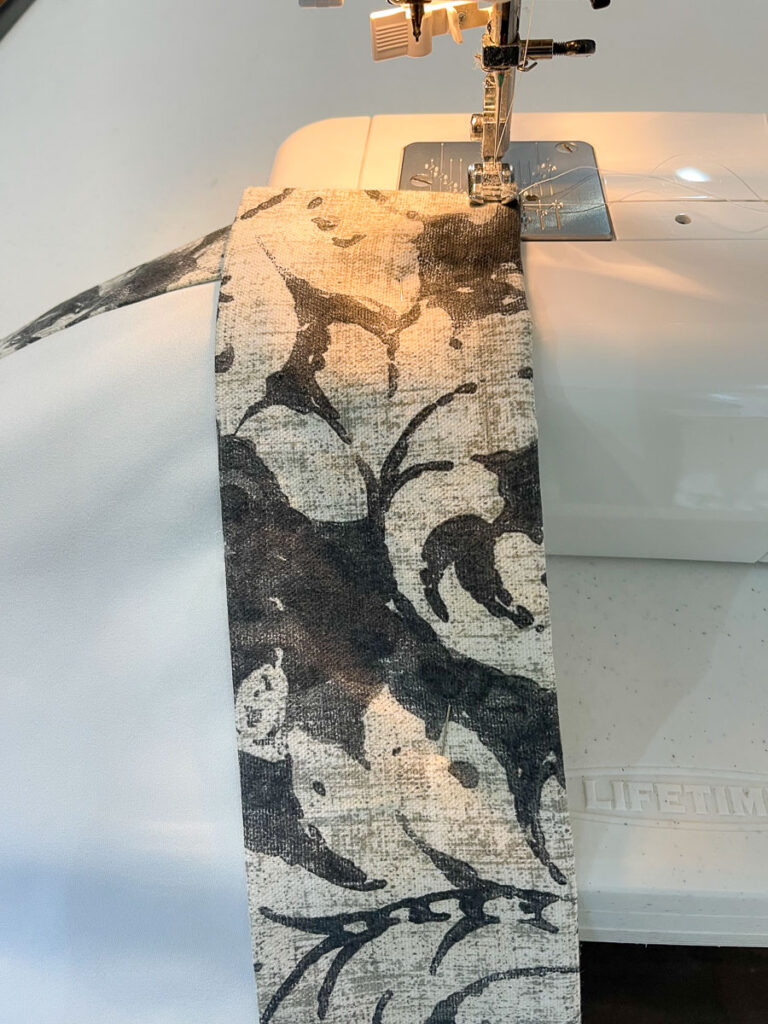
If you are doing only one 54” panel per side it is relatively easy. If there is more than one panel you will have to line up the print pattern (if there is one), sew the panels together, and iron the seams open.
Cutting away selvage
Cutting away selvage
Folding 3rd panel in half and cutting lengthwise for curtains with 1-1/2 panels
Lining up fabric print
Pinning full and half panel together after lining up the print
Sewing full panel and half panel together
Ironing open seams
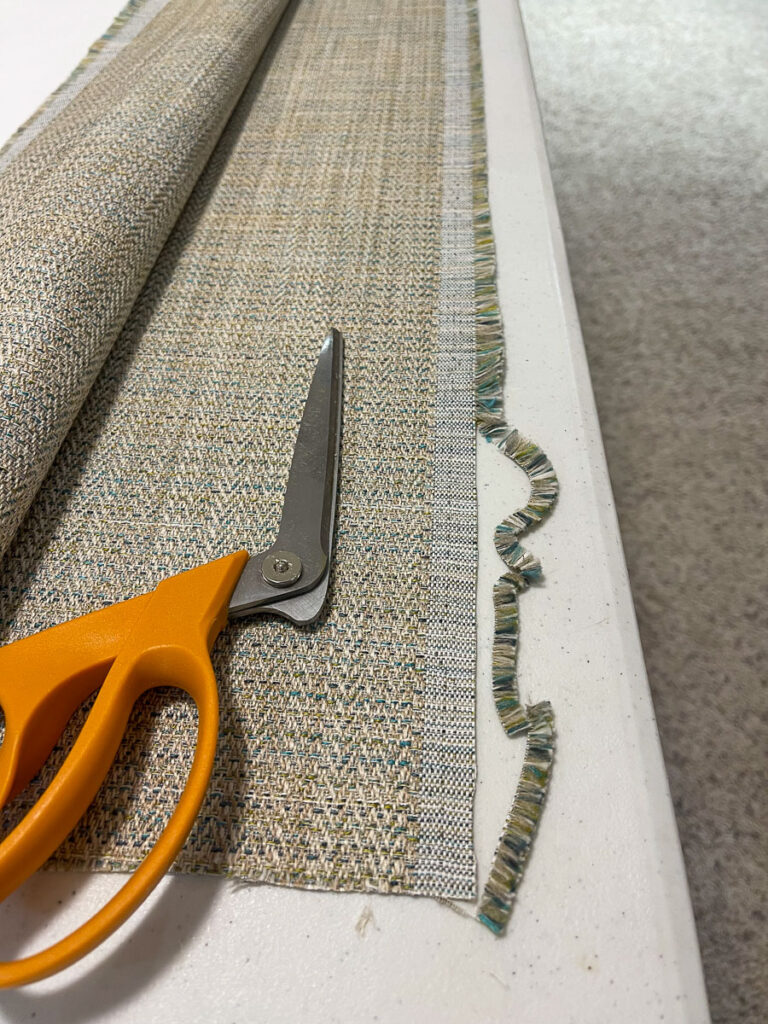
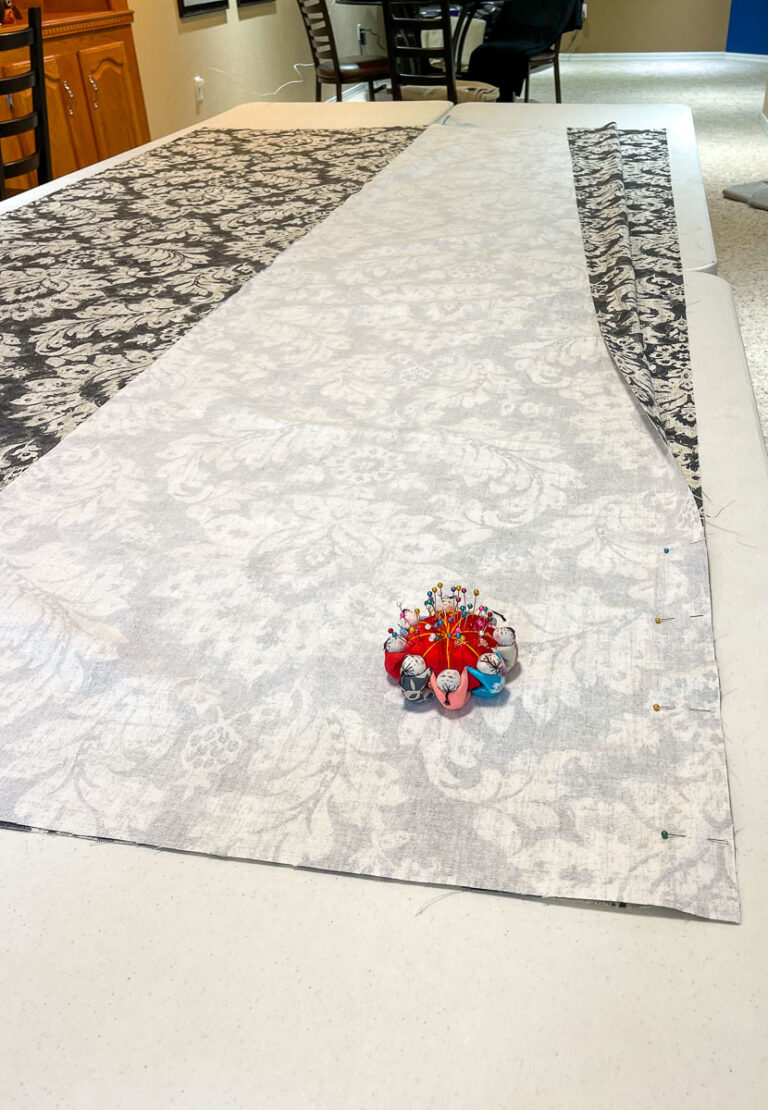
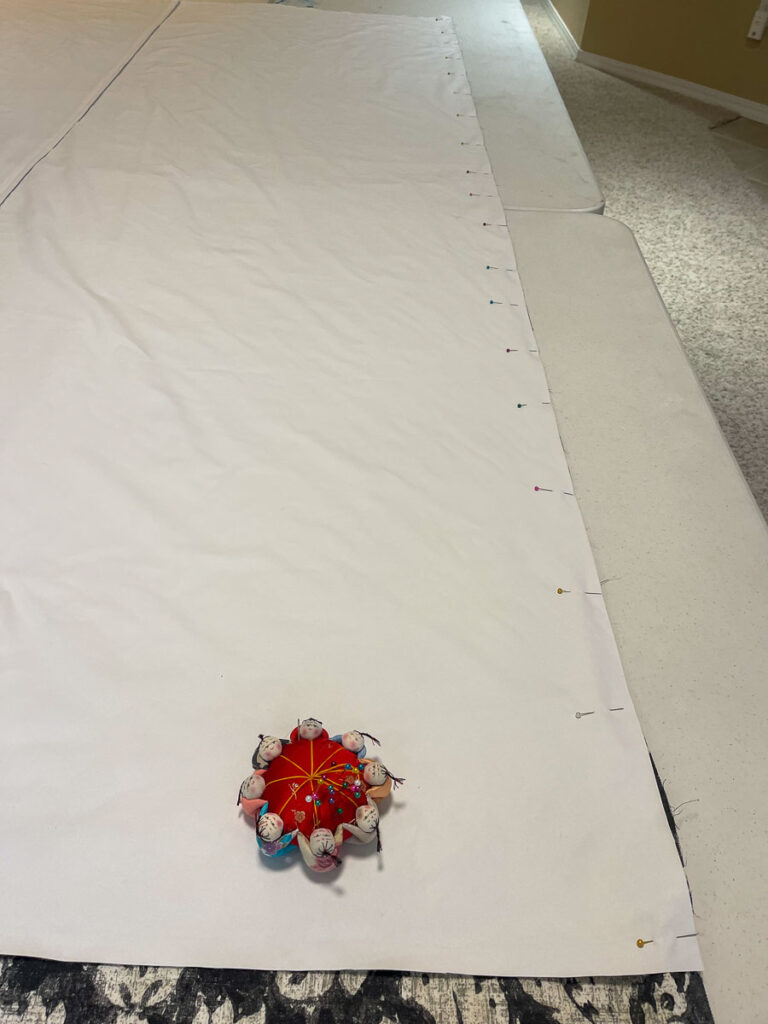
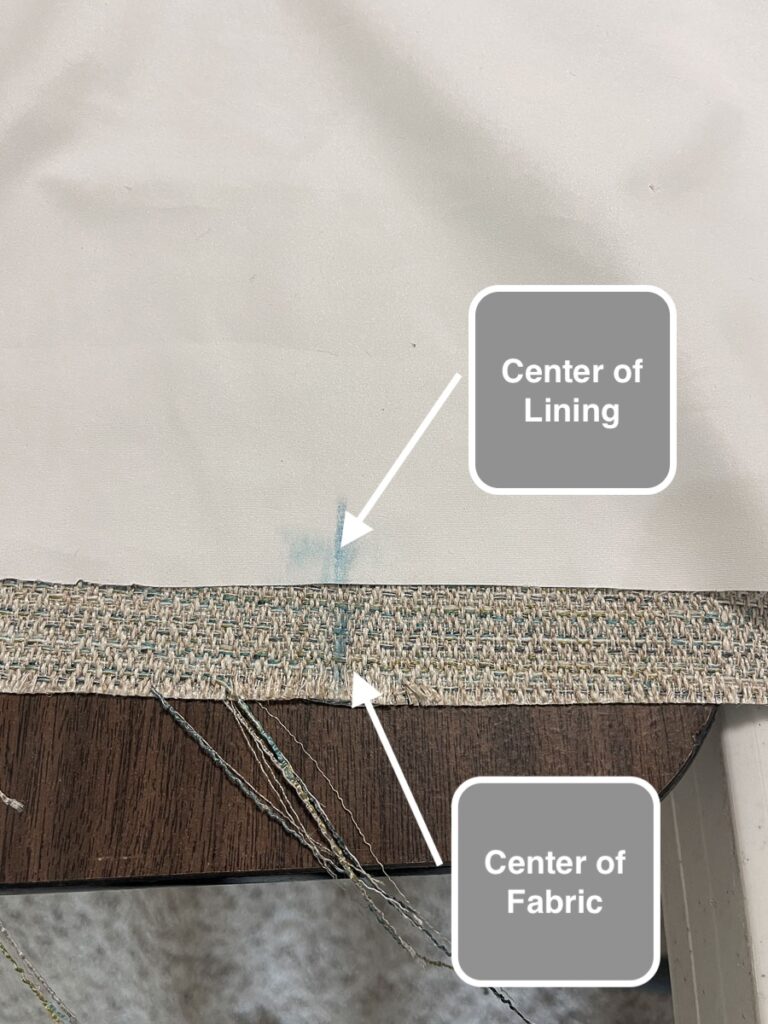
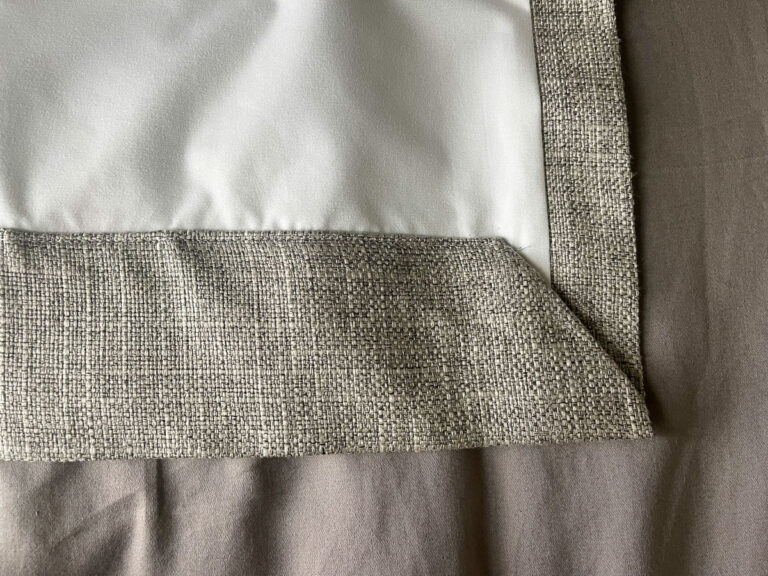
Step 3: Prepare the Lining
Follow the same steps above, however, there is never a print pattern to worry about. I usually purchase my lining at JoAnn and if possible use a coupon. Cut the lining 4” shorter in width per side than the fabric. This creates the desired 1.5” return per side.
Measuring the lining so it is 4" shorter in width
Cutting the lining 4" shorter in width than the fabric
Sewing the top edge of top hem after folding back 3.5"
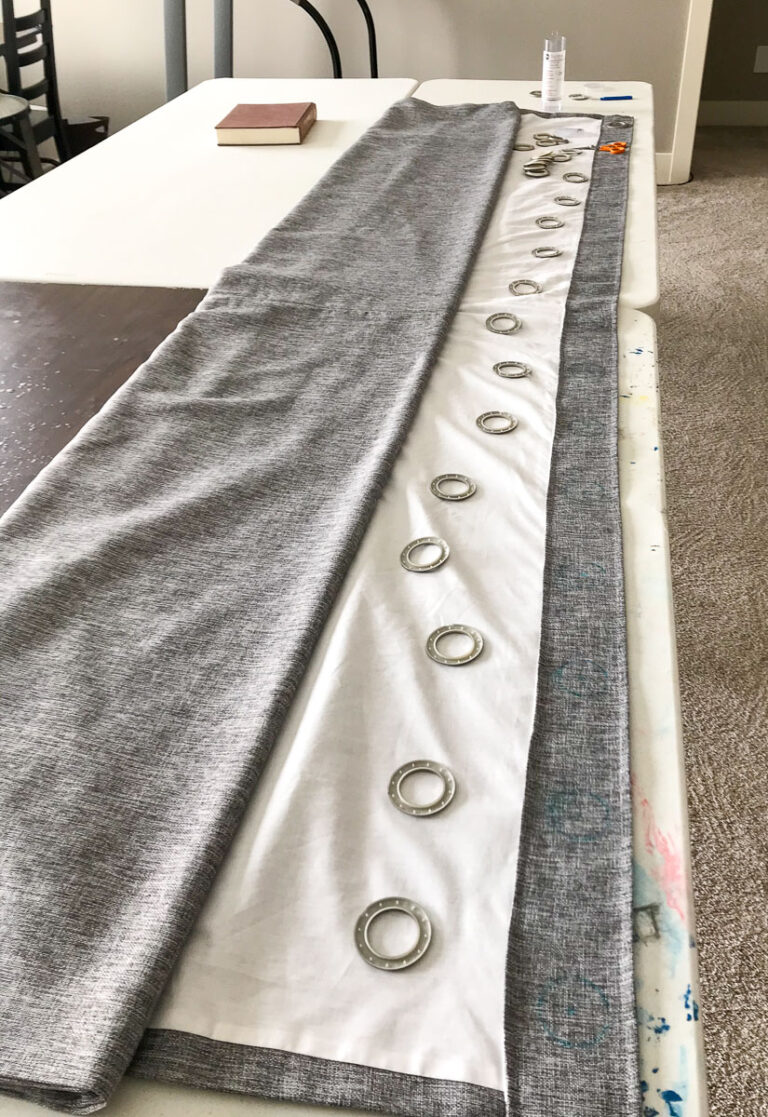
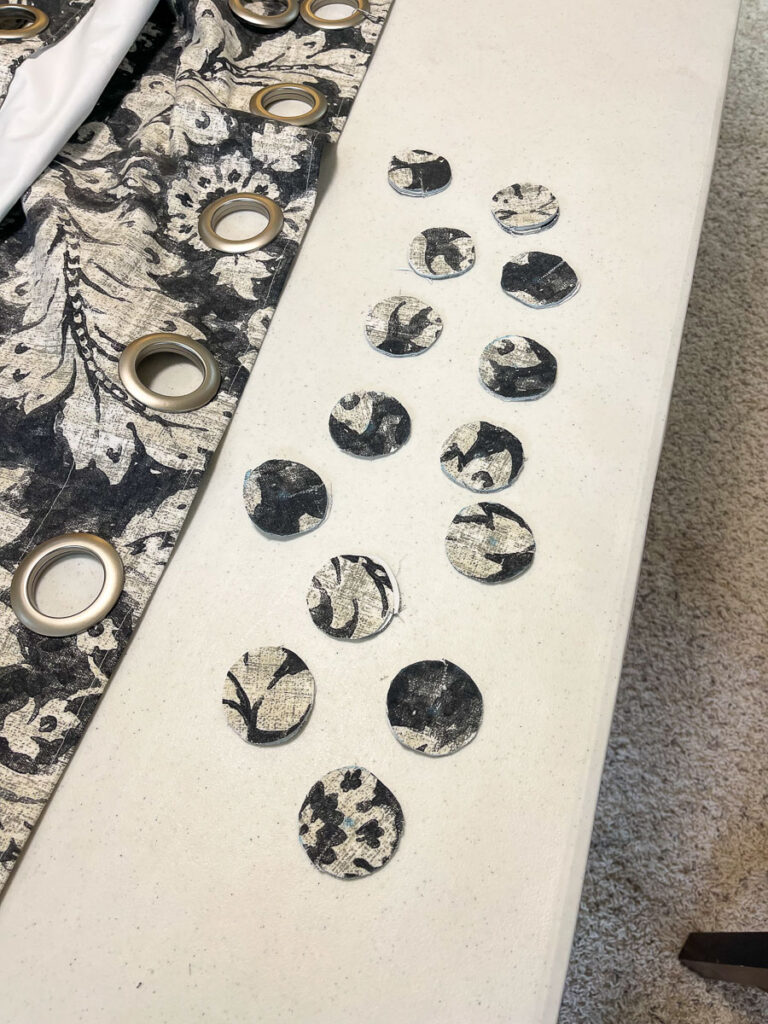
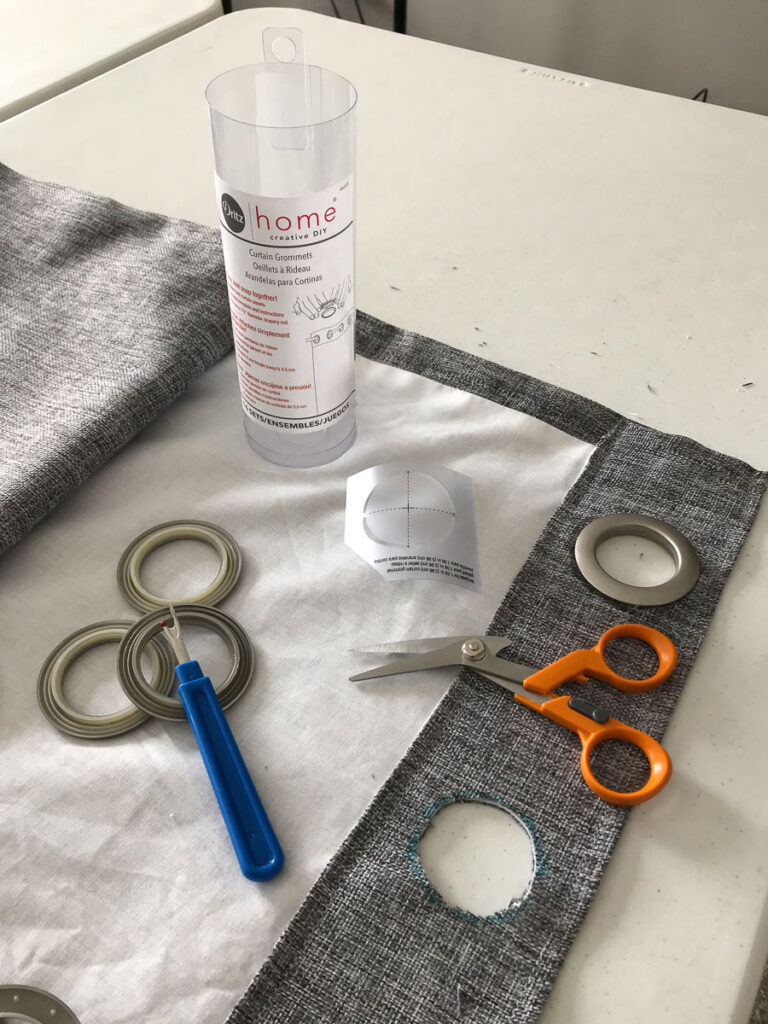
Step 6: Cut and Insert Grommets
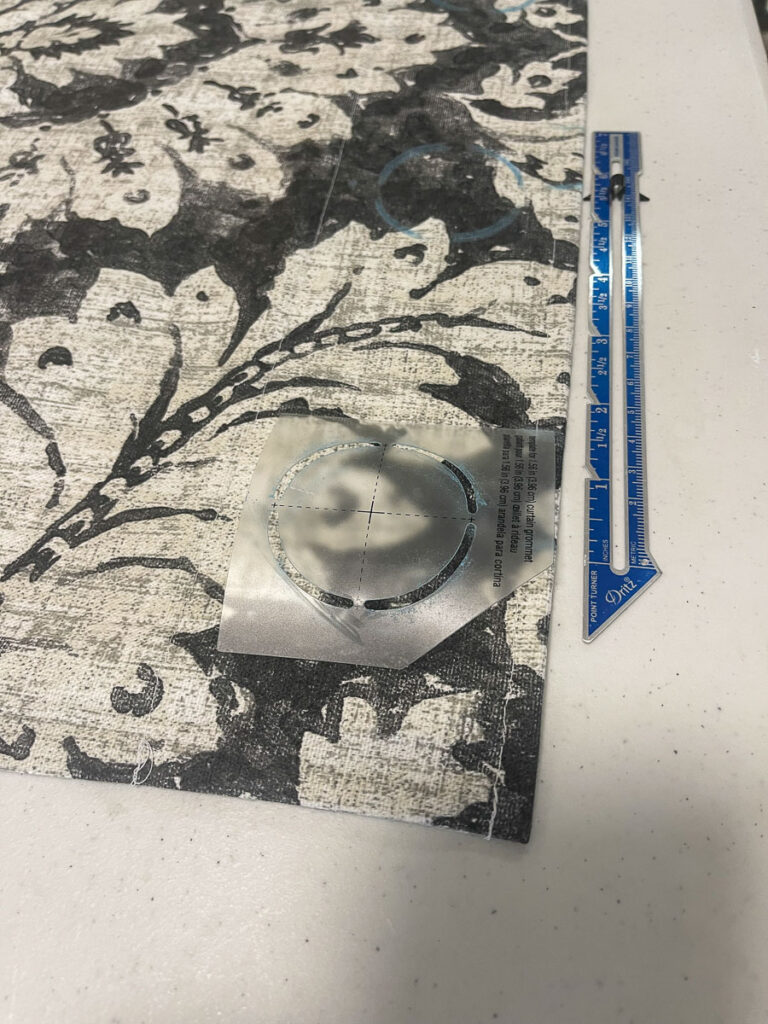
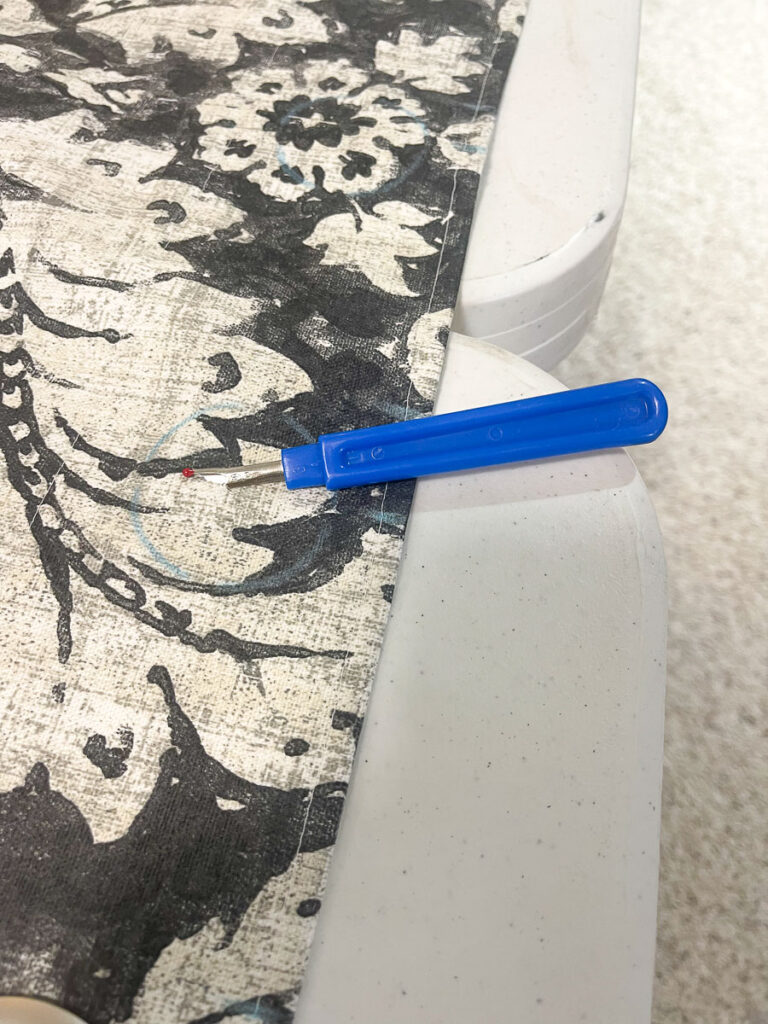
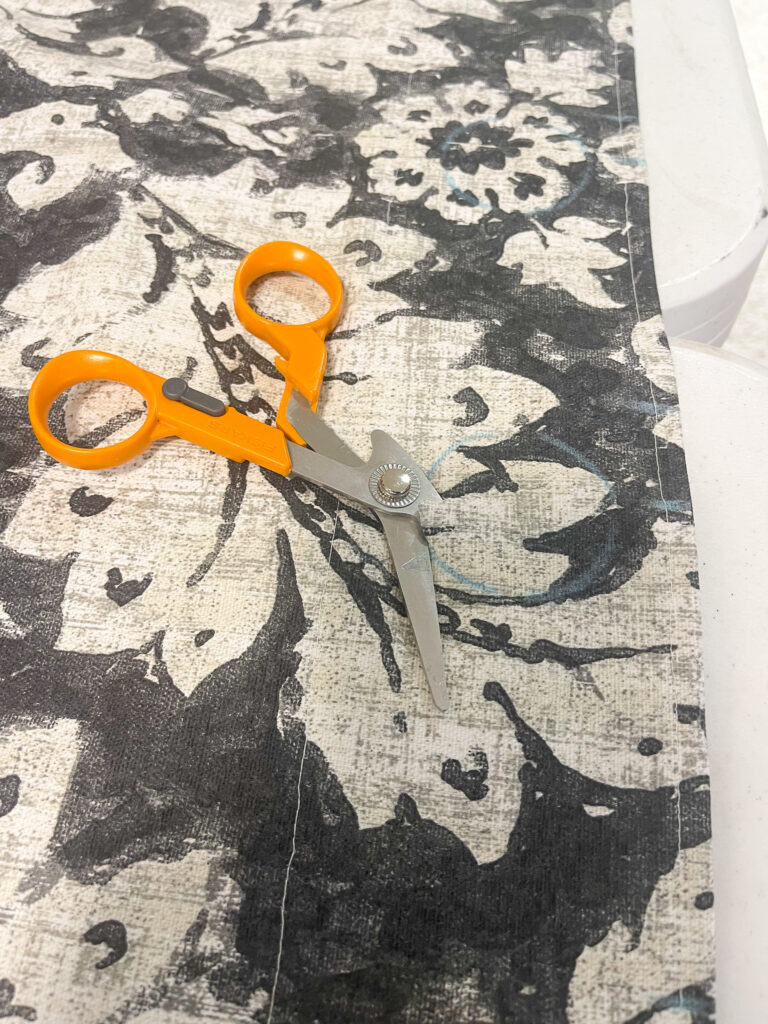
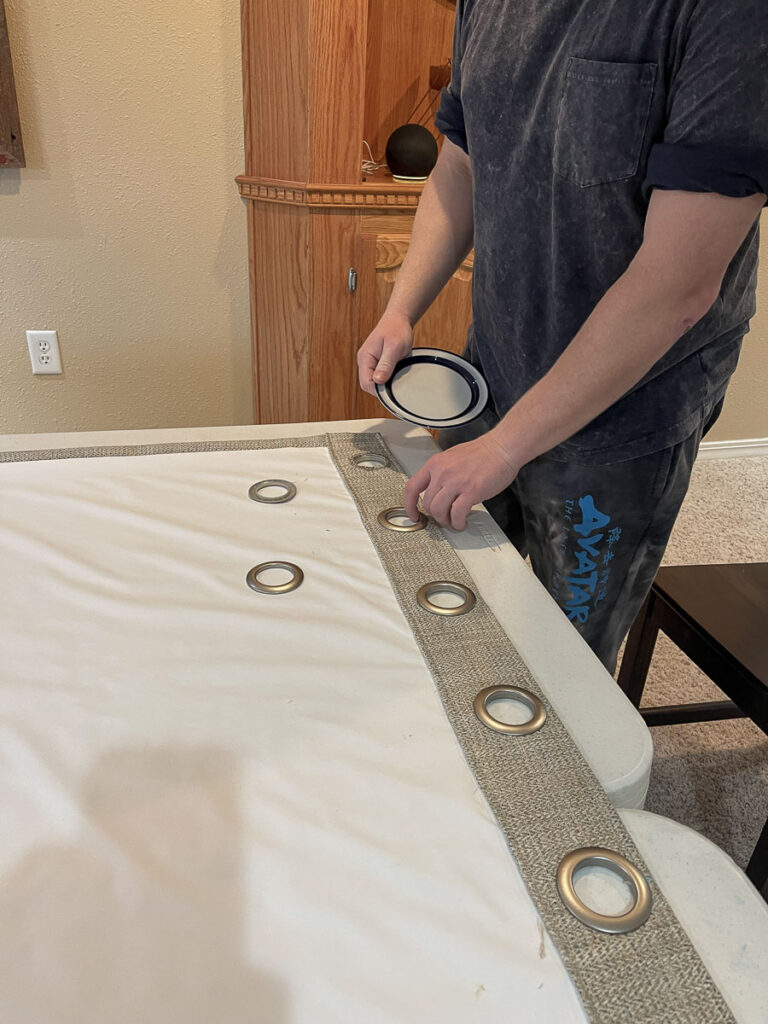
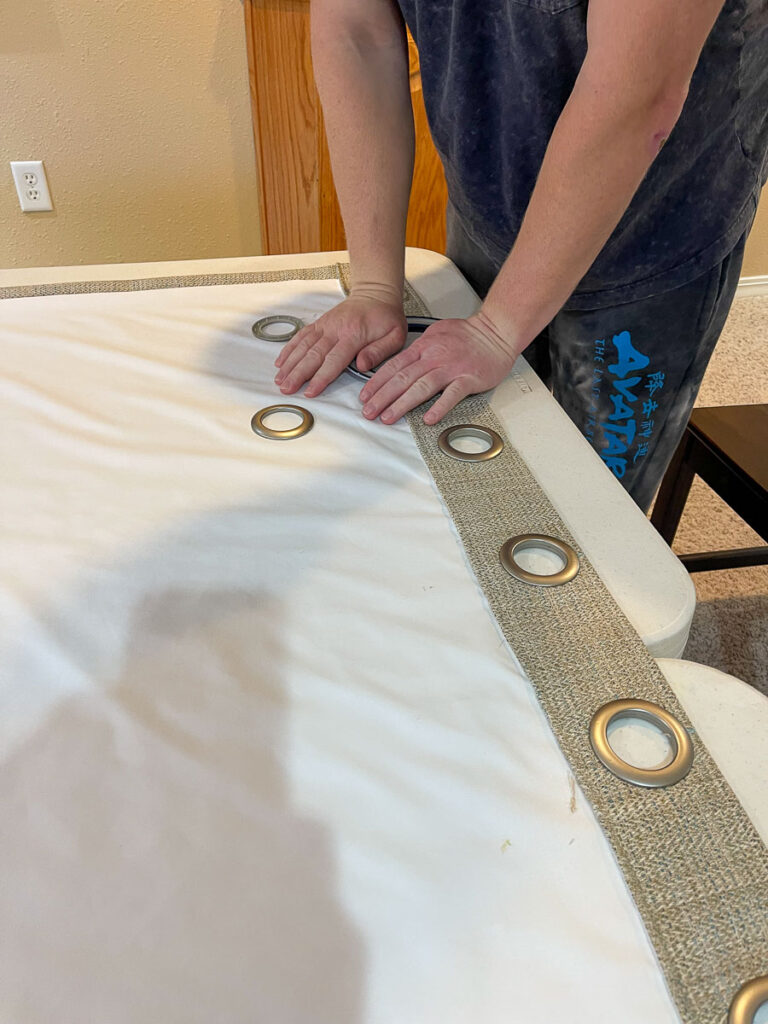
Determine the number of grommets needed using the Curtain Measurement Spreadsheet. It is important to have an even number. I made that mistake with my office curtains (see picture below under Results 2020). The grommets I used were Driscoll brand ordered in 16 set sleeves from JoAnn. I used the enclosed template to draw the circle, then used a seam ripper to cut a line from the middle to the edge of the circle. Lastly, scissors were used to cut around the marked line. Snapping the grommets together is sometimes a cinch and sometimes not. Using a small plate instead of the heel of your hand helped.
Items used to add grommets
Determining number and spacing of grommets
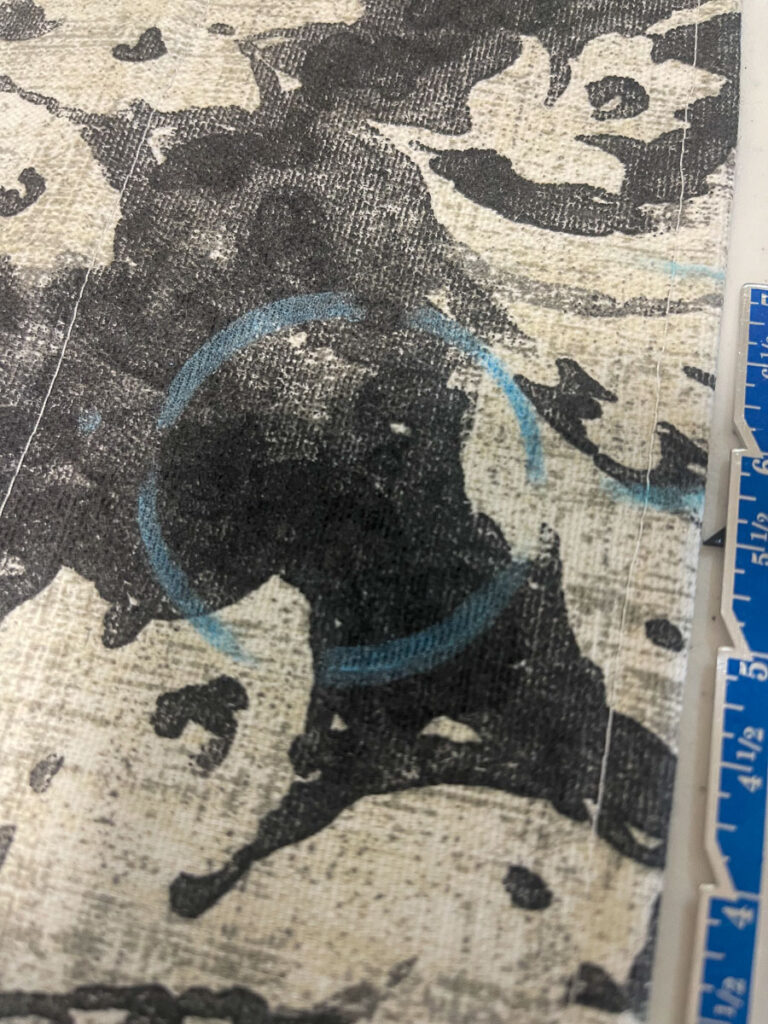
Drawn circle using grommet template
First using a seam ripper from middle to one edge of circle
Continuing to cut the circle with scissors
Small plate used to help insert grommets
Snapping two sides of grommet together
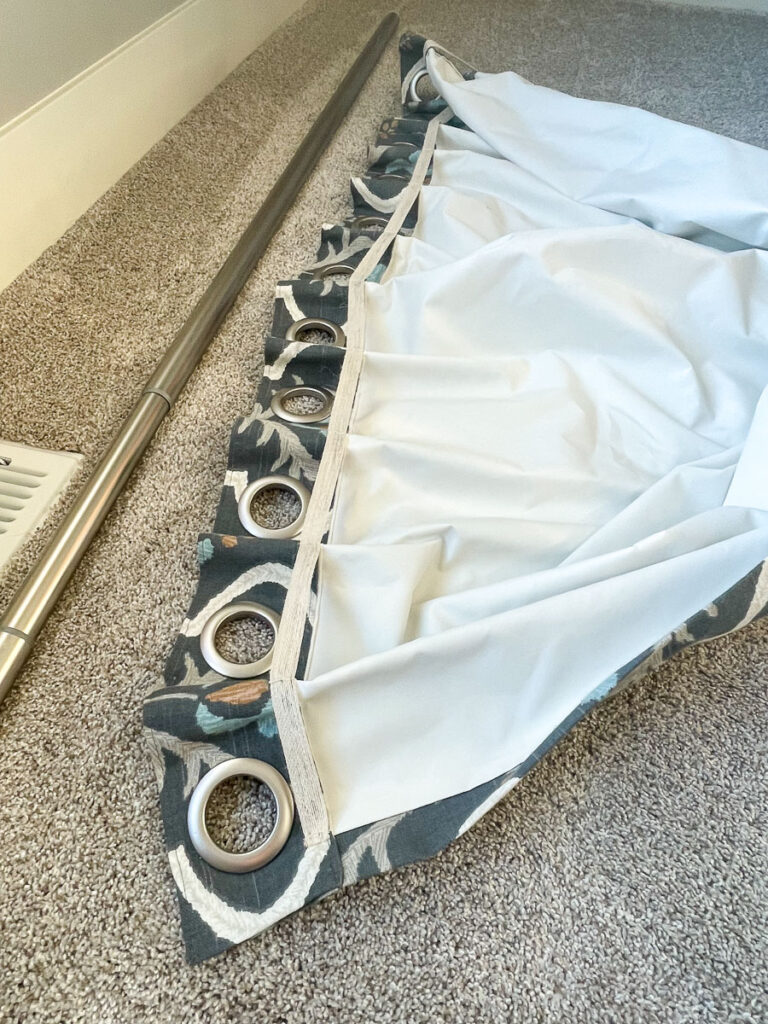
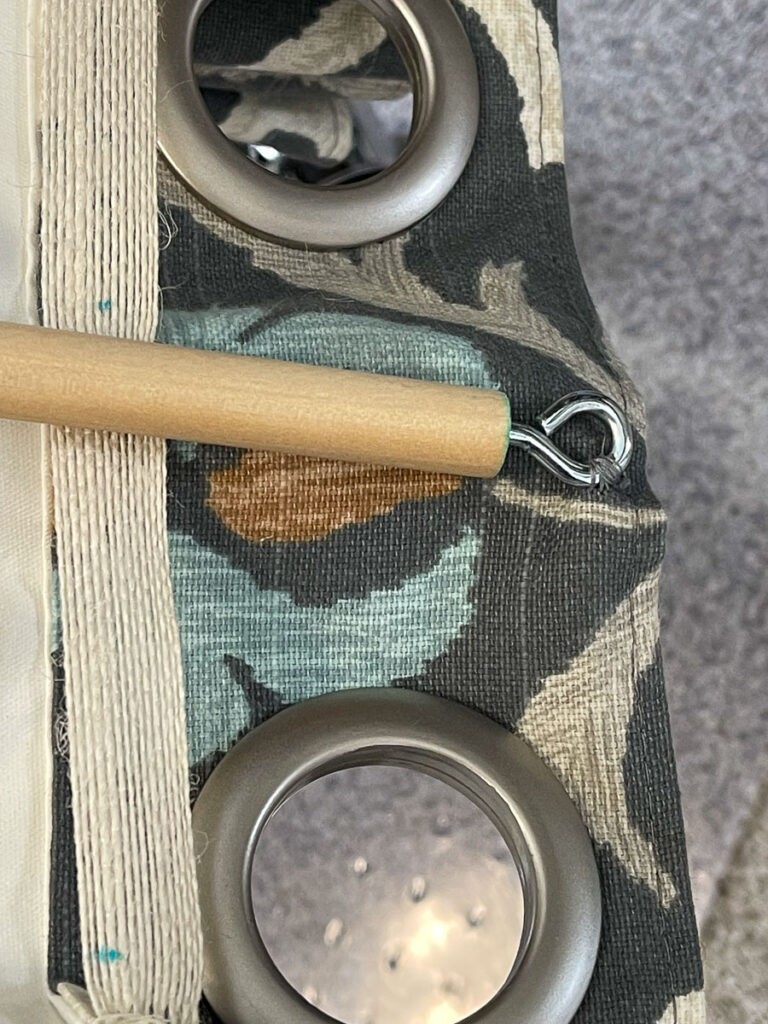
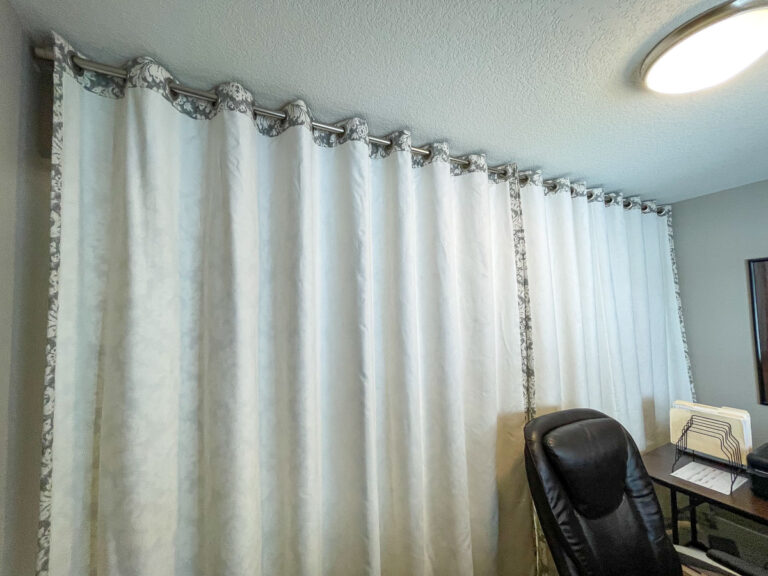
Step 7: Attach Trim and Dowels (optional)
I sewed twill tape trim purchased at Joann’s between the grommets to maintain a consistent fold on my office curtains. I attached a pull rod to curtains I knew would be closed frequently. I chose a ½” X 48” dowel purchased at Home Depot. I then screwed 10 x 1-⅜ screw eyes (also found at Home Depot) to the top.
Twill tape sewed between grommets
Eye screw in top of dowel and sewn between 1st and 2nd grommet
Step 8: Hem the Bottom of the Curtain
Hem the curtain per the Grommet Curtain Instructions. It is tedious, but I found pinning the curtains when hung worked the best particularly as the outer sides tended to be shorter than the middle. To create an even hem the outer edges had to be a smidge longer.
Hemmed curtain with outer edge a smidge higher
Angled edge on bottom back side of curtain
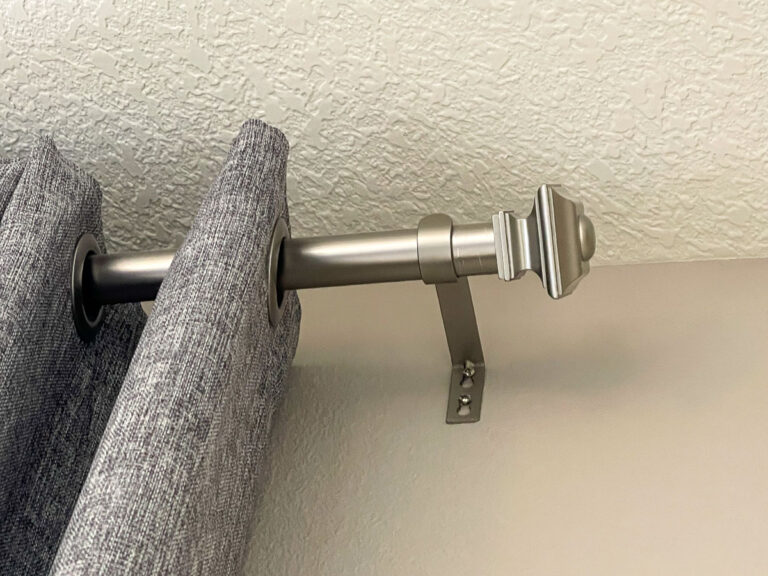
Step 9: Hang Curtains on Rod
I used a 1½” curtain rod purchased on Amazon. For the rods ending at the side wall, I used an end cap instead of a finial, also purchased on Amazon.
Rod with finial
Rod with flat end cap
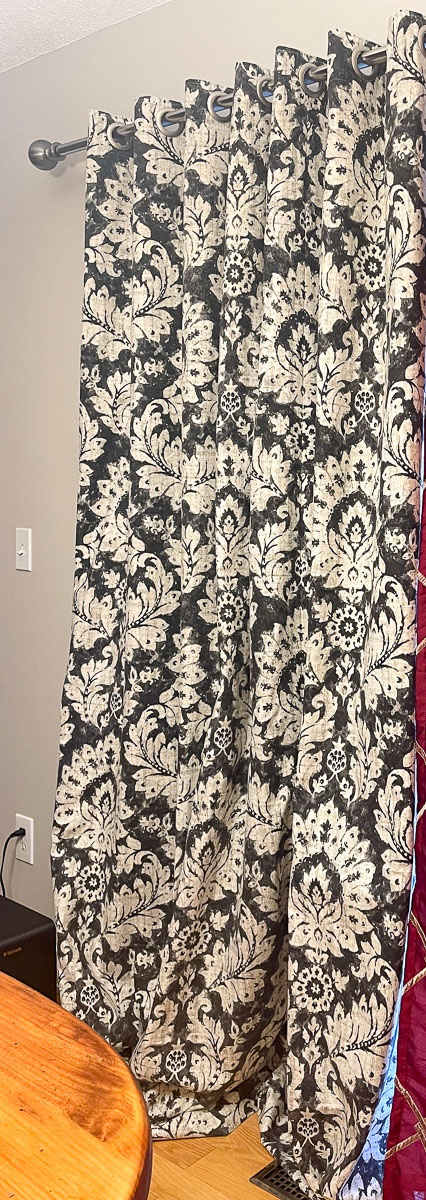
Results 2020
Sewn in Elshire Basement for Elshire Home
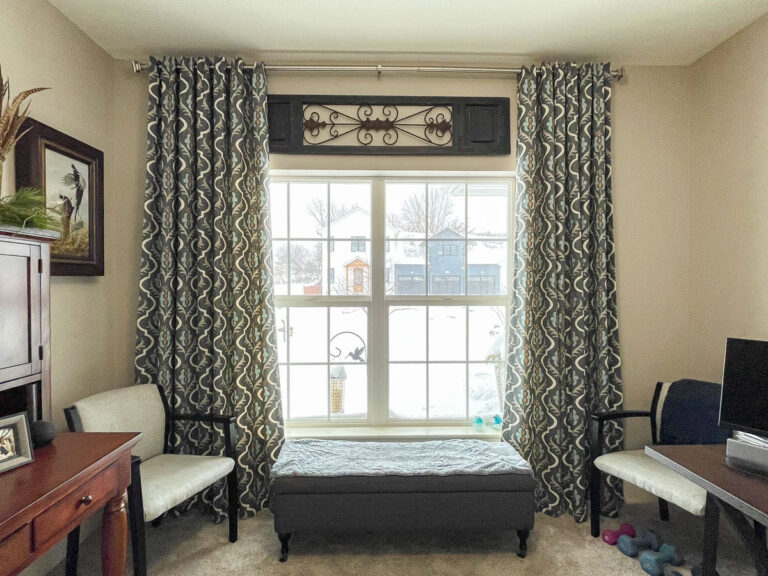
Elshire Main Floor Office
Created from 1½ panels (81” before side hems) per side.
Twill tape was sewn between grommets to create a uniform fold.
Dowel sewed to top between 1st and 2nd grommet for ease of pulling.
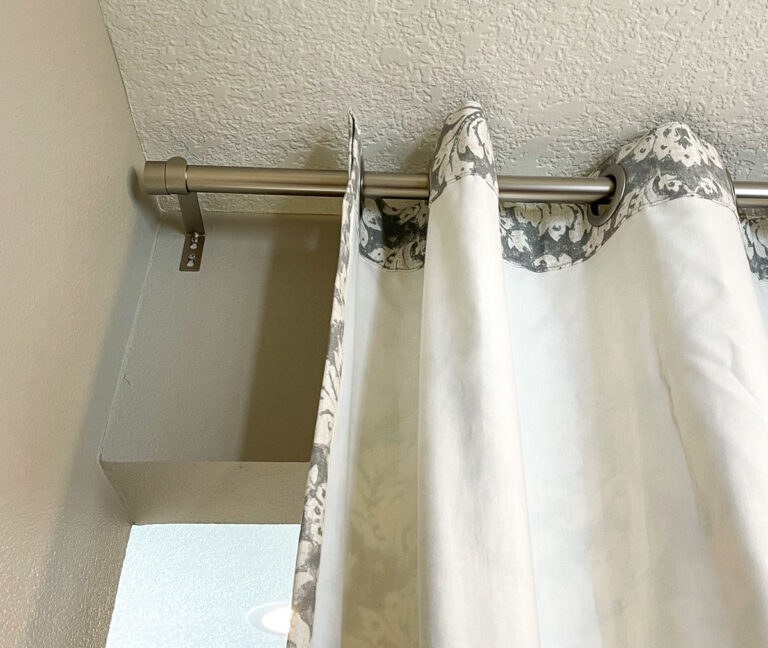
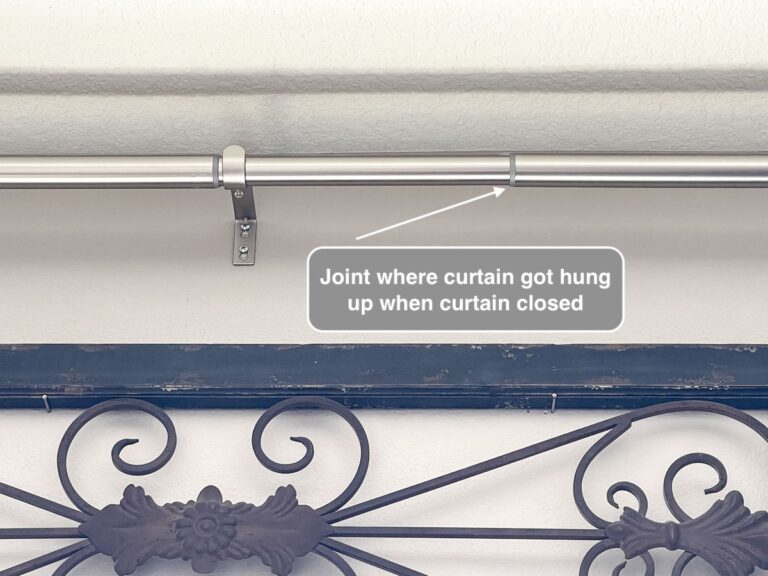
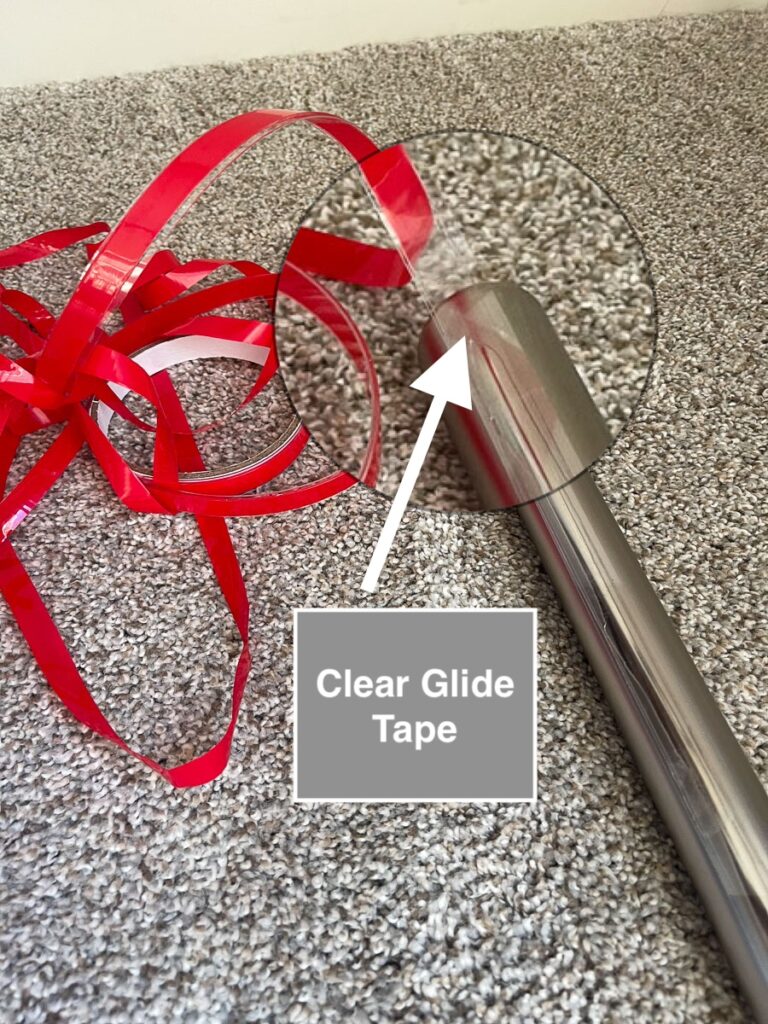
Glide tape adhered to the top of the rod. Before discovering this tape on Amazon, the curtain would get hung up at the rod joint. I was amazed at how easily the curtain slid along the rod after affixing the tape.
Elshire Main Floor Office
Elshire Main Floor Office
Glide Tape resulting in smooth transition when curtains pulled
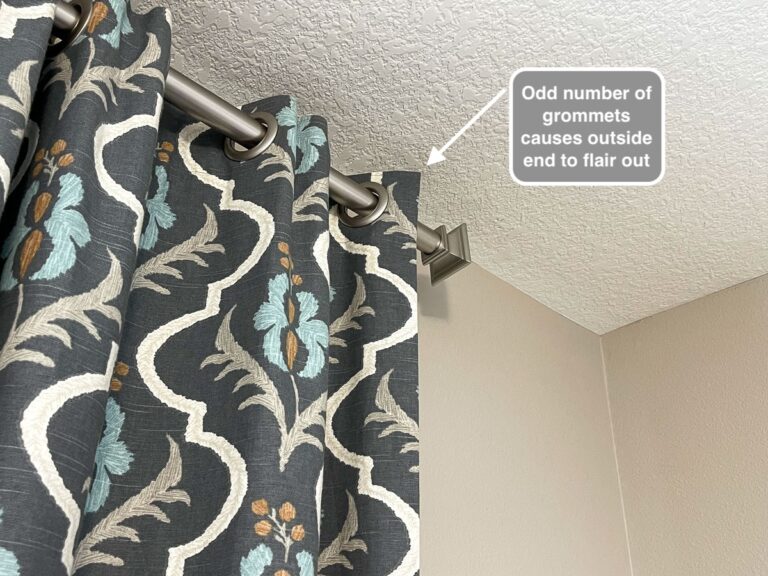
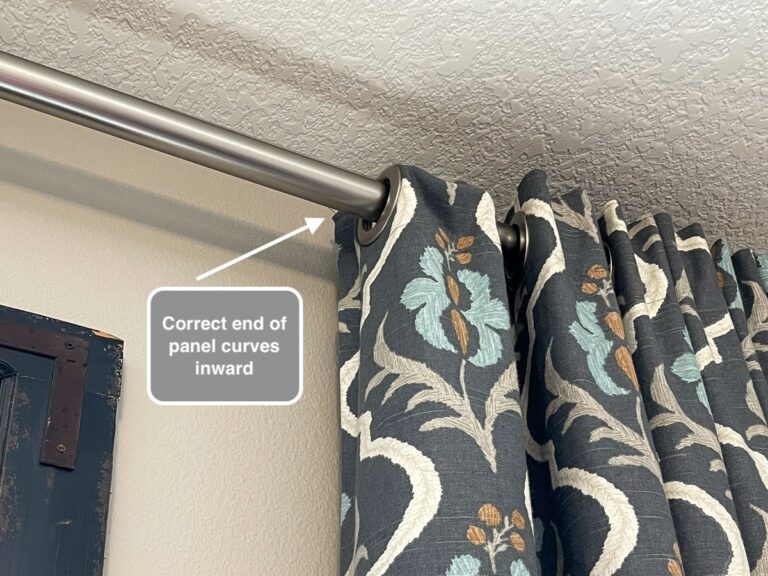
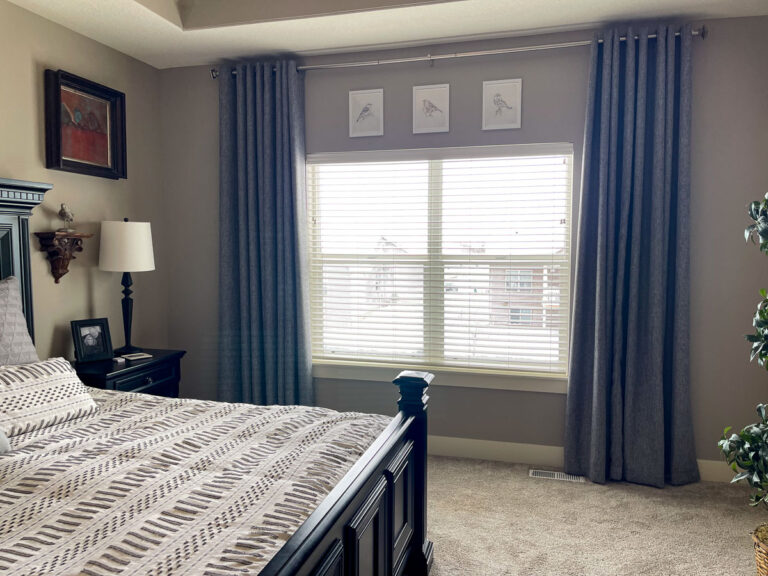
Mistake: There is an odd number of grommets (13/side) resulting in one side pointing out and the other side in. Ideally, both should fold in.
End flairing out
Correct end of curtain
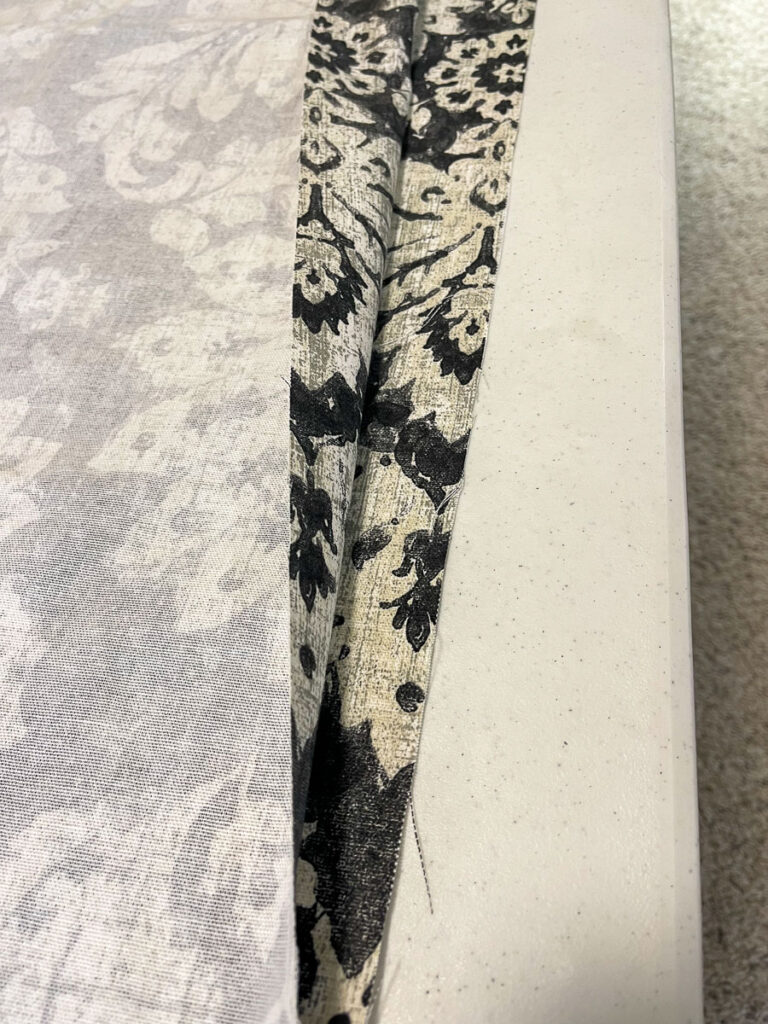
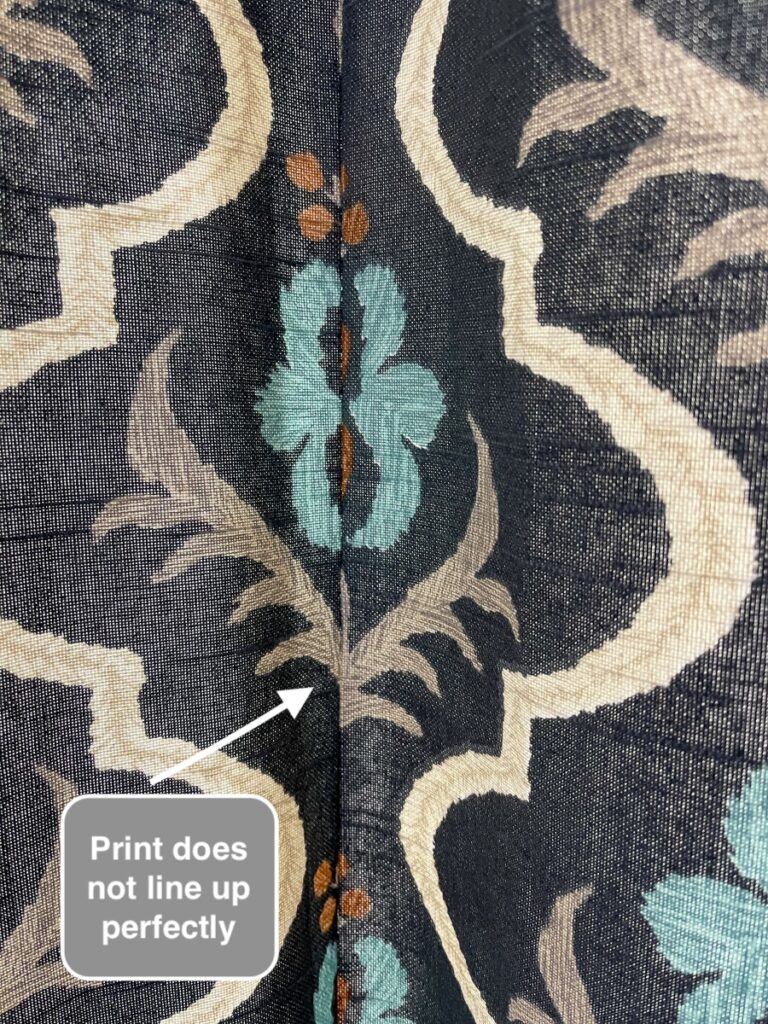
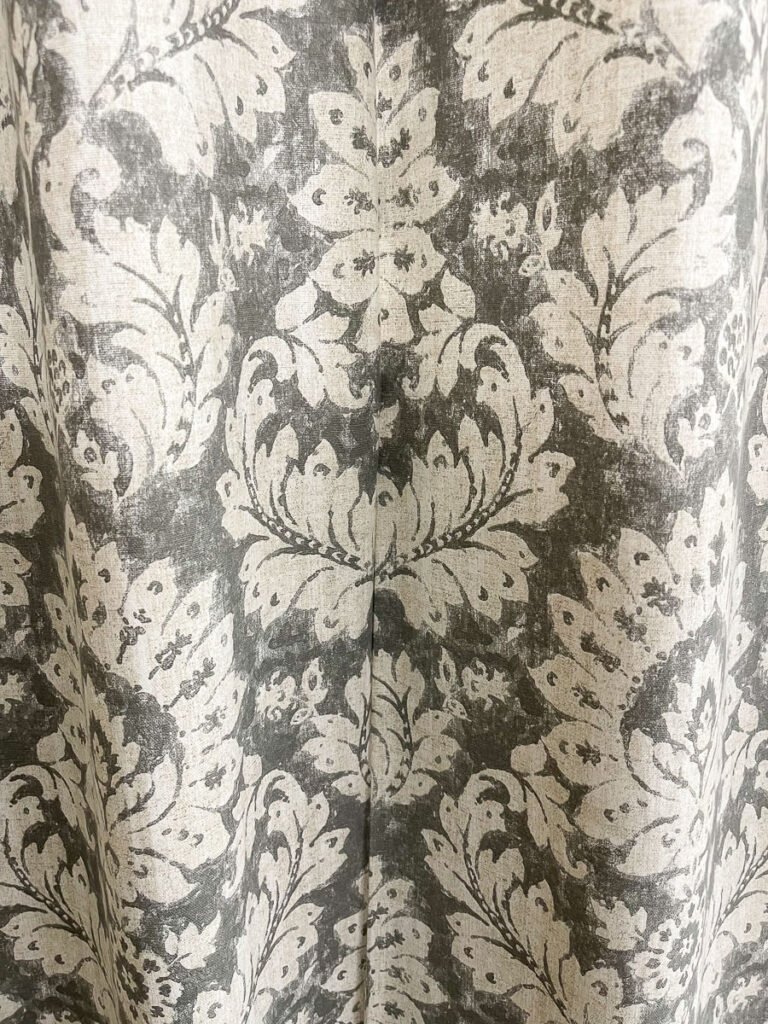
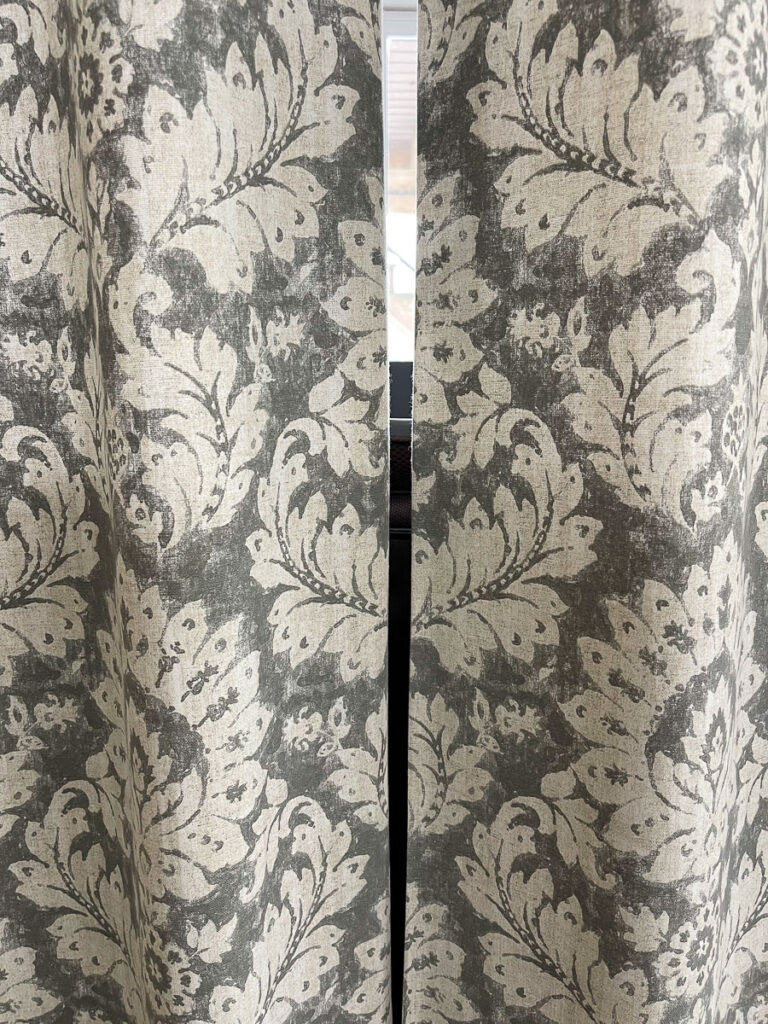
Mistake: The print does not match perfectly between sewn panels or between the two curtains when closed.
Print does not line up perfectly when panels sewn together
Print does not line up perfectly between the two curtains
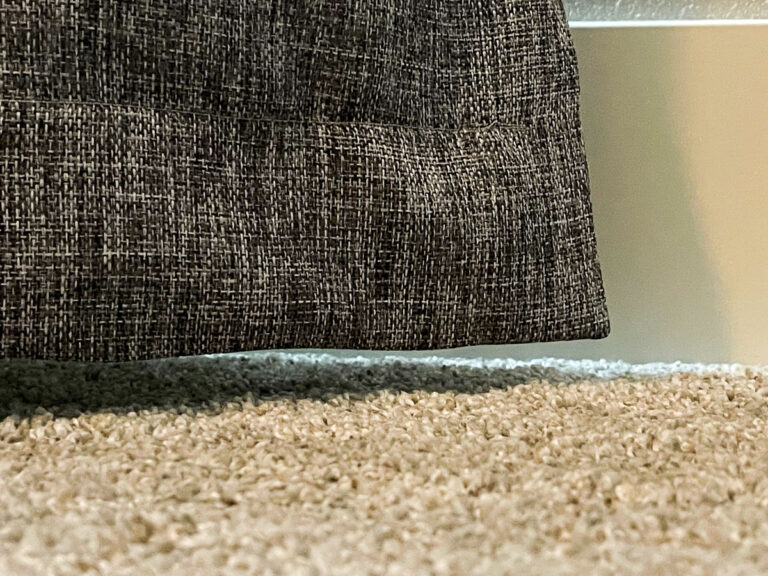
Mistake:Originally hemmed before hanging which resulted in being too long and dragging on the carpet for three years before finally corrected in 2023.
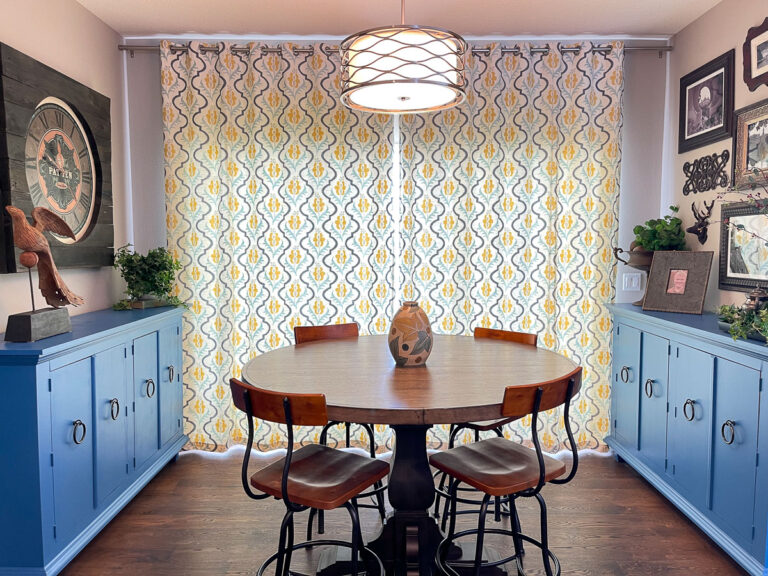
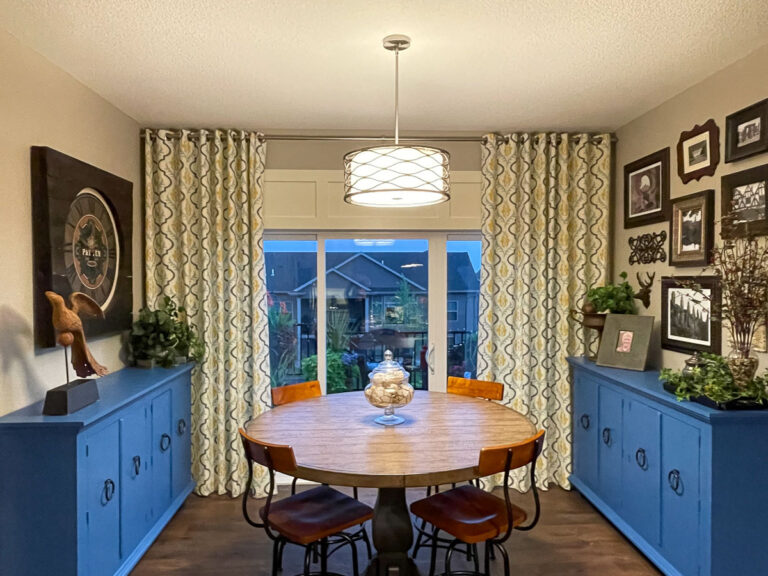
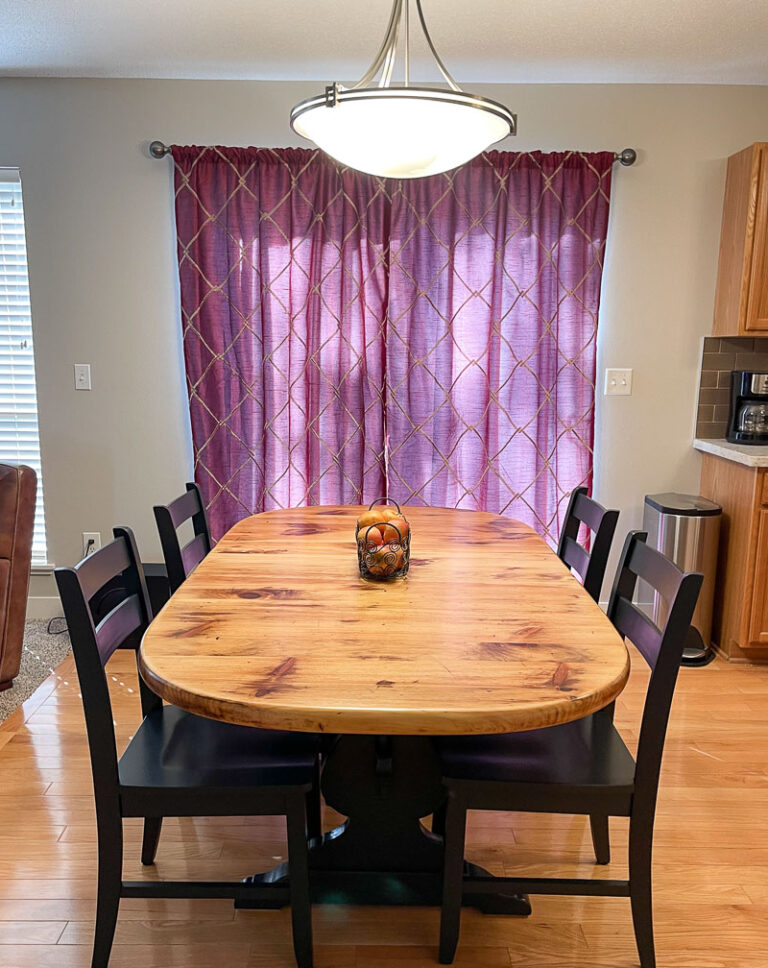
Elshire Kitchen Niche
Same print as Office, just a different color
Created from 1½ panels (81” before side hems) per side.
Fabric purchased on sale at FabricGuru.com for $5.95/yard. Because the slider is so wide, 2 panels per side would have been ideal, but there was not enough fabric available.
Elshire Kitchen Niche
Elshire Kitchen Niche
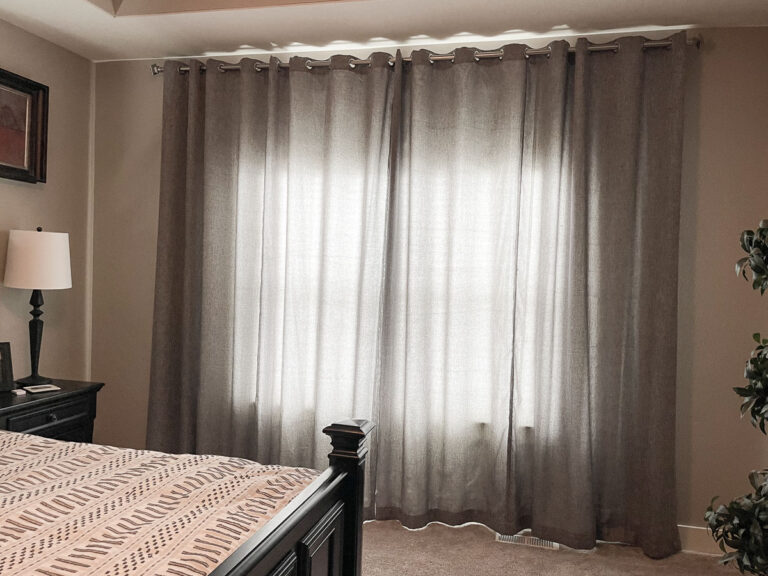
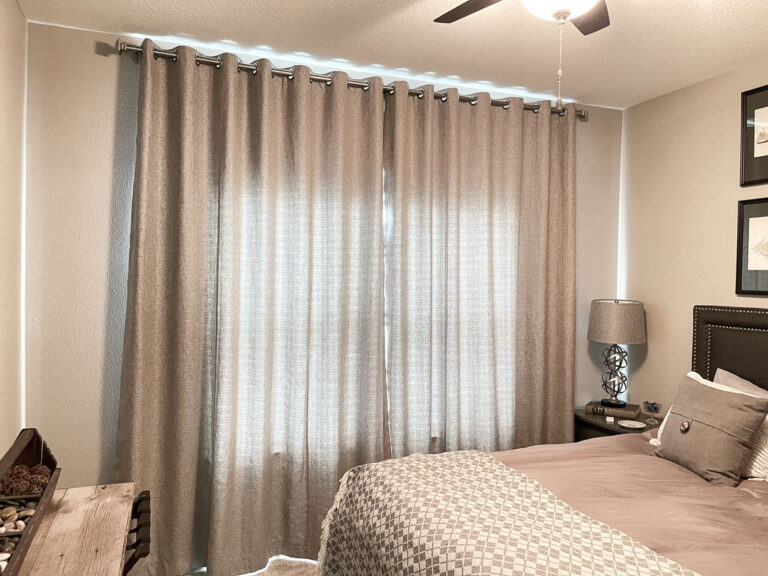
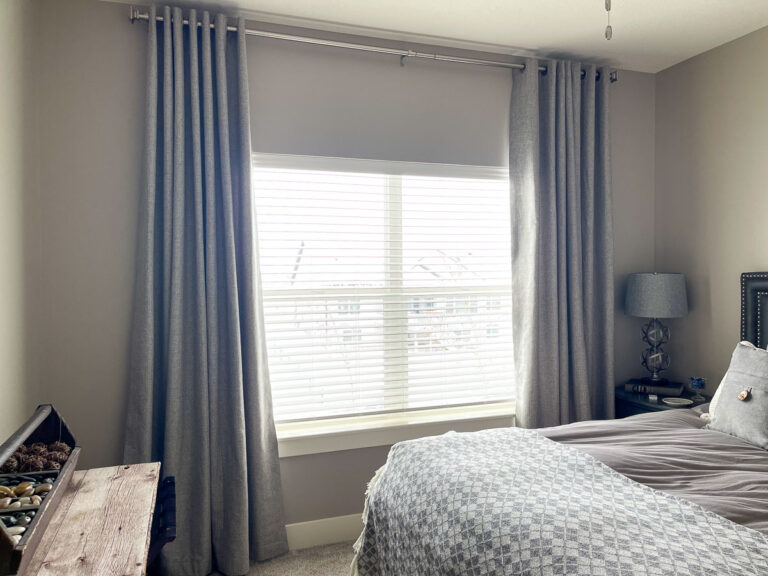
Elshire Master Bedroom
Created from 1½ panels (81” before side hem) per side.
Fabric was purchased online, at Fabric.com which is no longer in business. Cannot remember the price, but was probably under $10/yard.
I love how the curtains drape, but what makes them drape so freely made them more difficult to work with as they were more stretchy (not really a sewing term, but the best I could come up with)
Elshire Master Bedroom
Elshire Master Bedroom
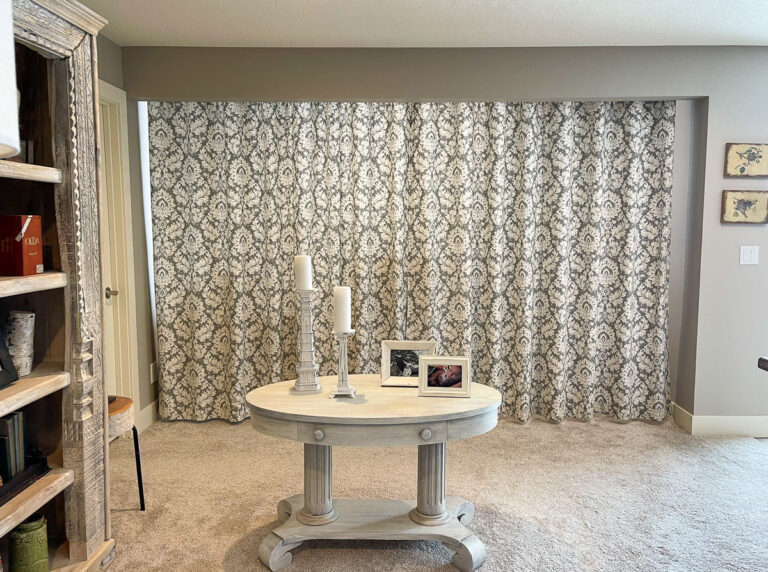
Elshire Lower Level Office
To fashion an office in this bump-out which was previously an unusable space I made a curtain wall.
Created from 2 panels (108” before side hems) per side.
Fabric purchased at Fabric.com (no longer in business) for $10.78/yard.
Even though the curtains were not as tall (96” versus 108”) the double panels per side made them cumbersome to work with, however, that is the width needed for the space. I did a better job than with the main floor office as the print matched between the panels and the print matched between the two curtains. When closed it looked like one continuous curtain wall.
Elshire Lower Level Office
Elshire Lower Level Office
Back Side of Elshire Lower Level Office Curtains
Print between sewn panels matched perfectly
Print where the two curtains came together matched perfectly
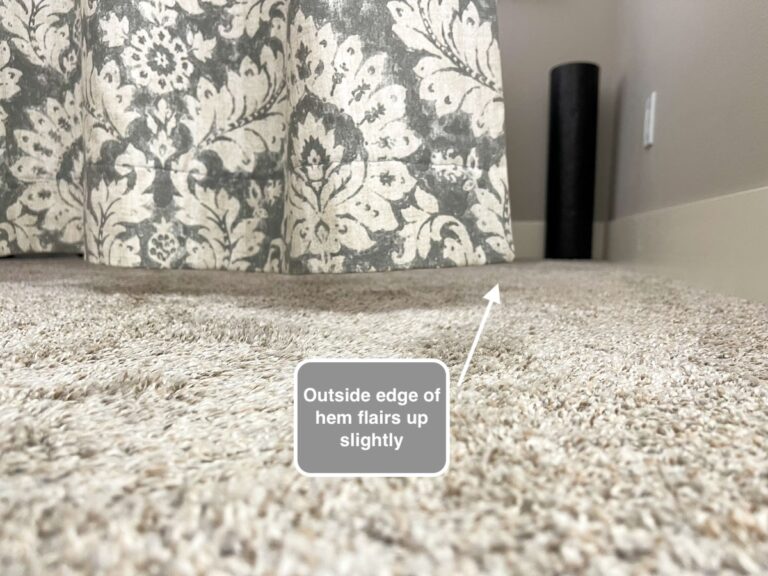
Mistake: I was not as meticulous with the hem and the ends flair up slightly.
Bottom hem of curtain flairs up slightly at end
Results 2023
Sewn in Sam’s Basement
Because the Elshire basement was now furnished there was no room for 4 tables. So, when my son, Sam, purchased his home I was able to set up a workspace in his basement as it was not yet furnished. One of the tables was shorter, but I made it work.
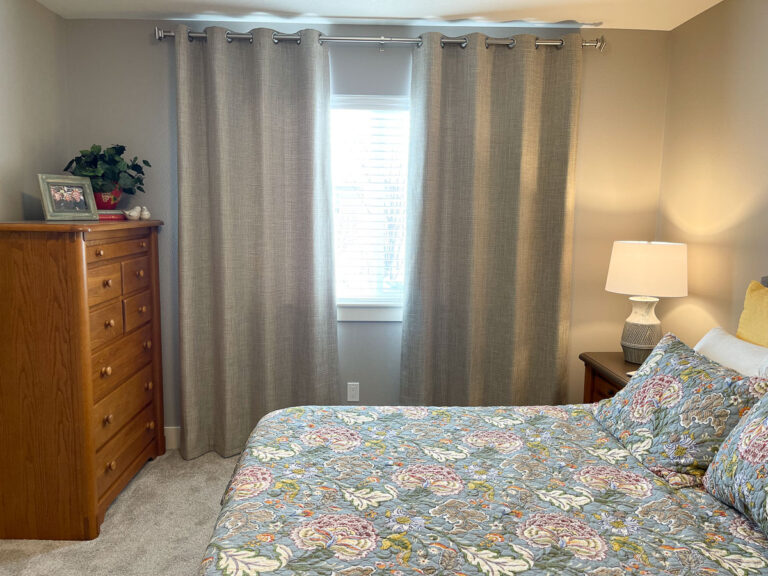
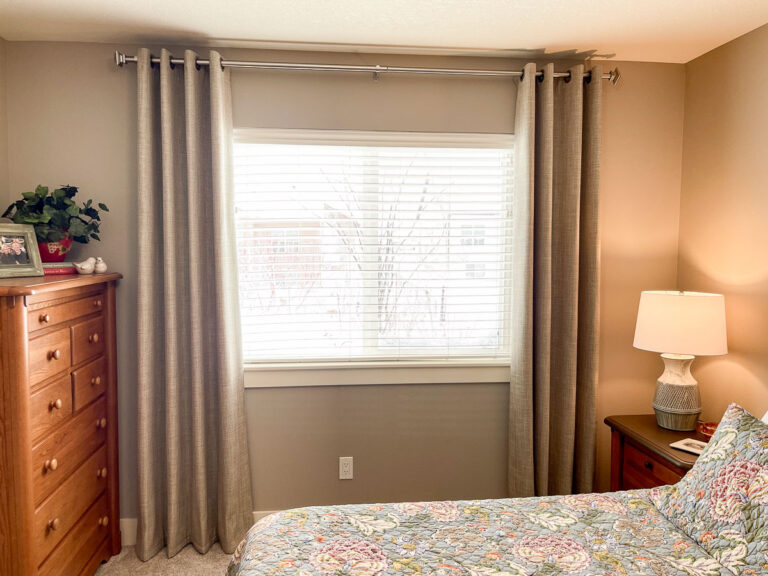
Elshire Main Floor Guest Room
Created from 1½ panels (81” before side hems) per side.
Fabric purchased on sale at Hobby Lobby for $9.59/yard.
Pictured before training (see Sam’s Slider below)
Elshire Main Floor Guest Room
Elshire Main Floor Guest Room
Elshire Lower Level Guest Room
Smallest window so was easier as it was only one panel (54” before side hems). Plus, there were no prints to line up.
Fabric purchased on clearance at Hobby Lobby for $12.00/yard.
I would have considered 1½ panels, but there was not enough fabric available.
Elshire Lower Level Guest Room
Elshire Lower Level Guest Room
Mistake: Would consider two extra grommets per side to create a tighter fold, particularly as there is only one panel
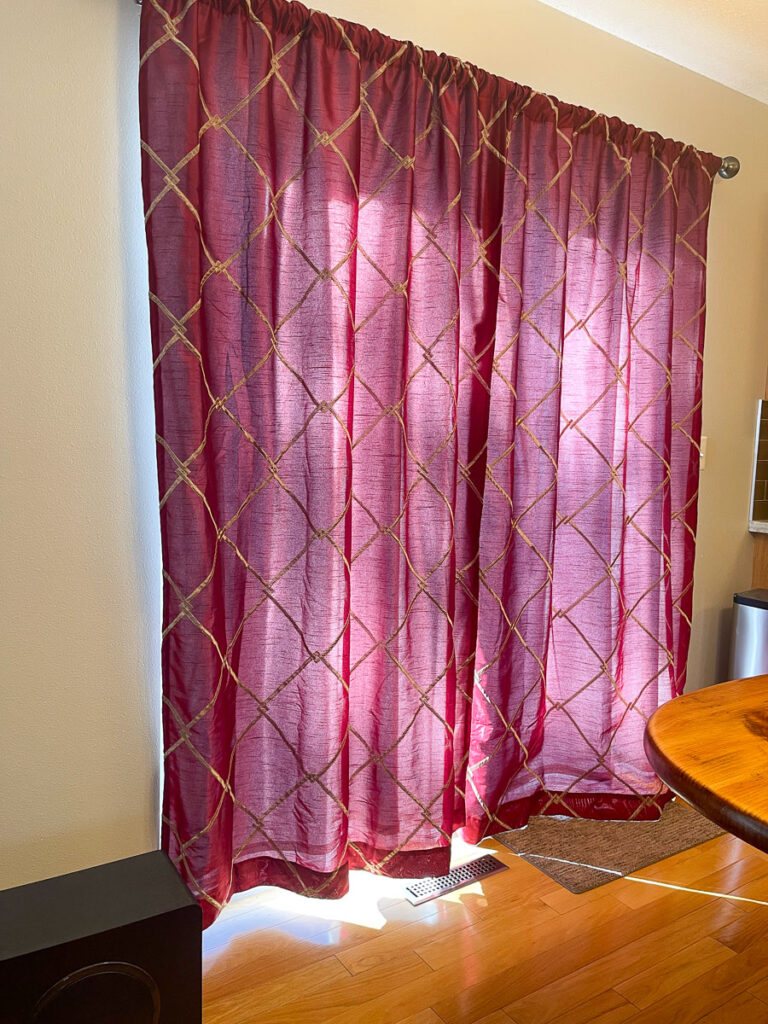
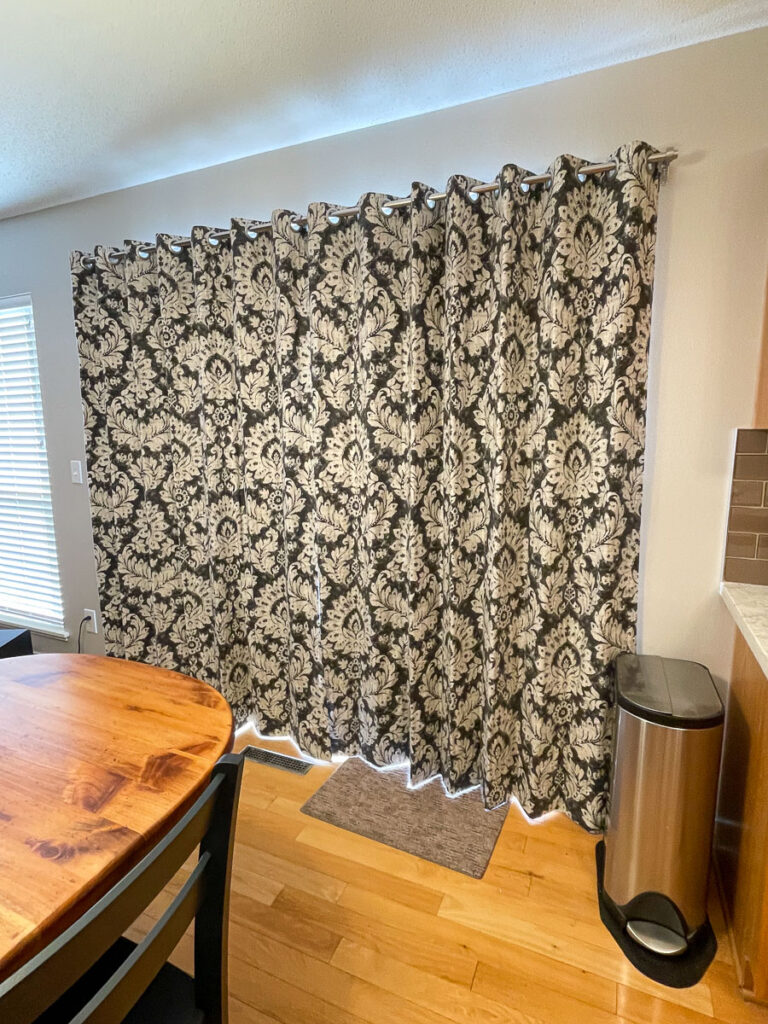
Sam’s Sliding Glass Door
When Sam purchased his home there were red “harlequin” curtains in front of his sliding glass door. I felt they were not a good style fit, plus they were not even the same length. Thus, I talked him into spending the $150 for custom “free labor” curtains. Again, it was hard to find fabric at a price he was willing to pay.
Original ugly curtains with two different hem lengths
Created from 1½ panels (81” before side hems) per side.
Fabric purchased on sale at FabricWarehouse.com for $10.43/yard. Ironically it was the same print as the Elshire Lower Level Office purchased 3 years earlier, just a different color.
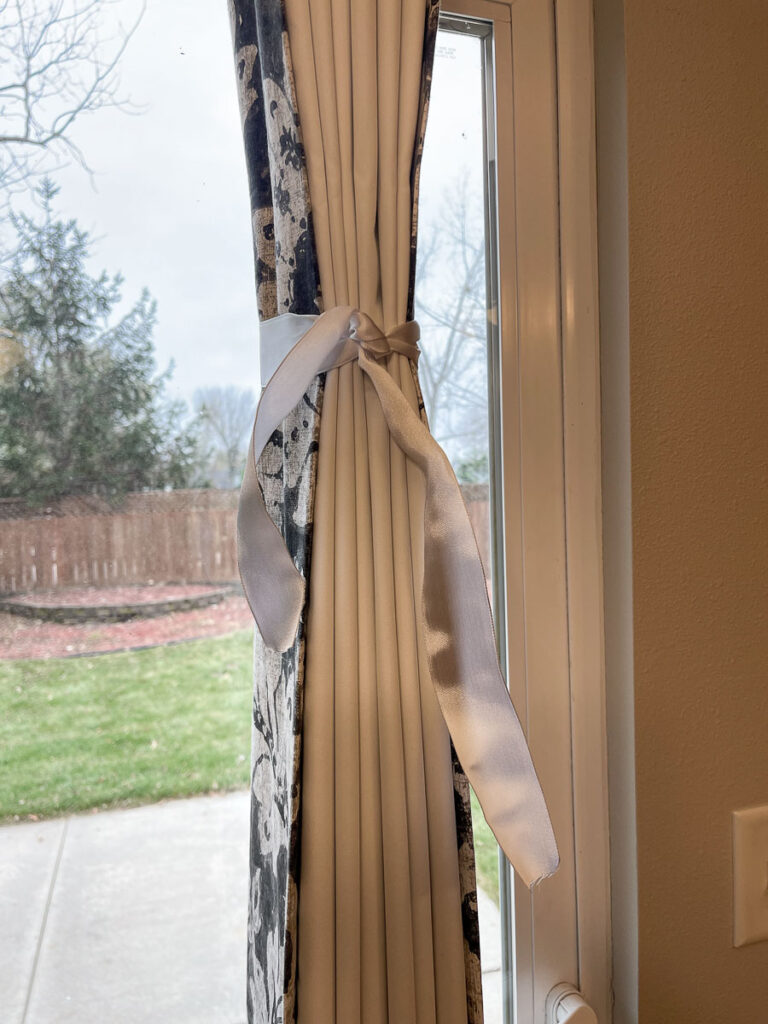
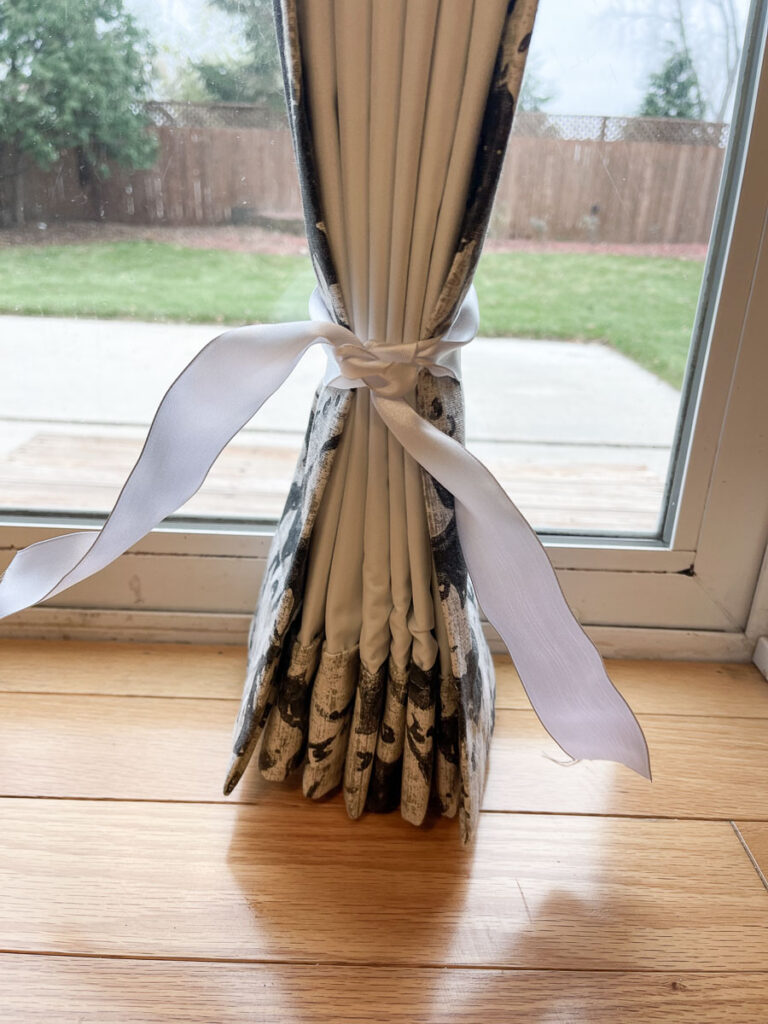
To train the curtains I hung them backward, pleated them together with ribbon, applied steam, and left them for a week. When I rehung them face out the pleats stayed in place.
The hem was straight as I meticulously hung and pinned before sewing.
The print matched between the panels and the print matched between the two curtains creating the illusion of one continuous curtain wall.
Sam's Sliding Glass Door Curtains
Curtains in training - hung backwards
Curtains in training - hung backwards
Curtains in training - hung backwards
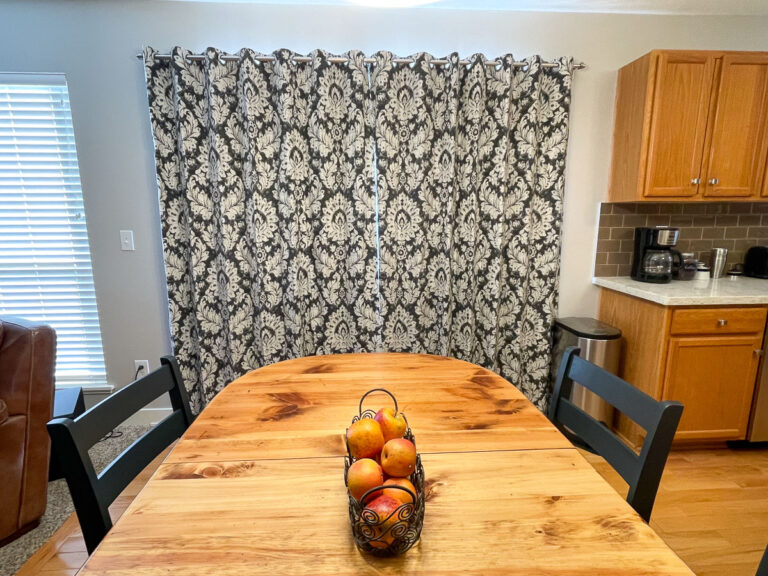
Sam's Kitchen Before
Sam's Kitchen After
Conclusion
Would I sew grommet curtains again? Yes! I love the luxurious look of fully lined curtains and I saved hundreds of dollars doing it myself. The 2023 sewing went much smoother than in 2020 as I had perfected my Grommet Curtain Instructions and did not have to think about each step.
I hope this has taken the guesswork out of sewing grommet curtains. Remember, you do not have to be an expert seamstress, just follow the the steps and enjoy your new set of fully lined custom curtains!


Wow! WOW! Wow!! But I probably won’t try this anytime soon. Are we really sisters?
The curtains are beautiful! I love how you improved your technique and learned as you went. And so smart to use the spreadsheets. Well done!
Thank you Karen!
They look great, Cheryl!