Designing an interesting wall collage can be tricky to pull off. You want it to have a cohesive flow and be intriguing without looking like a jumbled mess. I will show you how it can be done using these simple tips:
Vary the shapes
Vary sizes
Add texture elements such as iron, metal, fabric or wood
Add dimension, either in front or behind
Vary color, but still stay in the same hue
Center around a theme
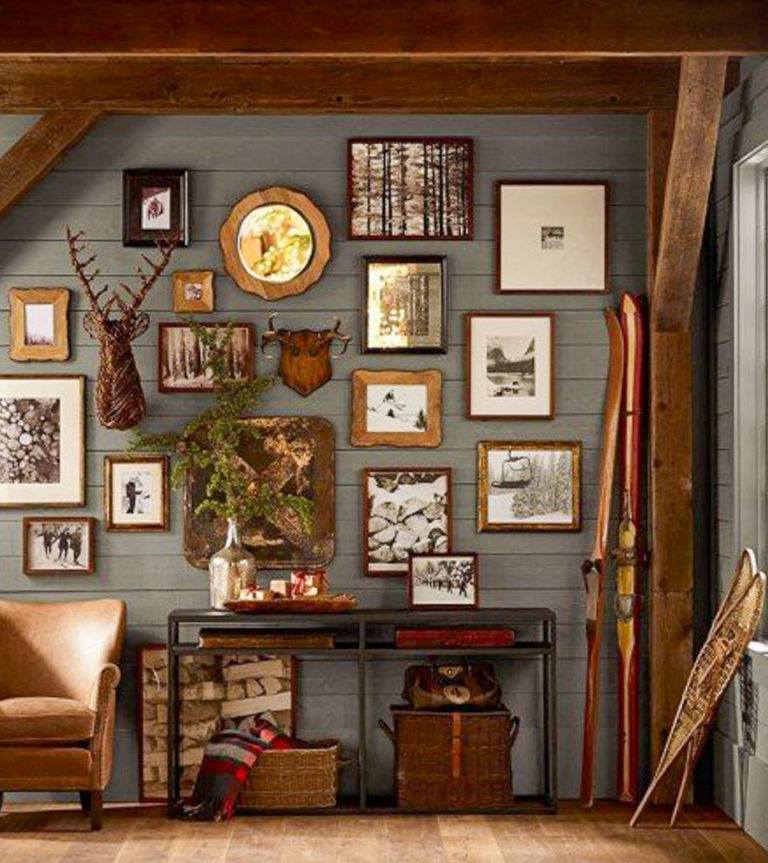
My favorite collage (actually my gold standard) was on the cover of a Pottery Barn catalog years ago. It takes you right to the edge of cluttered abyss without sending you over.
Vary Shapes & Sizes - Iron & Wood Texture - Theme
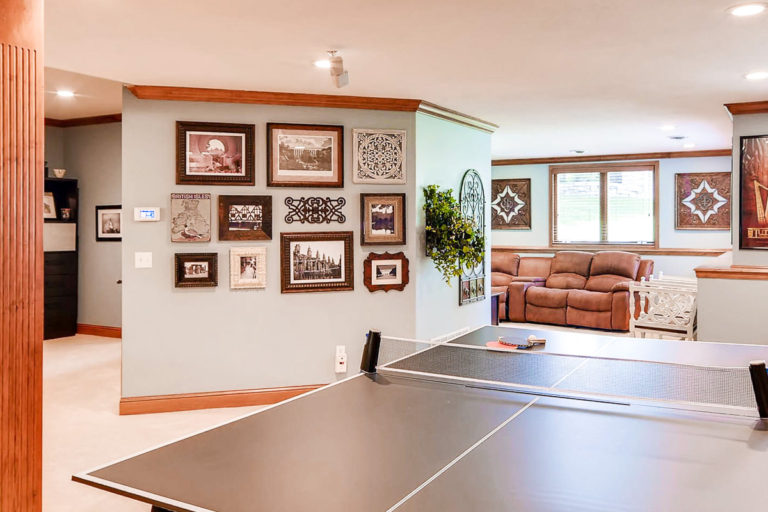
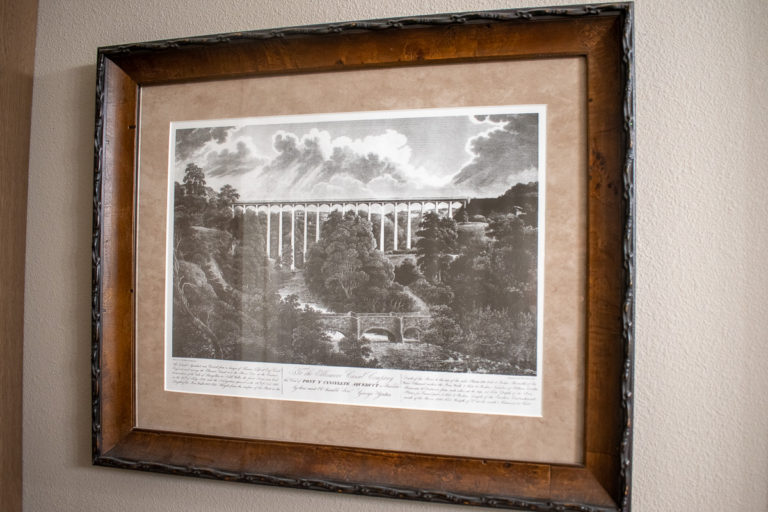
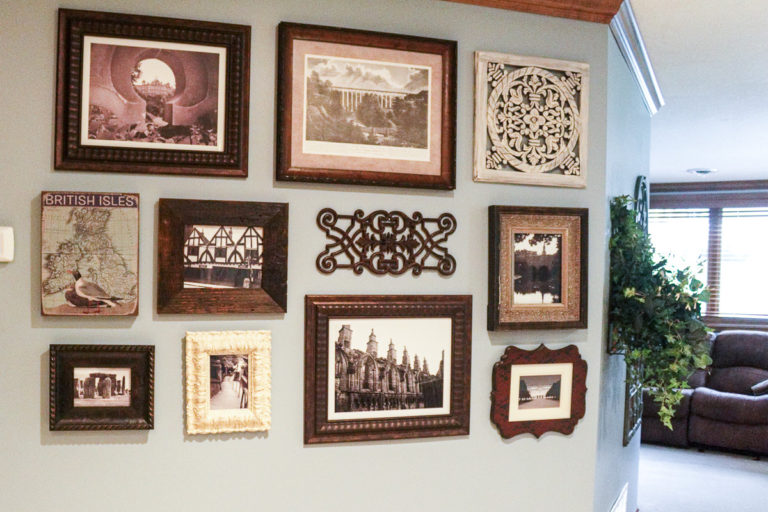
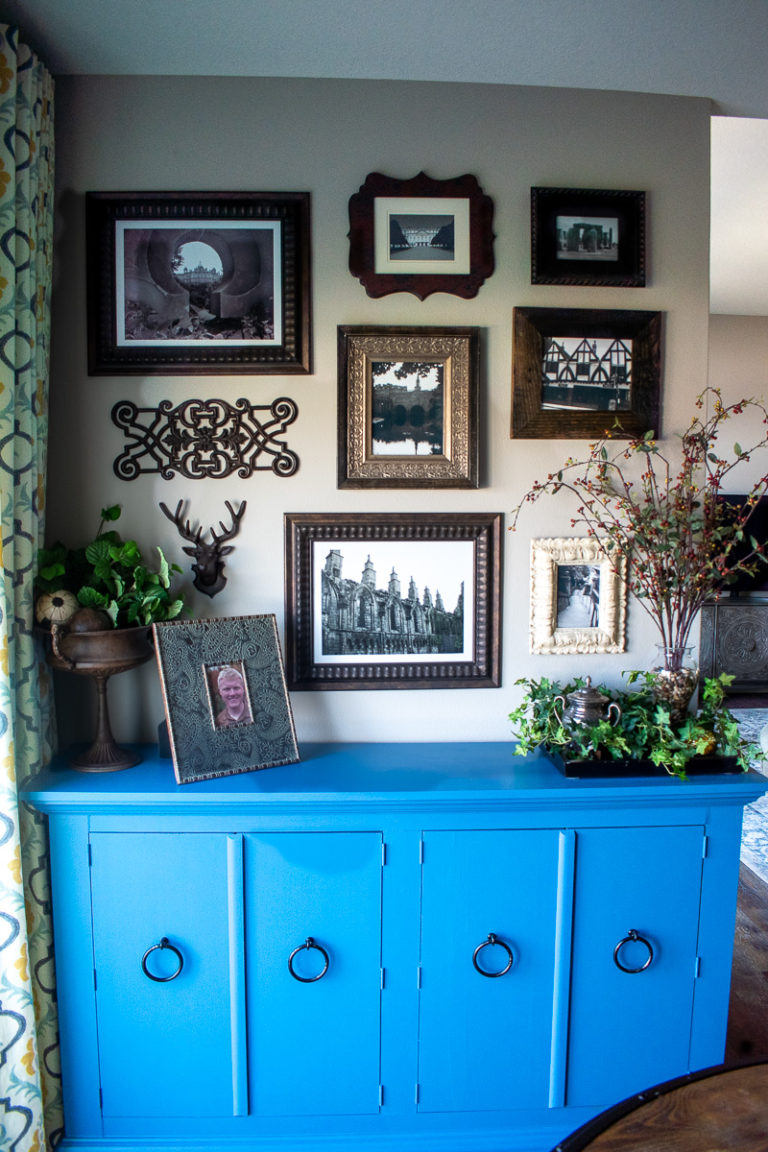
I have lots of different wall collages in my homes. One example is this collage in our Highover house centered around a trip to England. The inspiration piece was the engraved image of the Pontcysyllte Aqueduct, located in Wales, that is 214 years old and soars above the River Dee 126 feet. Amazingly it is on only 12 feet wide, but almost three football fields long. It was quite a thrill to take a boat ride on this historic bridge which sits on eighteen arched iron ribs.
Meanwhile, back to collages……. These black and white photos were taken on the same trip and encased in a variety of frame styles and colors. The wood piece on the upper right was the correct shape but the wrong color so I whitewashed it with diluted white paint. In contrast the simple rectangle iron scroll placed horizontally added an iron element. Not normally my style, the decorative frame shape on the bottom right gave my arrangement that extra twist. Finally, the simple box, found at HomeGoods, with a sketch of the British Isles completed my wall.
Vary Shapes & Sizes - Vary Texture - Theme
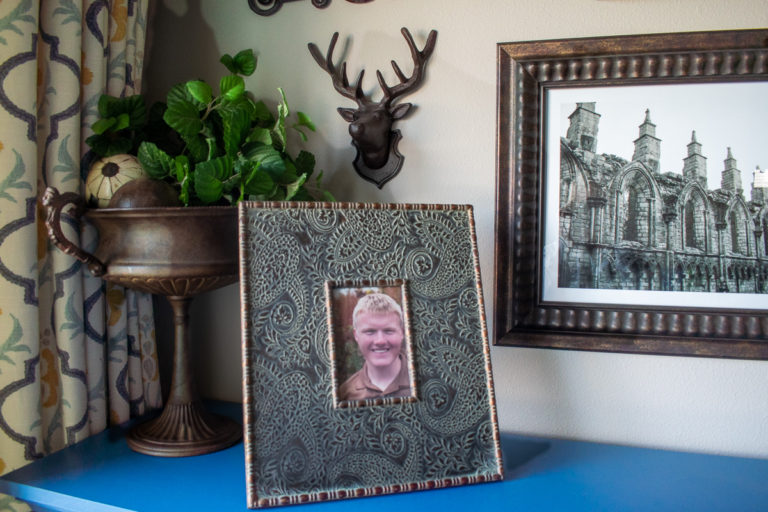
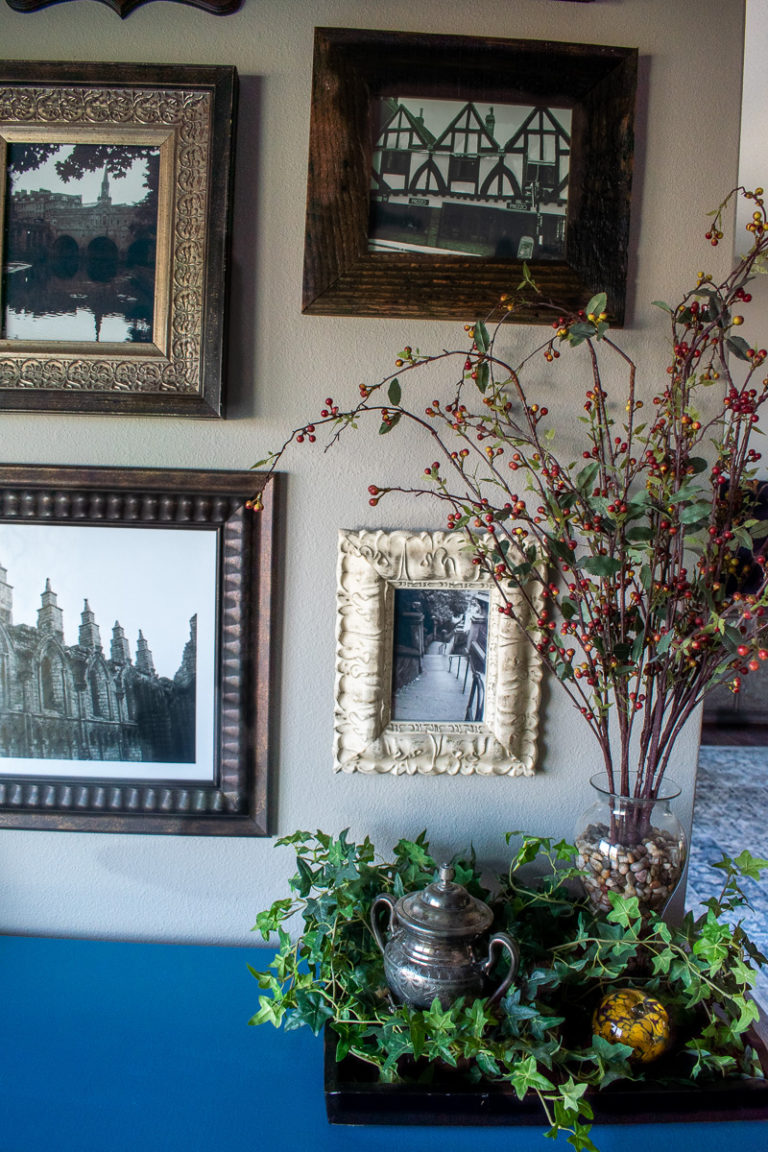
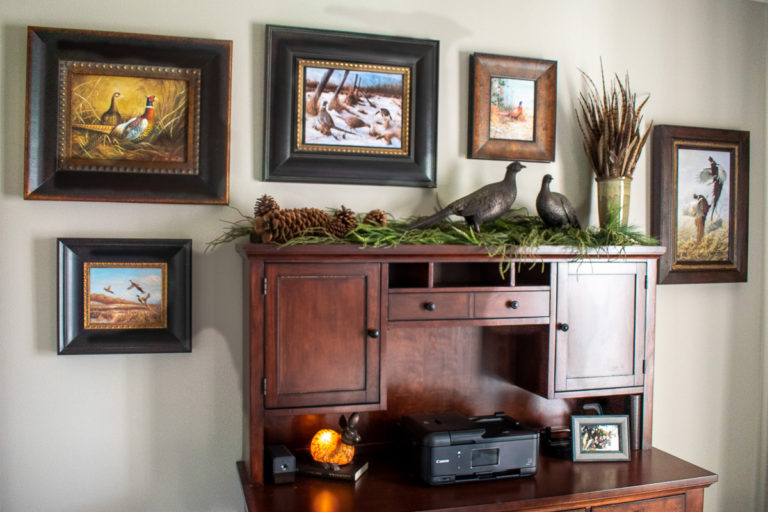
I repurposed my England wall when we moved into our Elshire home and arrange it above a blue credenza I built.
On one end of the cabinet is a photo of my son, Sam, in front of a rustic compote vase filled with balls and greenery.
On the other end, I added texture with the antique silver sugar bowl, glass paperweight, and faux greenery. Berry sticks in a vase of pebbles deliberately encroaches on one of the pictures to create added dimension.
Vary Sizes - Vary Color - Theme
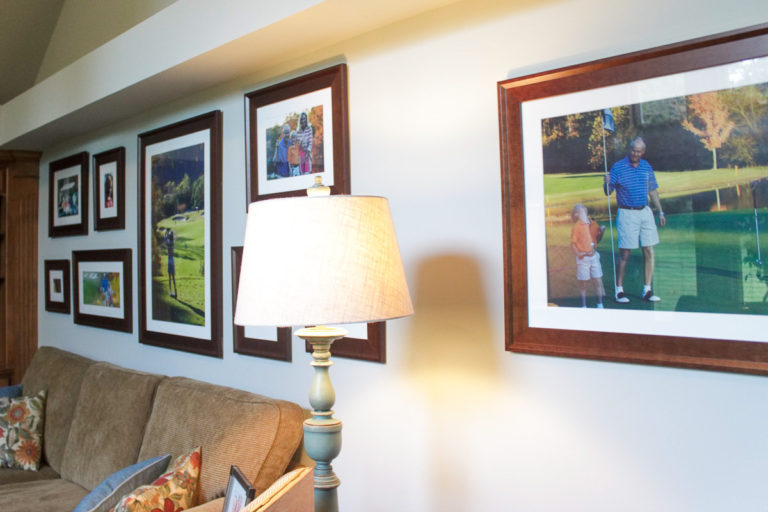
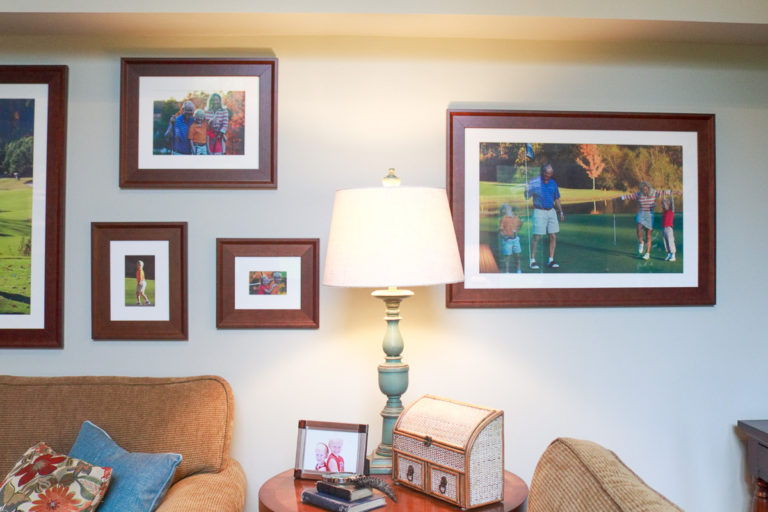
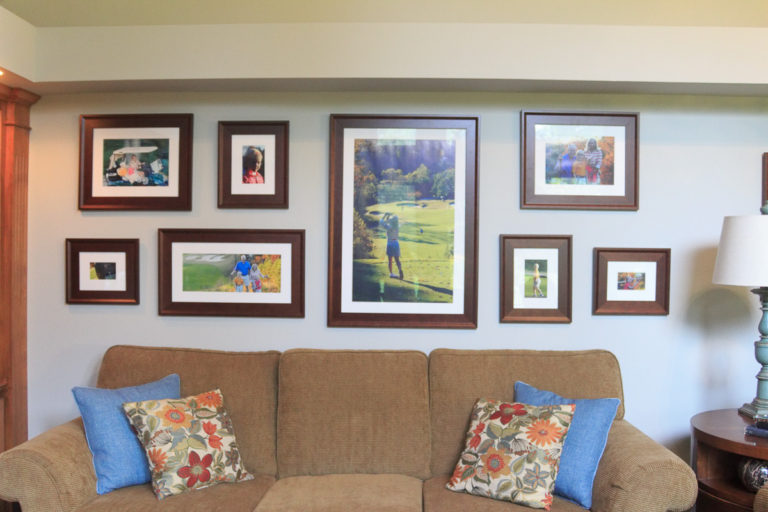
I wanted to make a statement on this long wall in the two-story Great Room in our Highover home so I chose colorful family golf pictures and placed them in the same frame style, but in a variety of sizes.
Space allowance was made for the table lamp when I laid out the frames on the floor of Hobby Lobby. The other customers must have thought I was crazy.
I loved the impact it made on the room. The pillows on the caramel couch picked up the colors in the photos perfectly. However, I wish I had paid extra for the non-glare glass as I had a ton of natural light streaming from the opposite wall of windows. Sometimes you should just bite the money bullet.
Vary Texture With Fabric
Fabric can add texture to any collage. For example, these decorative pillow covers purchased on a trip to Italy. I simply nailed the covers to the wall and alternated family group photos in frames of a similar size, but different style.
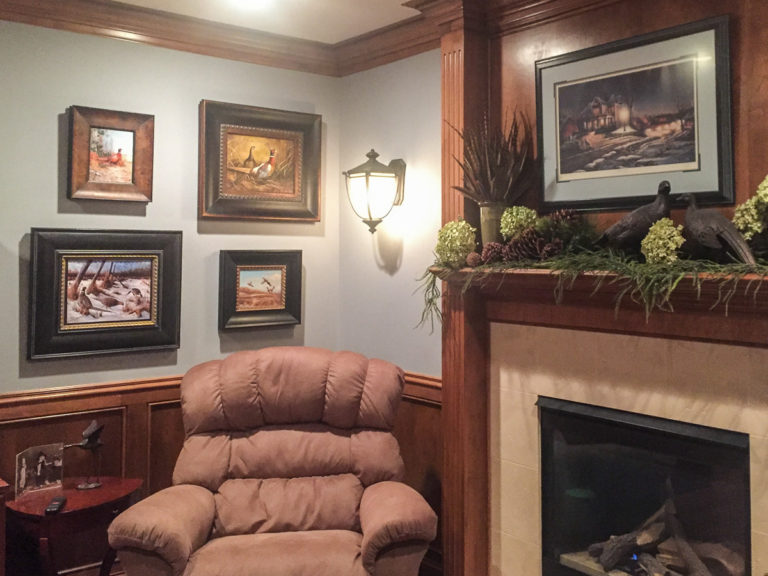
Vary Size and Frame Color - Add Texture With Iron and Wicker
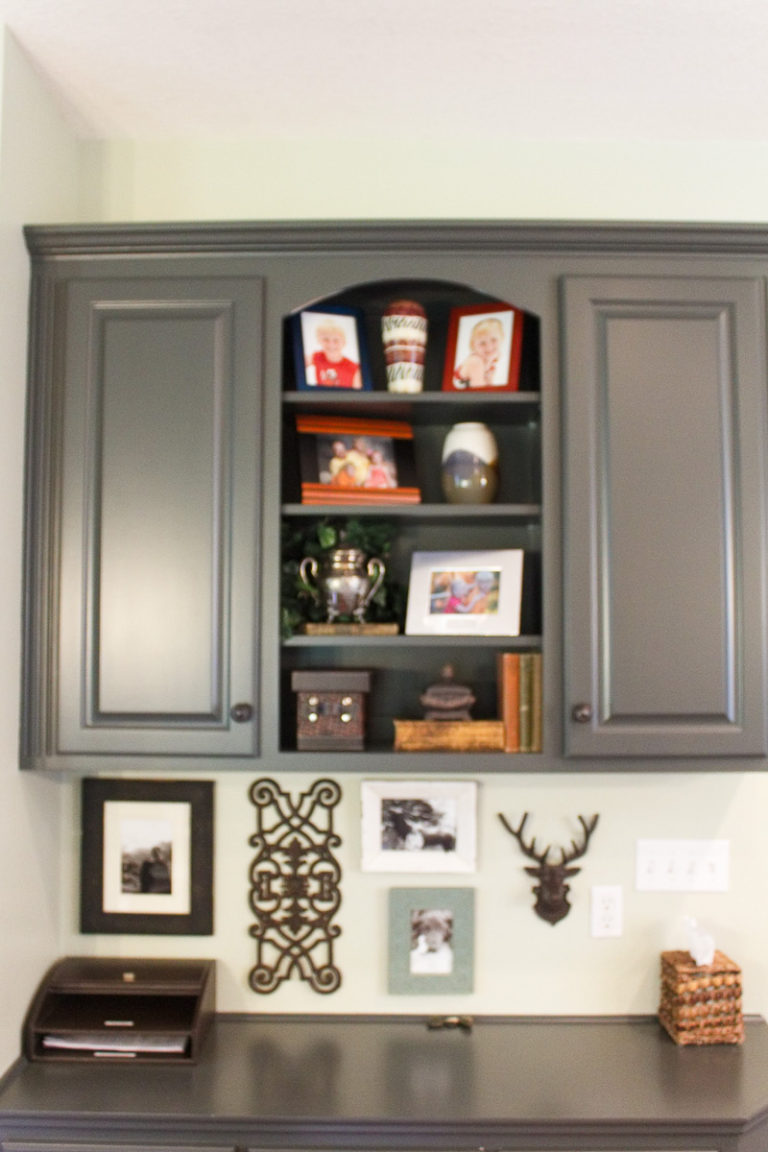
Collages can be simple with just a minimum number of elements. For instance, this collage of 5 items were quite interesting on the wall between the Highover kitchen desk and upper cabinet. Since there were only 3 framed photos I could go wild and not overwhelm the senses. Each black and white photo was placed in a frame of different color, shape, and design. I then added a rectangular iron scroll from Hobby Lobby and an iron elk mount from Scotland.
The challenge in this space was the staggered light switches and electrical outlet to the right. My eye wanted to complete the arrangement, so I placed a wicker tissue box on the end of the desk. It not only added a different texture element, but it completed the collage nicely. The kicker was that it was also functional!
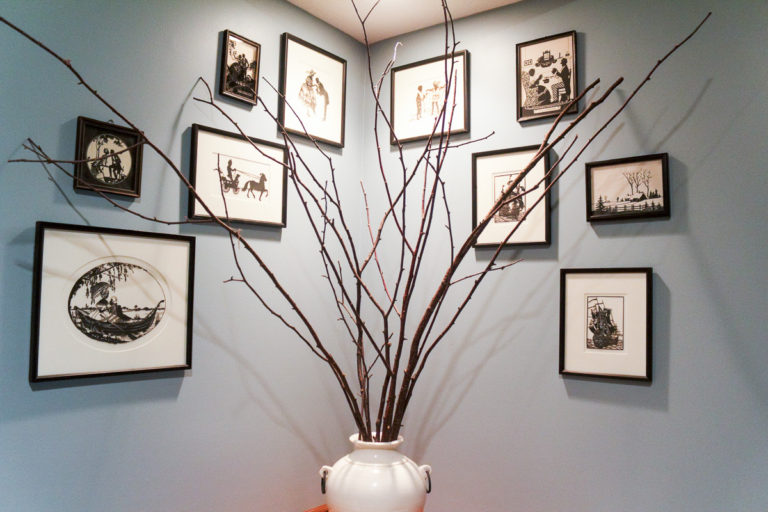
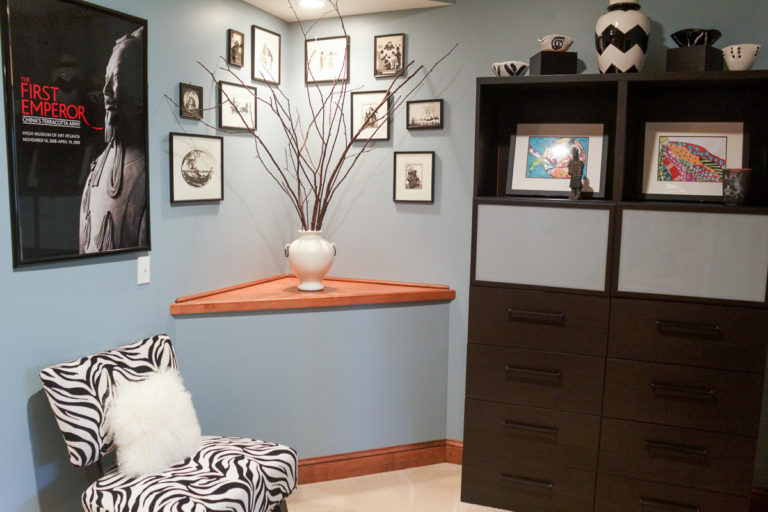
Vary Frame Size - Add Dimension with Sticks
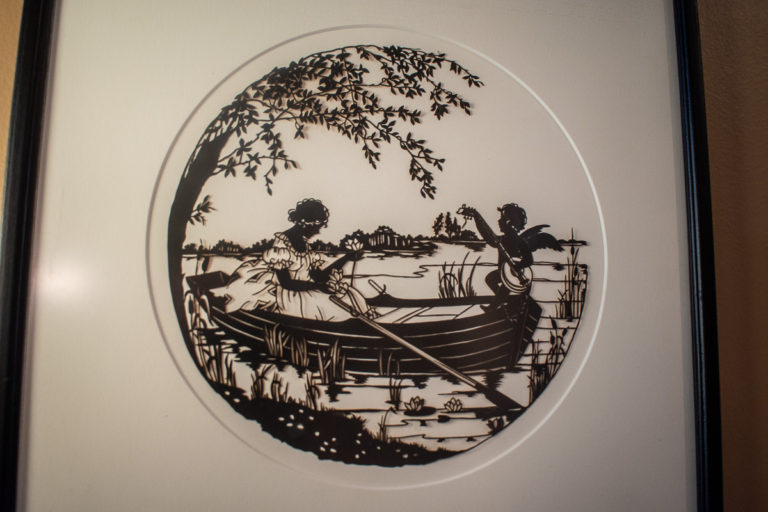
My mother, Elaine, has collected cut silhouettes for years. I am amazed at how the artist can etch such intricate designs from paper. They must have had an incredibly steady hand. From my mom I started my own silhouette collection. Alas, not all of mine are the pricey antique cut style.
My silhouettes were laid out in a pyramid shape in this lighted niche located at the base of the stairs to the Highover lower level. Everything is black and white except splotches of color in my children’s artwork and the wording in the poster of China’s Terracotta Army.
The kids and I attended the 2009 exhibition at the High Museum of Art in Atlanta on one of our “Camp Cheryl” days and were in awe of the enormity of the archaeological site dating 210 BCE.
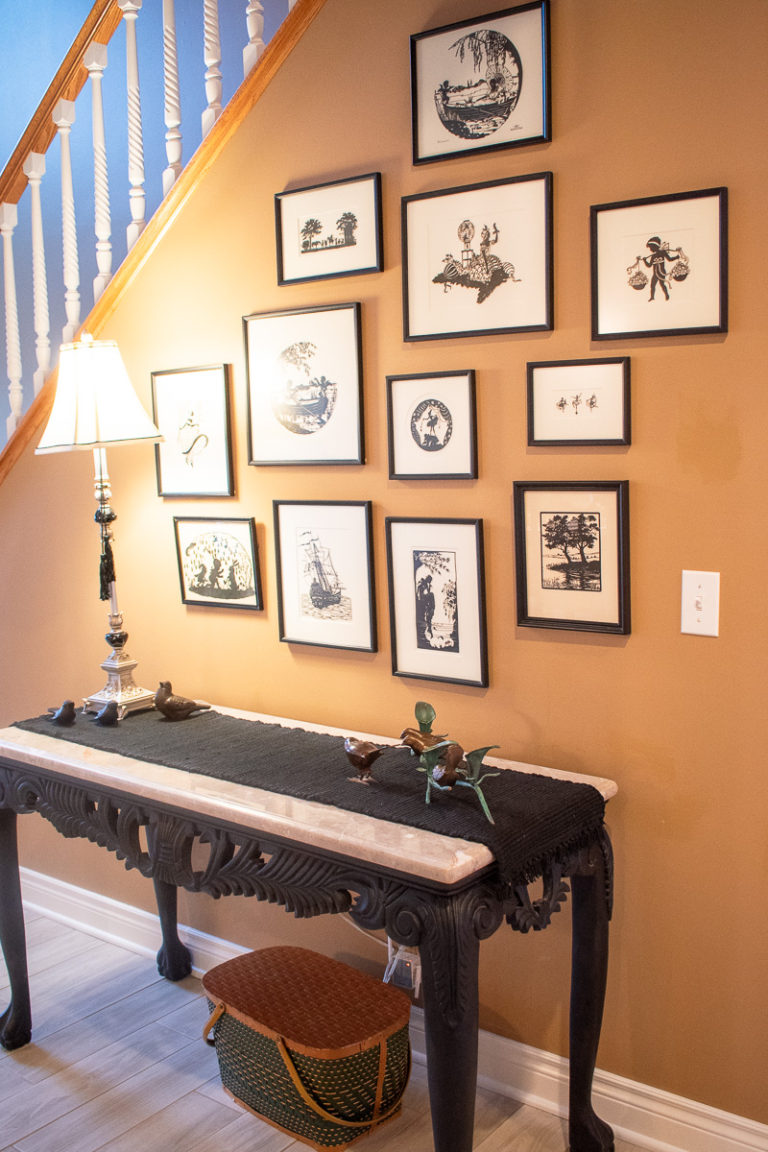
My sister, Christie, mounted her silhouettes in an intriguing arrangement below her stairs.
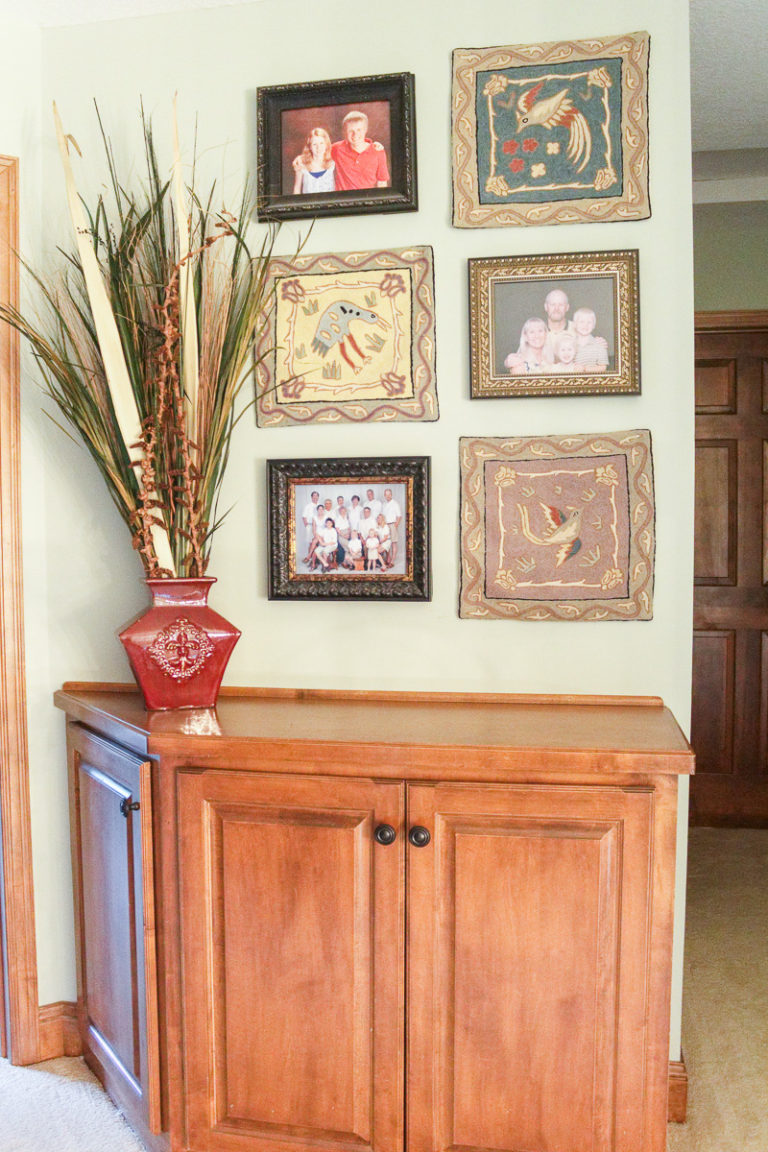
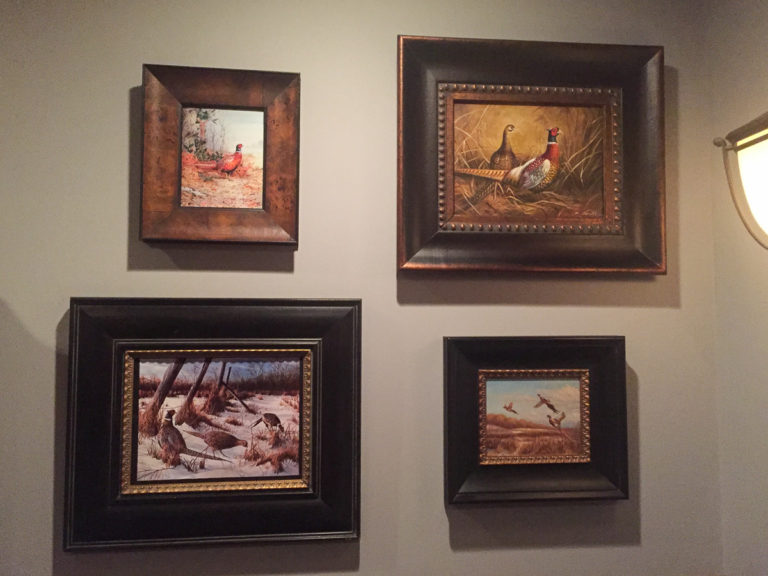
Theme - Vary Frame Size
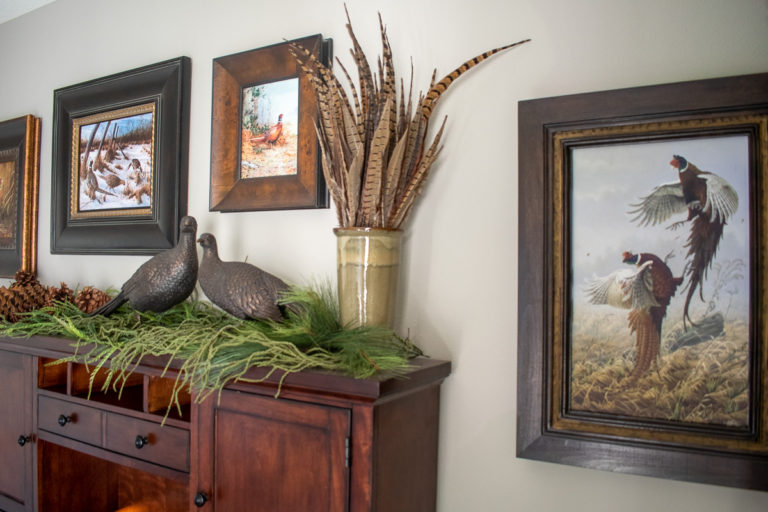
Pheasants remind me of my childhood home on the plains of western Nebraska. Their stature is stately and their plumage is beautiful. Exactly what I envisioned for my husband’s Highover office which was wrapped in dark rich wainscoting and slate blue walls.
I discovered two of these canvas oil paintings when on a trip home to Oshkosh (the one in Nebraska and not Wisconsin). Low and behold they were in the drugstore that still bears our family name, Campbell Drug. It brought back memories of long high school summers working the soda fountain and gorging on ice cream. With the addition of two canvas prints from Art.com and frames purchased from Hobby Lobby I created a beautiful collage
The pheasant feathers in the vase are from my son and husband’s annual hunting trips to western North Dakota. The pheasant statues were purchased after seeing them in my best friend, Diane’s, home. Not all my design is original. When I see something I like, I am the first to copy.
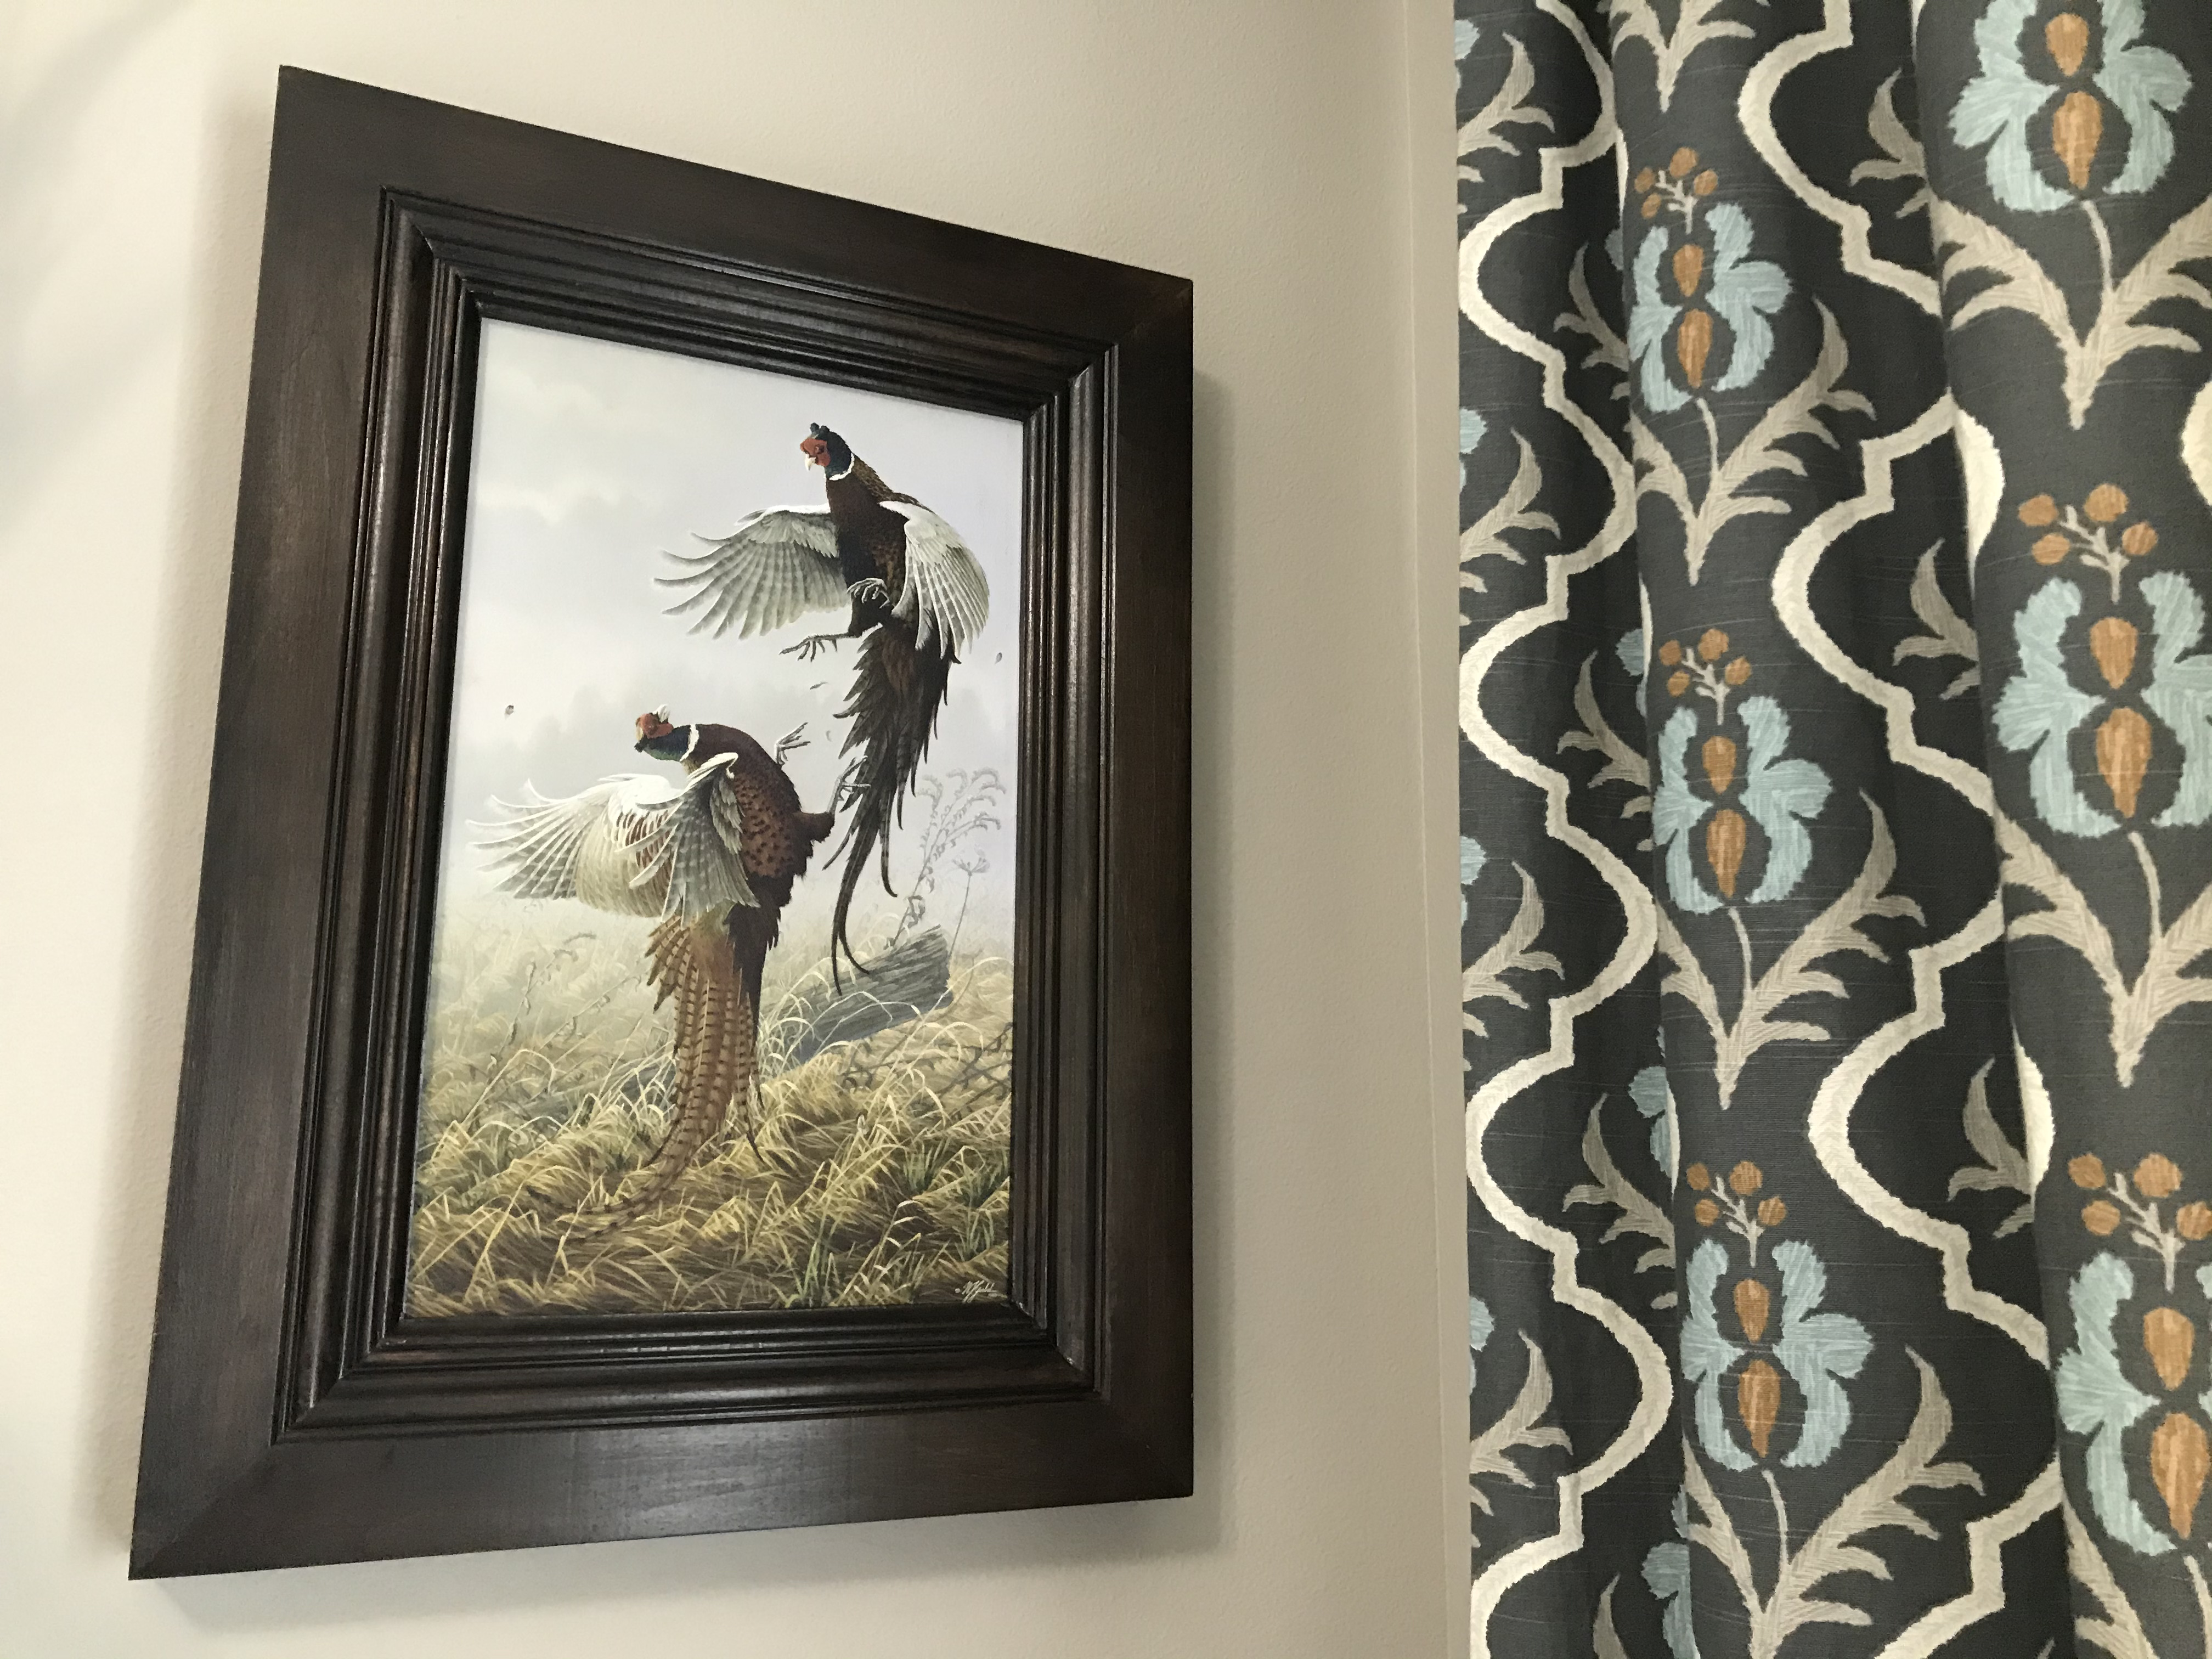
I repurposed the pheasant pictures in our Elshire home and added a 5th canvas on the far right, from Art.com. The two pheasants fighting are exciting in contrast to the tranquility of the other four canvases.
Once I priced a custom frame to fit the unique size I decided to make my own from crown molding and 2×2 boards purchased at Home Depot. To keep the frame from becoming too heavy, my clever husband, Daryl, suggested placing four wood pieces with a screen clip to create the rabbet to hold the canvas in place.
Originally, I stained and distressed the frame a dark brown, but it just sat there. I took a nod from the other frames and added a small gold band with craft paint. It made all the difference in the world.
Before - No Gold Band
After - Gold Band
Which of these wall collages did you like best? Let me know in the comments below.
Now, are you ready to take the plunge and design your own wall collage? Use these tips and you can’t go wrong!
Vary the shapes
Vary sizes
Add texture elements such as iron, metal, fabric or wood
You are so amazing. I laughed when I pictured you at the Hobby Lobby. These posts are great! Do you still have a lot of these collages? Or did you need to part with some when you downsized?
Thank you!
I do have all my collages.
It has been fun re-configuring the pieces and finding ways to incorporate them into our Elshire home.
Chris
5 years ago
The central theme of pheasants with different frames was clever. I see you extended the theme with real feathers and brown figurines of pheasants. Lovely effect.
Again, Cheryl, your ideas and talent are amazing! I love all of this post!
(From Carole)
Thank you Carole! 🙂
You are so amazing. I laughed when I pictured you at the Hobby Lobby. These posts are great! Do you still have a lot of these collages? Or did you need to part with some when you downsized?
Thank you!
I do have all my collages.
It has been fun re-configuring the pieces and finding ways to incorporate them into our Elshire home.
The central theme of pheasants with different frames was clever. I see you extended the theme with real feathers and brown figurines of pheasants. Lovely effect.
Thank you!
I dub you the Queen of Collages, your Royal Highness! Great ideas.
😊